 This lab is under revision and will be posted soon.
You will need to consult the following resourses for this lab:
Starting Code
Start by extracting the provided source code and publishing it to your w3stu account:
Requirements
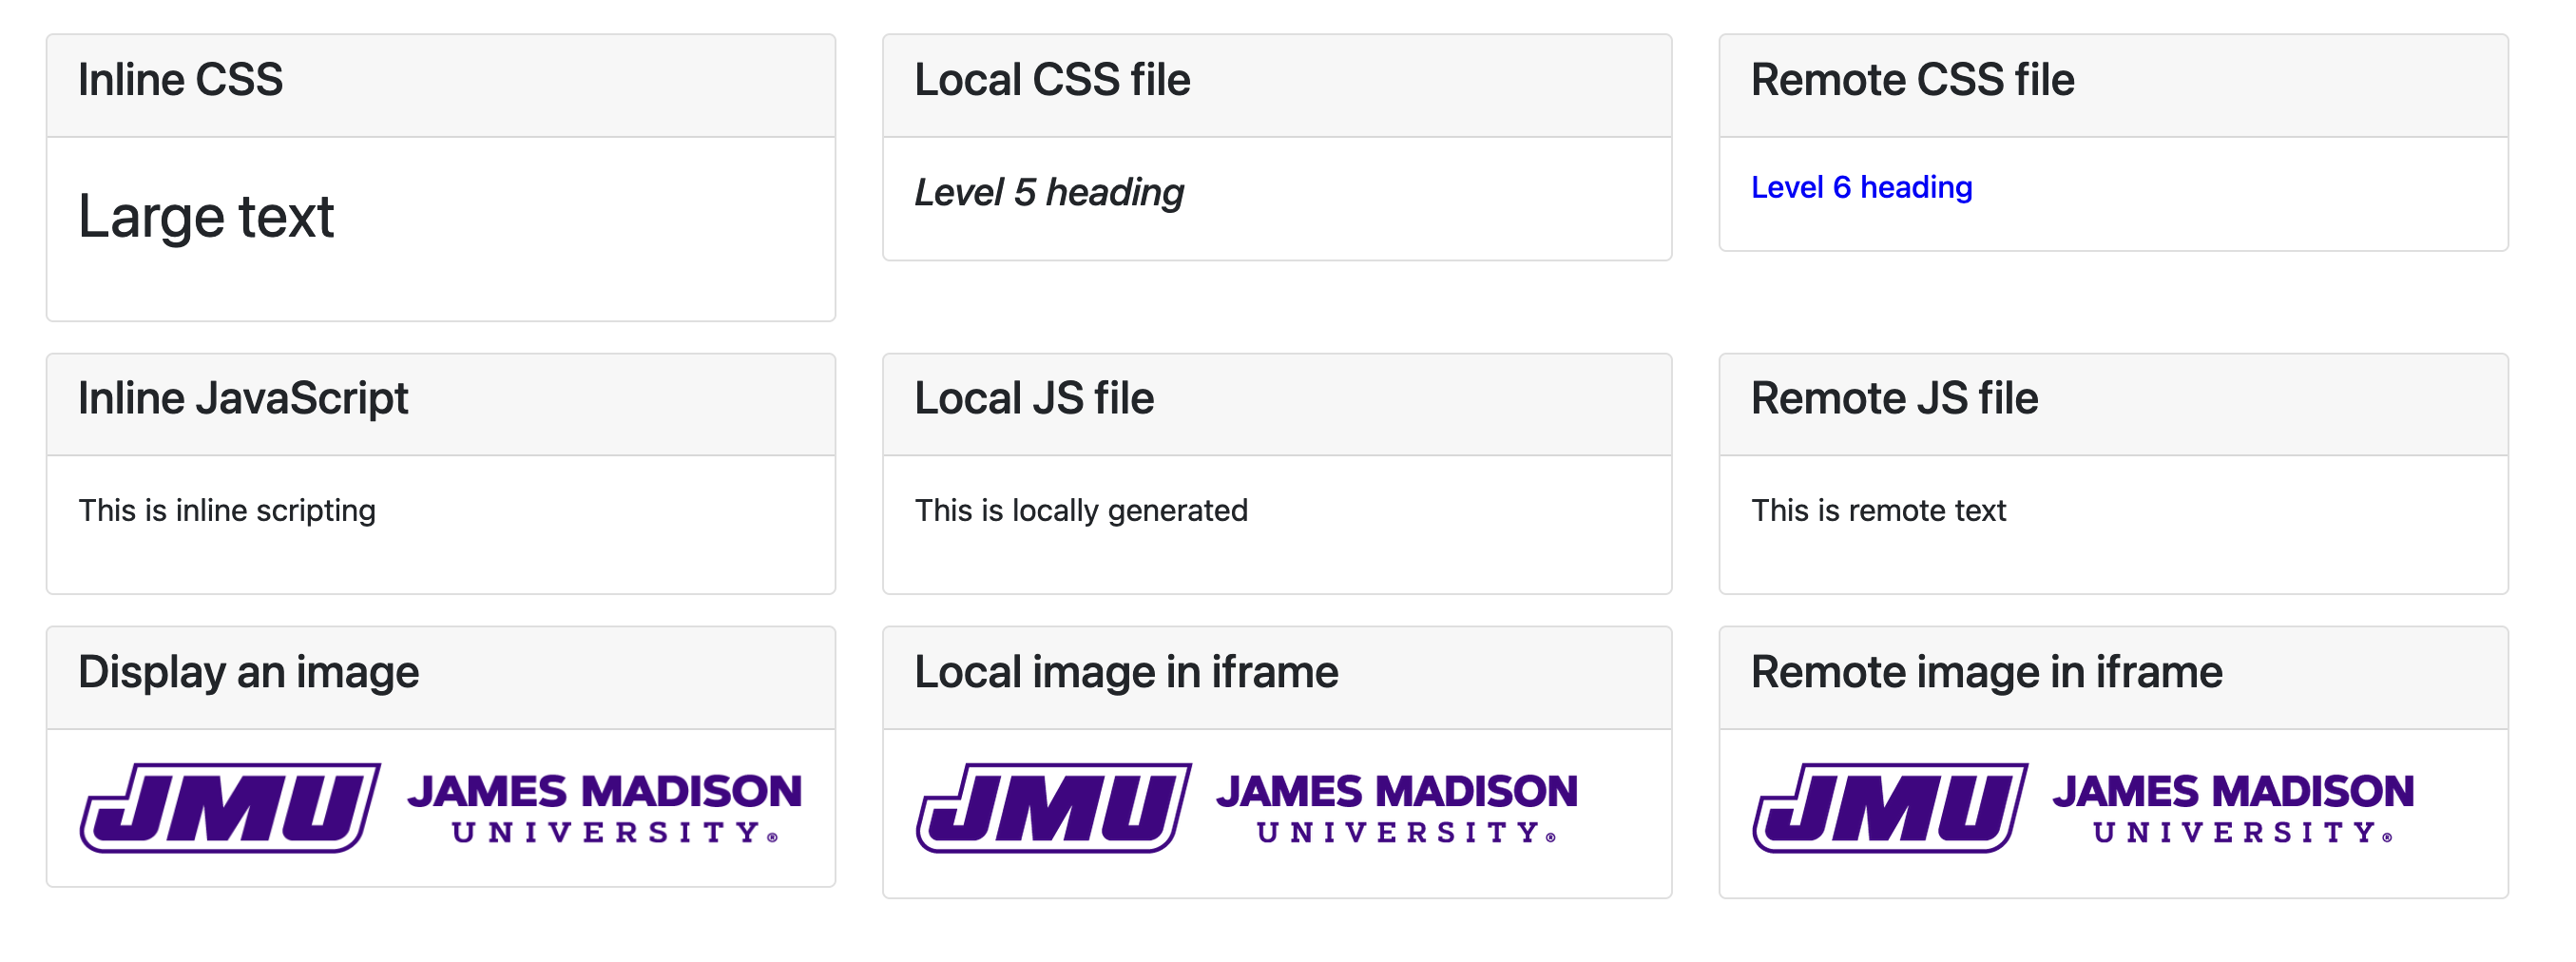
Your task is to create three versions of the provided HTML file with different combinations
of CSP policies to allow content to be loaded selectively. Without any CSP policy, the page
should look like the following (note that none of these images include the <nav>
elements) when published on your account:
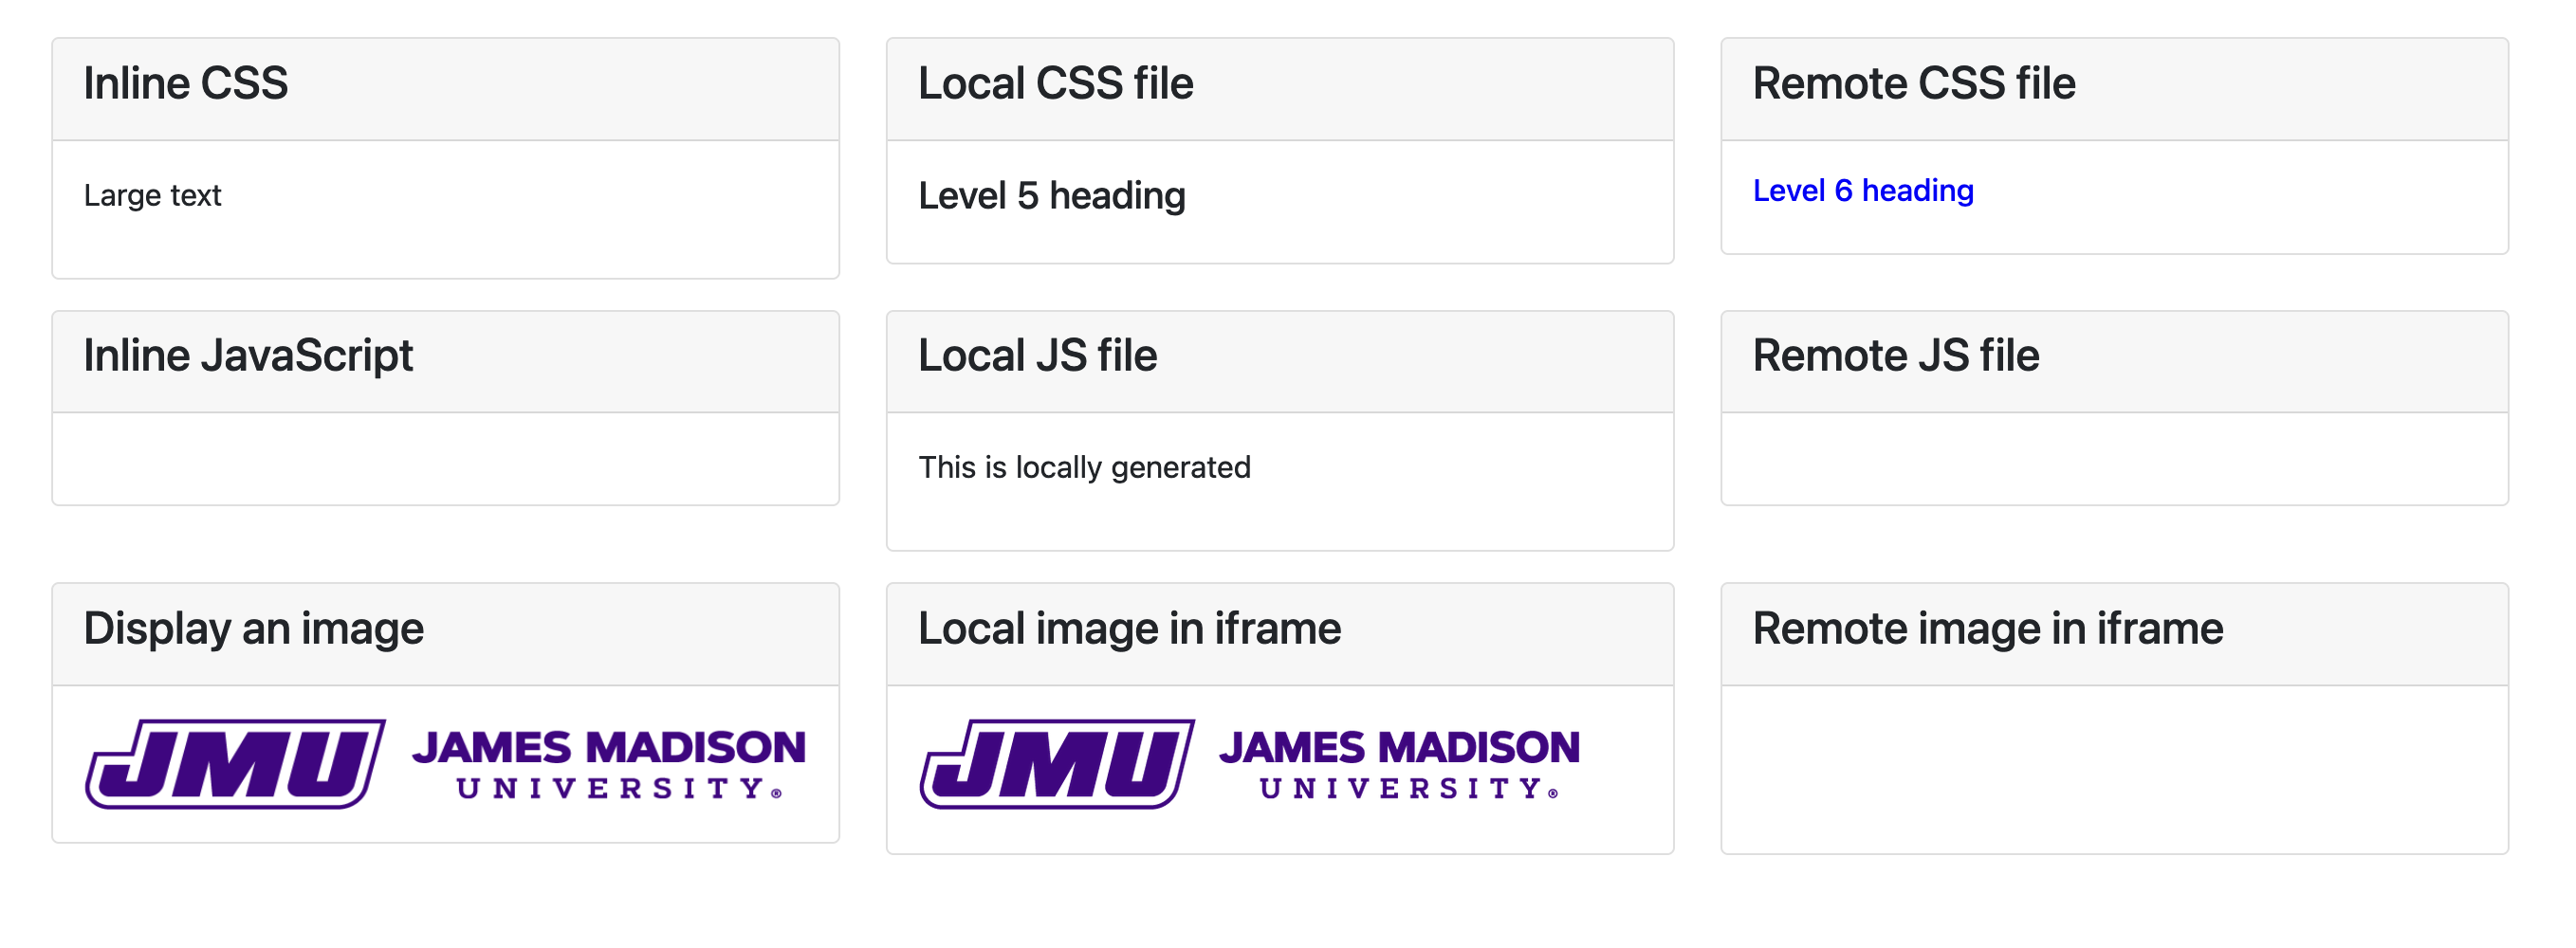
Blocking remote elements
For the first version, create a copy of the index.html file called
bootstrap.html. In this version, you'll only block certain remote elements
and unsafe inline material. The only remote elements allowed are CSS files. With the
correct policies, the page should look like the following:
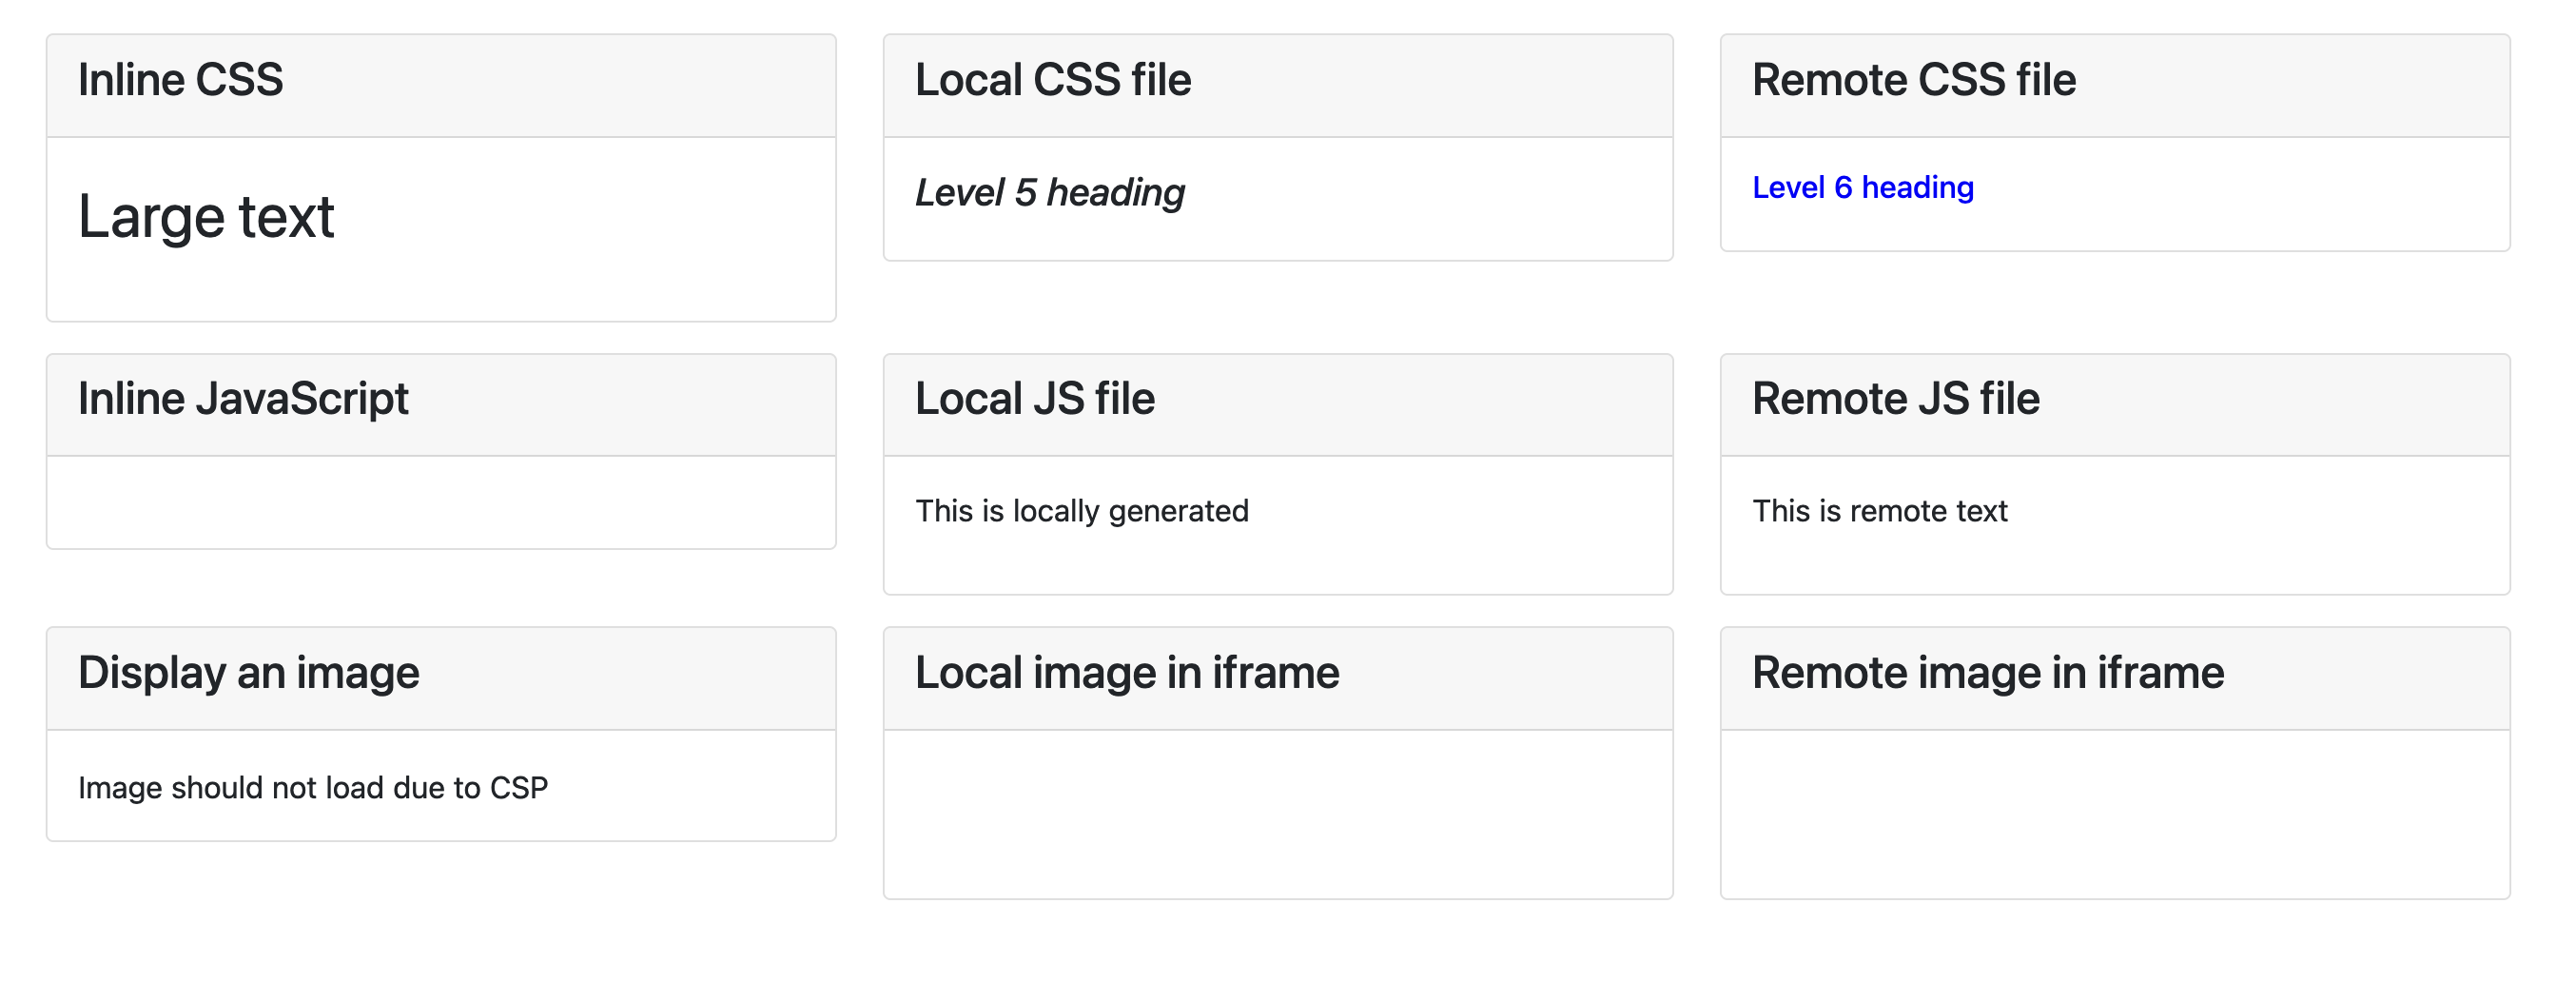
Blocking images and frames
For the next version, create a copy called noframe.html. This version will
block <iframe> elements, images, and unsafe JavaScript. The resulting
page should look as follows:
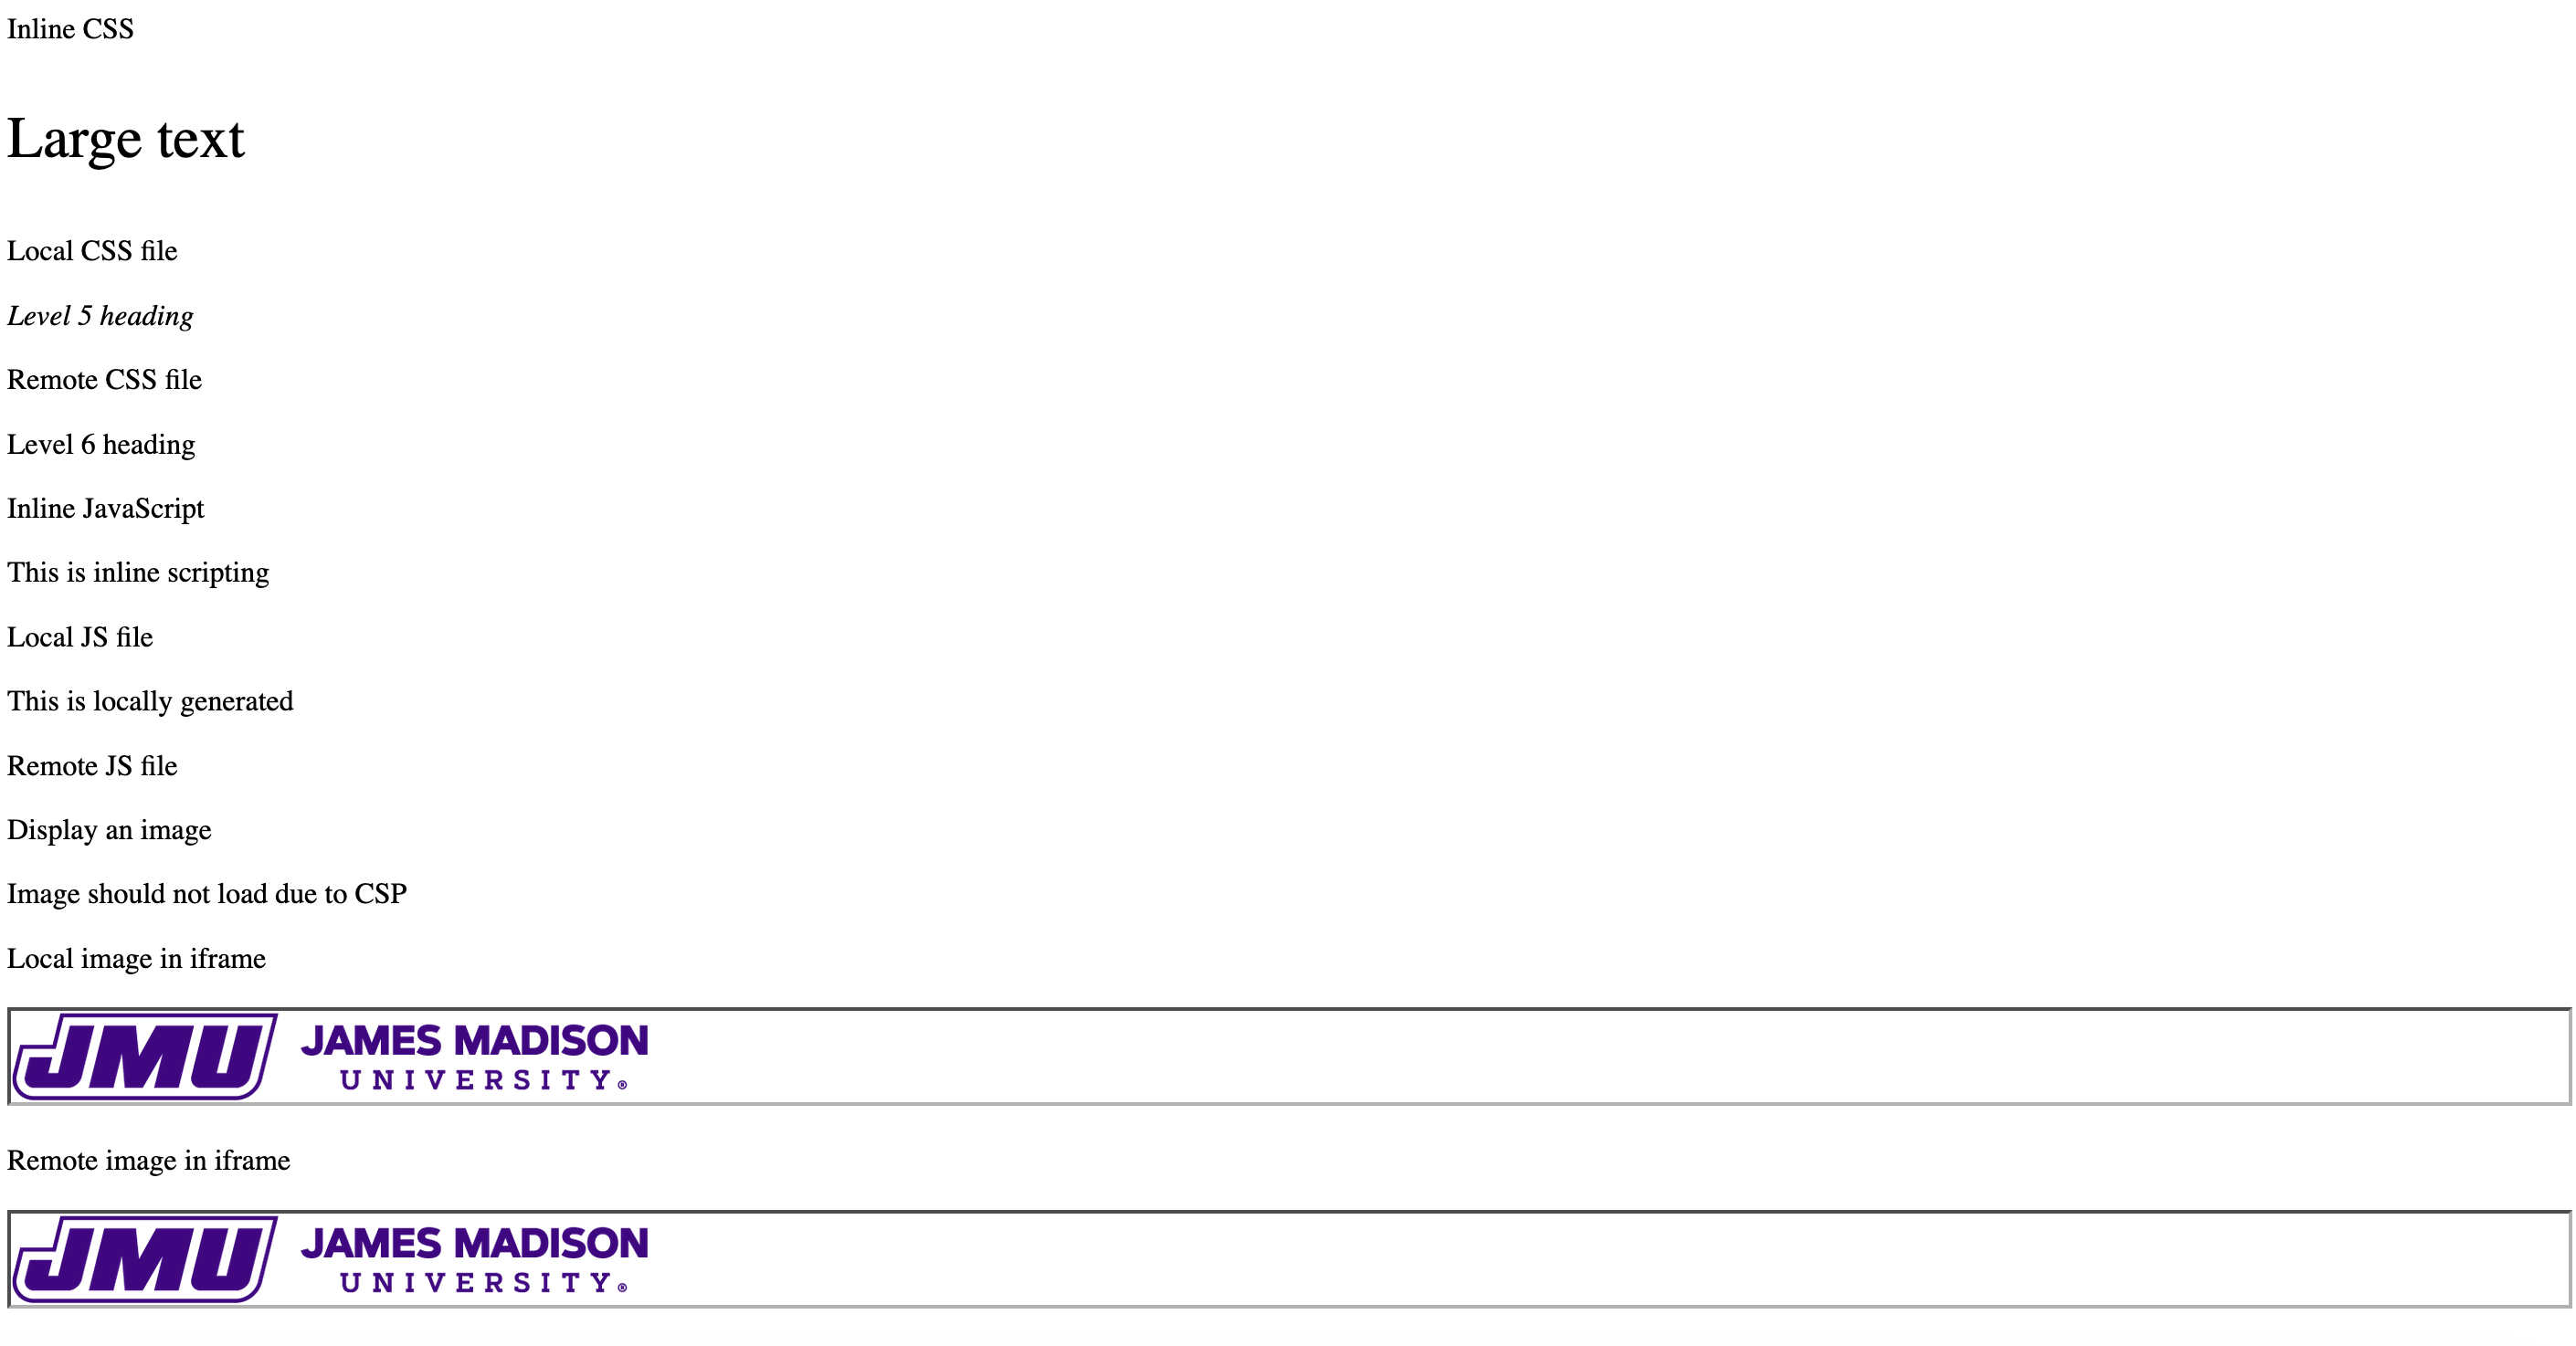
Local only
For the last version, create local.html. This version only allows things
from the same site and inline elements. This version will look very different because it
will block the Bootstrap styling:
Submission
When you are finished, submit a link to your bootstrap.html file through Canvas.