File Publishing and Validation
In this lab, you'll practice using the web server infrastructure that will be available throughout this course.
stu.cs.jmu.edu) using your e-ID
(JMU email address without the "@dukes.jmu.edu" part) and your standard
JMU password. Please let me know ASAP if you have problems.
Background
Throughout this semester, you will frequently need to transfer data to
w3stu.cs.jmu.edu, the JMU CS web server for students. (Note that
w3stu is the same as stu. When accessing your pages
through a web browser, you will use w3stu; when transferring
files, you will use stu.) As a CS student, you already have an
account.
The easiest way to get started transfering files is to use FileZilla, a free, cross-platform, open-source file transfer application. From that site, download the program on your laptop or wherever you will be doing your development work.
The JMU CS Wiki has a
page showing some FileZilla basics
that perhaps you should check right quick.
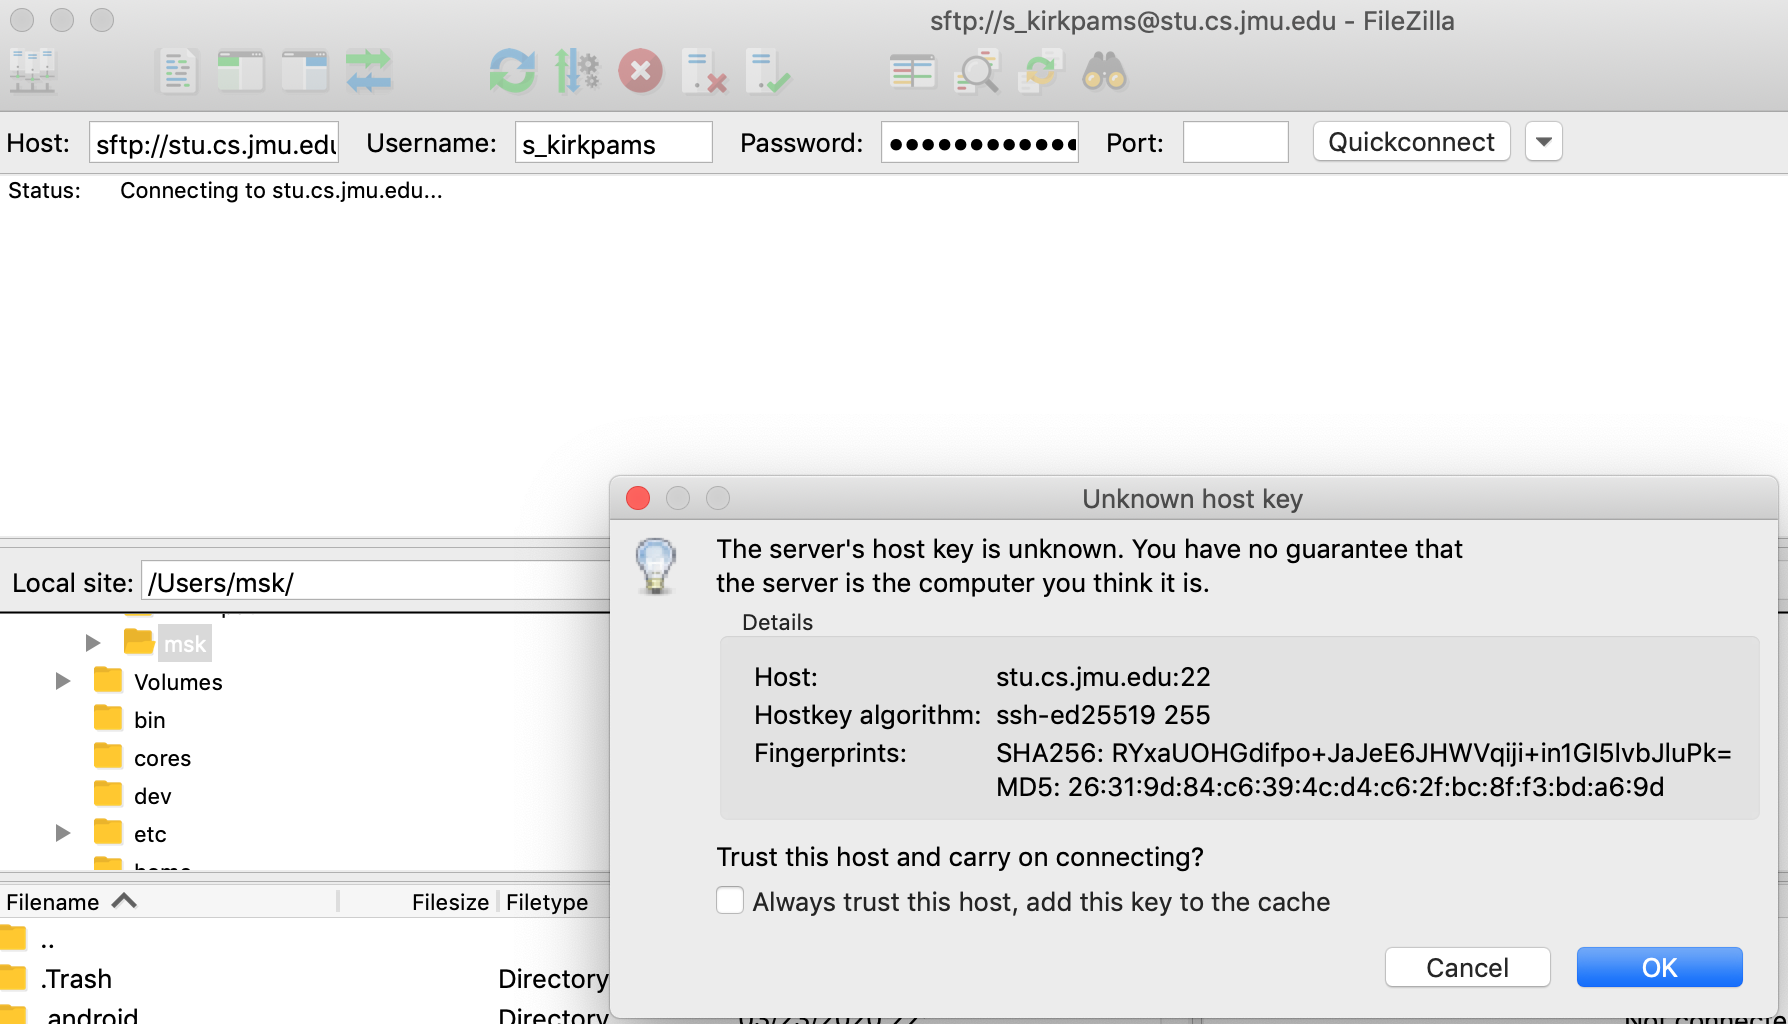
Once you have FileZilla installed, you will connect to
stu.cs.jmu.edu using the sftp:// protocol as shown in
this screenshot, setting your username
and password as appropriate. The first time you connect to stu,
you will get the "Unknown host key" pop-up box as shown; click "OK" to
continue.
Make sure that
the Host: file is sftp://stu.cs.jmu.edu and not just
stu.cs.jmu.edu. The default behavior for FileZilla is to use the
insecure ftp:// instead of sftp://. This will not work,
as stu does not accept incoming ftp:// connections.
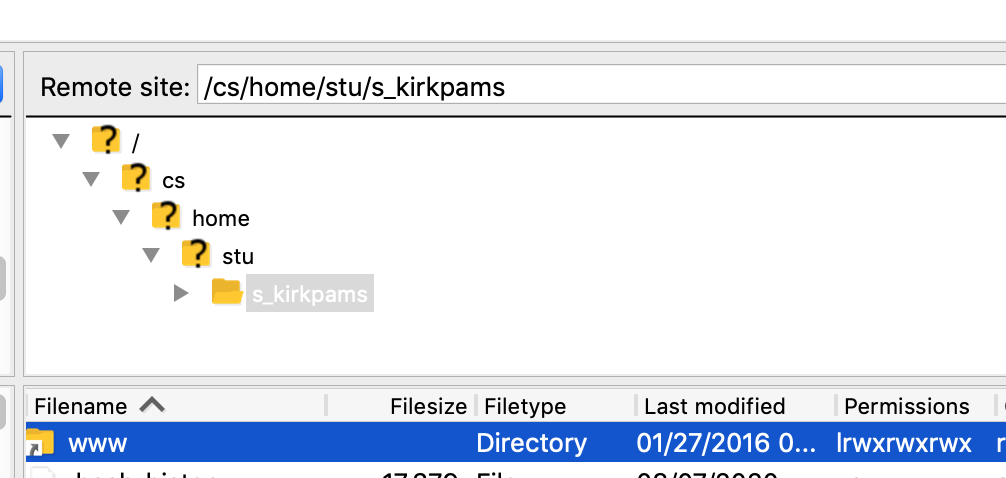
Once connected, the right-hand side will show a folder path on the
"Remote site:" that looks like /cs/home/stu/your_user_name.
This screenshot shows an example. Under
the "Filename" list, scroll down until you see the "www" directory
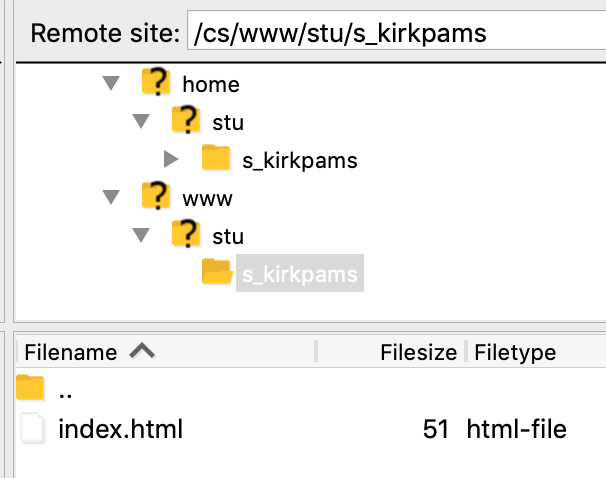
shortcut. Double-click on it and you will see something that looks liks
this screenshot. Notice that the
"Remote site:" has changed to /cs/www/stu/your_user_name,
which is the base directory of your web site.
Any file that you drag-and-drop into this directory will be published on
w3stu automatically. If you copy a file called foo.html
into this directory, you can access that file by pointing a web browser
to the URL https://w3stu.cs.jmu.edu/your_user_name/foo.html.
Within FileZilla, you can also create subdirectories to organize your
site's pages.
Note: If you are comfortable with working on the command
line, you might try doing this lab using something like scp or
rsync. You can find plenty of tutorials for either by searching.
The scp command line would look something like:
$ scp index.html your_user_name@stu.cs.jmu.edu:~/www/index.htmlFile Publishing
Your first task is to download and publish the following files based on the naming conventions shown below. Right-click on each to save a copy to the desktop on your computer.
Step 1: Publish index.html
Open the index.html file in a text editor and
change your name in the <meta> tag that indicates the
"author" of the file. Then transfer the index.html file so that
it can be accessed at the URL
https://w3stu.cs.jmu.edu/your_user_name/cs343/lab1/.
Note that you will need to create the cs343 directory in your
www directory and lab1 in cs343.
www directory but in www/cs343/lab1. That way,
if you already have an index.html page, it will not be
overwritten.
Test this step by going to the URL in your web browser. If you click on any of the links, they should not work (giving you a 404 error).
Step 2: Publish the other files
Transfer the data.txt file so that it is in the same directory
as the index file. Click on the "text file" link from the index file and
confirm that you can access it.
Transfer the linked.html file, but you'll need to create a
subdirectory and rename the file in the process. Once you've transferred the
file, it should be in the www/cs343/lab1/linked subdirectory and
renamed as index.html.
Fill out the textbox below with your eID to generate links to test your directory structure. Once you've done this and uploaded everything correctly, all of the following links (and the links in the index.html file) should work:
Validation and Minimization
Throughout the semester, your lab and project submissions need to successfully pass the
W3C Nu HTML Validator. The
provided index.html file does not pass. Copy and paste the link to
your published version and fix the error based on the feedback there. Do the same for the
linked/index.html file. Note that there is one error there (use of
<tt>) that cannot be fixed based on what we have discussed so far.
Additionally, one part of professional coding practice is to adhere to common coding styles. Throughout this semester, you should adhere to the CS 343 Coding Style Guide, which is based on the Google HTML/CSS Style Guide. One rule in this guide is to eliminate optional tags to reduce the file size. This includes rules such as:
- Eliminate an entire line at a time or not at all. You don't need to remove parts of a line.
- Keep the blank lines, unless you have multiple in a row. If there are multiple blank lines in a row, keep only one.
- Don't change the indentation.
- The file must still pass the W3C Nu HTML Validator cleanly with no warnings or errors.
Submission
Download this site.txt file and edit it with vscode.
Replace your_EID with your JMU EID. Submit your modified version of the
site.txt file to the Lab 1 assignment on Gradescope.