Data Binding with Reflex
Introduction
By now, you’ve created interactive web applications and should be familiar with getting DOM elements, adding event listeners, and updating the DOM in response to user interactions!
The following pattern should be very familiar to you:
let counter = 0; // Tracks the "state" of the counter

// 1. Get DOM element(s)
const counterDisplay = document.getElementById("counter-display");
const incrementButton = document.getElementById("increment-button");

// 2. Add event listener
incrementButton.addEventListener("click", () => {
  counter++;

  // 3. Update the DOM element(s) to reflect the new state
  counterDisplay.textContent = `Counter: ${counter}`;
});
Let’s dive deeper into this pattern and see how modern user interface (UI) frameworks handle this for us with a powerful concept called data binding.
Learning Objectives
By the end of this activity, you should be able to:
- Identify the difficulties with manual DOM manipulation
- Understand the concept of data binding and how it helps with UI development
- Understand the underlying implementation of Reflex and how it achieves data binding
- Use Reflex to create state variables and bind them to the UI for automatic updates
Starter Code
Download the starter code and unzip it in a safe location (e.g., your cs343 folder):
Open the folder in VS Code.
Part 1: DOM Manipulation
(20 minutes)
Let’s start by implementing some interactive features using DOM manipulation, just like we’ve done in previous activities. (It’s good practice!)
Overview
Open up interactivity.html in VS Code.
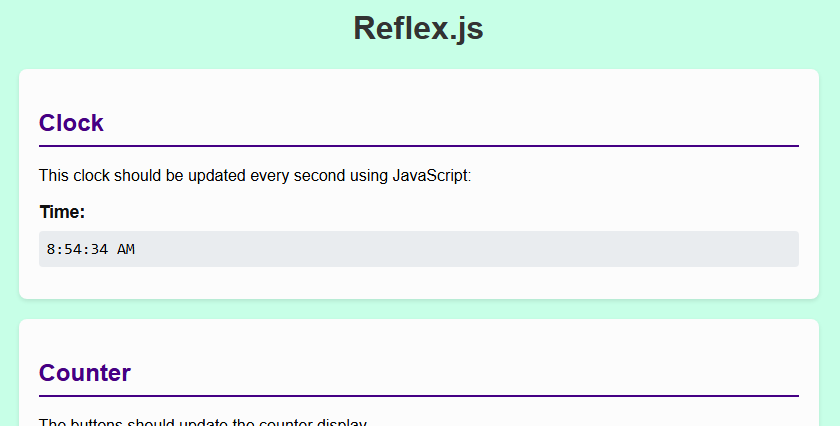
You’ll see four sections in the HTML, describing four separate interactivity examples:
- 🕑 A clock that should update every second
- 🔢 A counter that should increment and decrement when you click the buttons
- 🎨 A color picker that should change the background color of the page
- 📃 A form that should make a request and display the response
Your goal is to implement all four examples.
Instructions
- For the clock, you can create a
new Date()to get the current date/time- And then use
.toLocaleTimeString()to get a nice string representation of the time like
- And then use
- For the counter example, you’ll need three event listeners
- All three should update the counter’s value and the counter display
- For the color picker, you can use the
inputevent to detect when the user changes the color- The value of the color picker is a hex code like
"#ff0000"that you can set as the page’s background color (e.g.,document.body.style.backgroundColor = "#ff0000") - Don’t forget to update the color code display too!
- The value of the color picker is a hex code like
- The form should send the name and age values in the request body and display the response
- You should pretty-print the response JSON before displaying it (e.g.,
JSON.stringify(data, null, 2))
- You should pretty-print the response JSON before displaying it (e.g.,
Don’t forget to test your code by opening interactivity.html in a preview and trying out the different features!
Part 2: Reflex
(20 minutes)
First of all, let’s think about what made that annoying to implement. Take a moment to discuss with a partner, then expand the section below to see our thoughts:
Think: What were some of the pain points?
- You had to retrieve the DOM elements using
document.getElementByIdor similar- All of those elements needed unique
ids, which can be a pain to manage
- All of those elements needed unique
- You had to manually add event listeners to the buttons and inputs
- Just looking at the HTML, you can’t immediately tell where the code for each element resides
- Changing the value of
counterdidn’t automatically update the display; you had to remember to update the DOM every time you changed the state- If you forgot to update the display, the UI would be out of sync with the counter!
There’s gotta be a better way!
Data Binding
Modern UI frameworks like React, Vue, and Svelte all use a powerful concept called data binding to solve these problems. There are two main types of data bindings that we’ll talk about:
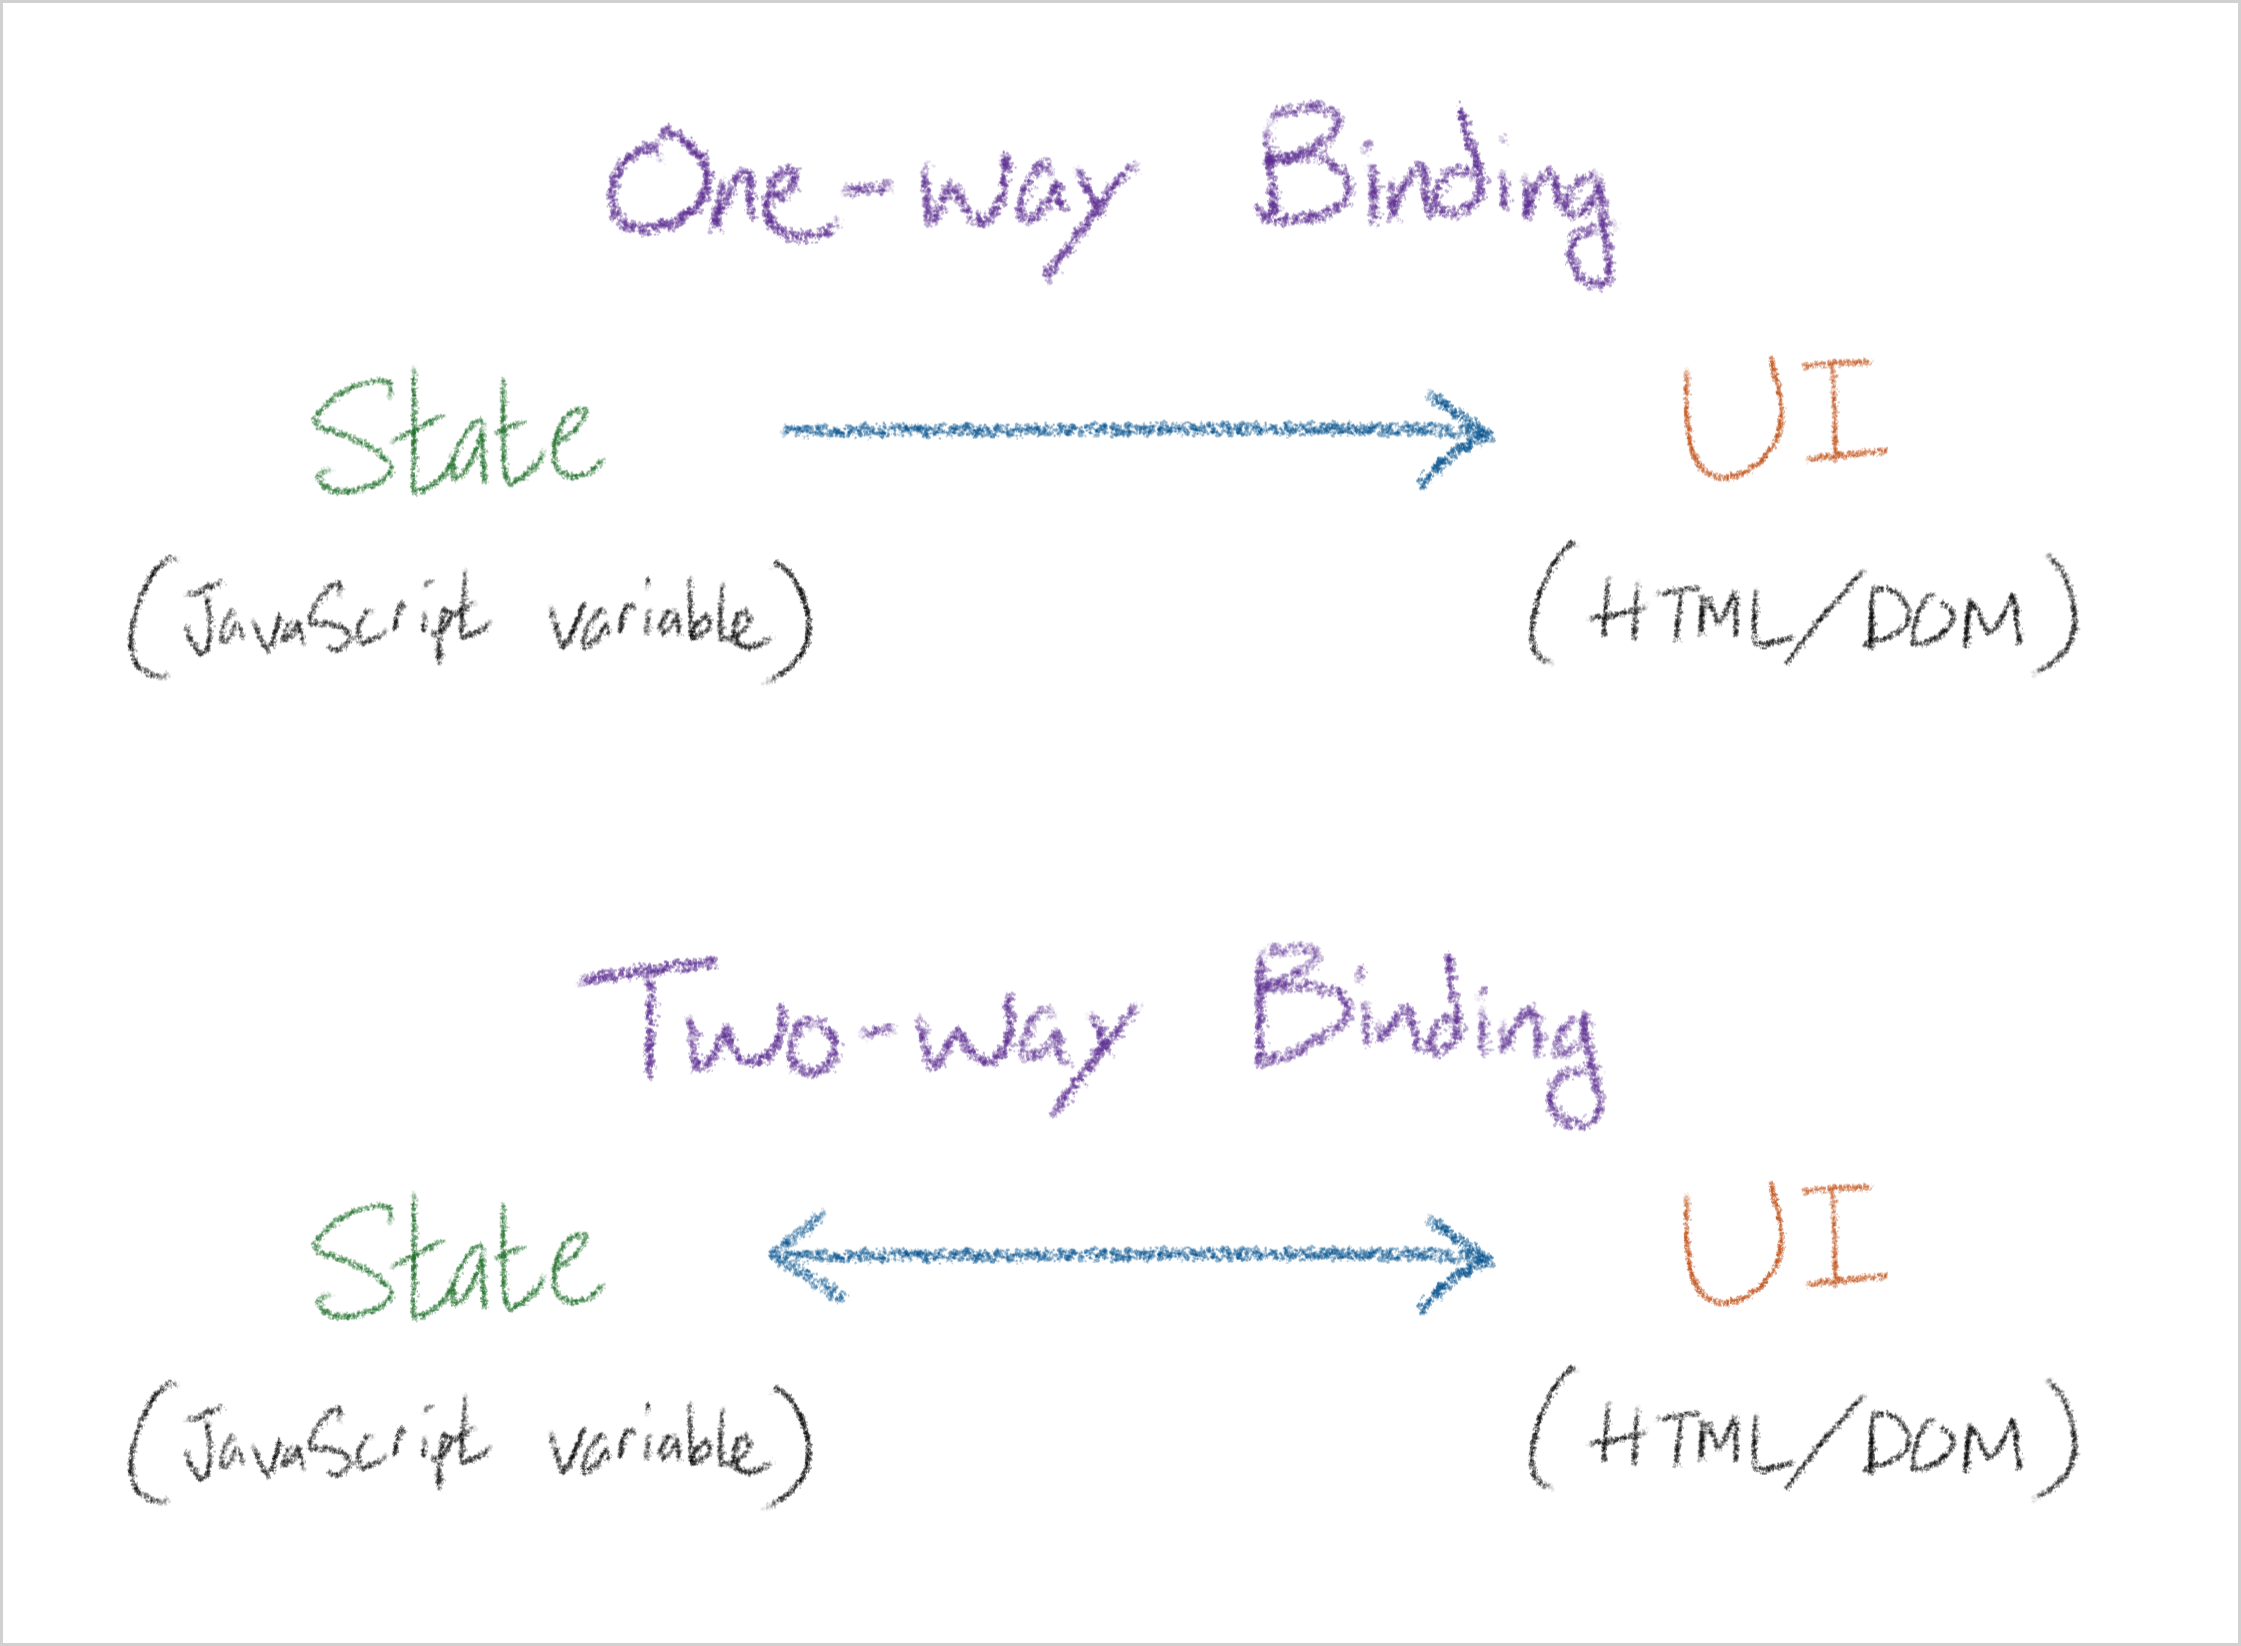
- One-way: When the state changes, the UI automatically updates to reflect the new state.
- Two-way: When the state changes, the UI automatically updates, and when the user interacts with the UI (e.g., typing in an input), it likewise updates the state.
One-way bindings are used for things like displaying data, while two-way bindings are used for inputs and controls where the user needs to update the state from the UI.
Data binding allows a UI to be “reactive”. You no longer need to manually update the UI when your state changes; instead, you can just declare your state variables and bind them to the UI, and the framework will automatically keep everything in sync for you!
Overview
Now, open up reflex.html and reflex.js in VS Code.
The HTML file contains the same four examples as before. This time, you’ll implement them using Reflex, which is a simple UI framework that provides data binding.
We’ve given you some starter code for the clock example. Let’s isolate it and take a closer look:
<h3>Time:</h3>
<div data-binding="currentTime"></div>

<script>
  const timeState = new State("currentTime", new Date().toLocaleTimeString());
</script>
In the JavaScript, we create a new State object and assign it to timeState:
- The first argument is the name of the state variable:
"currentTime" - The second argument is the initial value of the state variable:
new Date().toLocaleTimeString()
Take a look at the HTML too:
- The
<div>has adata-bindingattribute that matches the name of the state variable ("currentTime") - This is a one-way binding that tells Reflex to automatically update the
textContentof this<div>whenever the"currentTime"state variable changes!
In your JavaScript, you can use timeState.value to get and set the value of the state variable:
timeState.value = "8:54:34 AM"; // Or some other value
Instructions
- 🕑 For the clock:
- Inside the
setIntervalcallback, updatetimeState.valueto the current time string- Use
.toLocaleTimeString()again
- Use
- That’s it! The UI automatically updates when you set
timeState.value
- Inside the
- 🔢 For the counter:
- Create a new
Statefor the counter value with the name"counter"and an initial value of0. Store it in a variable also calledcounter. - In the HTML, add
data-binding="counter"to the<div>that displays the counter value - For the buttons, instead of using event listeners, add an
onclickattribute:- E.g.,
<button onclick="counter.value++">Increment</button> - This lets you put JavaScript code directly in the HTML!
- E.g.,
- Create a new
- 🎨 For the color picker:
- Create a new
Statefor the color value with the name"bgColor"and an initial value of"#ffffff". Store it in a variable calledbgColor. - In the HTML, make a one-way binding to the color code display
- For the color picker input, we’ll need a two-way binding:
- Add
data-two-way="bgColor"to the<input type="color">element - When the user picks a color, the value of
bgColorwill be automatically updated!
- Add
- Then, in the
<body>element, you’ll need a special one-way binding:- First, add
data-binding="bgColor"to bind it to thebgColorstate variable - By default, Reflex will update the
textContentof the<body>. We don’t want that!- We must specify that Reflex should set the
style.backgroundColorproperty: - Add
data-property="style.backgroundColor"to the<body>
- We must specify that Reflex should set the
- First, add
- Create a new
- 📃 For the form:
- You’ll want to create three state variables and use them:
name(initial value:"") for the name inputage(initial value:18) for the age inputoutput(initial value:"") for the output display
- In the HTML:
- Add two-way bindings to the name and age inputs
- Add a one-way binding to the output display
- Like before, you’ll want to send a request and display the response in the output
- You’ll want to create three state variables and use them:
That’s it! The code should be much cleaner; no need to get DOM elements or add event listeners.
Test your code by opening reflex.html in a preview and trying out the different features!
How does Reflex work?
We’ve given you the source code for Reflex in reflex.js. Take a moment to read through it and see if you can understand how it works.
Reflex uses the observer pattern to implement data binding. When you create a new State, it goes through the DOM and finds all elements that have a data-binding or data-two-way attribute that matches its name.
It has a getter and setter for the value property. Whenever you set a new value, it automatically updates all the bound elements in the DOM to reflect the new value.
Take a Look: Real UI Frameworks
Reflex is a simple implementation to help demonstrate the core concepts. It’s fully usable and you can use it in your own projects, but some parts are “clunky” in comparison to real frameworks (e.g., how you have a lot of data-binding and data-property attributes).
Modern UI frameworks provide data binding and much more, focusing on component-driven development to make building UIs easier.
React
For example, React lets you write HTML directly in your JavaScript using a syntax called JSX.
Then, you just reference your state variables directly in the HTML (like string interpolation), and React automatically updates the UI whenever those variables change:
function Counter() {
  const [counter, setCounter] = useState(0);

  return (
    <div>
      <p>Counter: {counter}</p>
      <button onClick={() => setCounter(counter + 1)}>Increment</button>
      <button onClick={() => setCounter(counter - 1)}>Decrement</button>
    </div>
  );
}
Here, useState creates and returns two things:
counterrepresents the state of the counter (read-only).setCounteris a function that sets the value ofcounterand automatically updates the UI.
The Counter: {counter} magically updates the content of the <p> element whenever counter changes, without us having to manually manipulate the DOM or specify a data binding!
Think: Advantages to this approach?
- Instead of having separate HTML and JavaScript, having them together in the same file makes it easier to see how the UI and logic are connected
- There are no unnecessary
id,data-binding, or event listeners cluttering up the code - Components like
Counterare reusable and composable, making it easier to build complex UIs from simple building blocks - You don’t need to use
document.createElementor.appendChild(or<template>tags) to create new DOM elements!
Svelte
Another example is Svelte, which takes a different but arguably more intuitive approach.
Similarly, Svelte lets you write HTML and JavaScript (and CSS) together, but instead of using a special syntax like JSX, you can just write almost-vanilla HTML and JavaScript:
<script>
  let counter = $state(0);
</script>

<p>Counter: {counter}</p>
<button onclick={() => counter += 1}>Increment</button>
<button onclick={() => counter -= 1}>Decrement</button>
Here, $state creates a state variable that can be read and assigned to directly. Whenever you change the value of counter, Svelte automatically updates the UI to reflect the new value!
Think: How does this compare to React and Reflex?
- Svelte’s syntax is closer to regular HTML and JavaScript, making it familiar
- You can assign to
counterdirectly without needing a setter function likesetCounter - The code looks cleaner without the extra attributes for data binding and event listeners
Conclusion
Now you know a little about how modern UI frameworks make building interactive apps easier! We encourage you to do some exploration on your own and try a tutorial for a modern UI framework like React, Vue, or Svelte.
There are a lot of them out there, but they share similar core concepts like components, state, and data binding.
Submission
For credit, submit interactivity.html and reflex.html to the corresponding assignment.