CS 354 Autonomous Robotics
Fall 2021
Installing an Ubuntu/Mint Virtual Machine with VirtualBox
Install Virtual Box and the Virtual Machine Image
- Download and install the VirtualBox software for your platform from https://www.virtualbox.org
- Download the virtual machine image This file is rather large (2.0 GB)
- Start VirtualBox
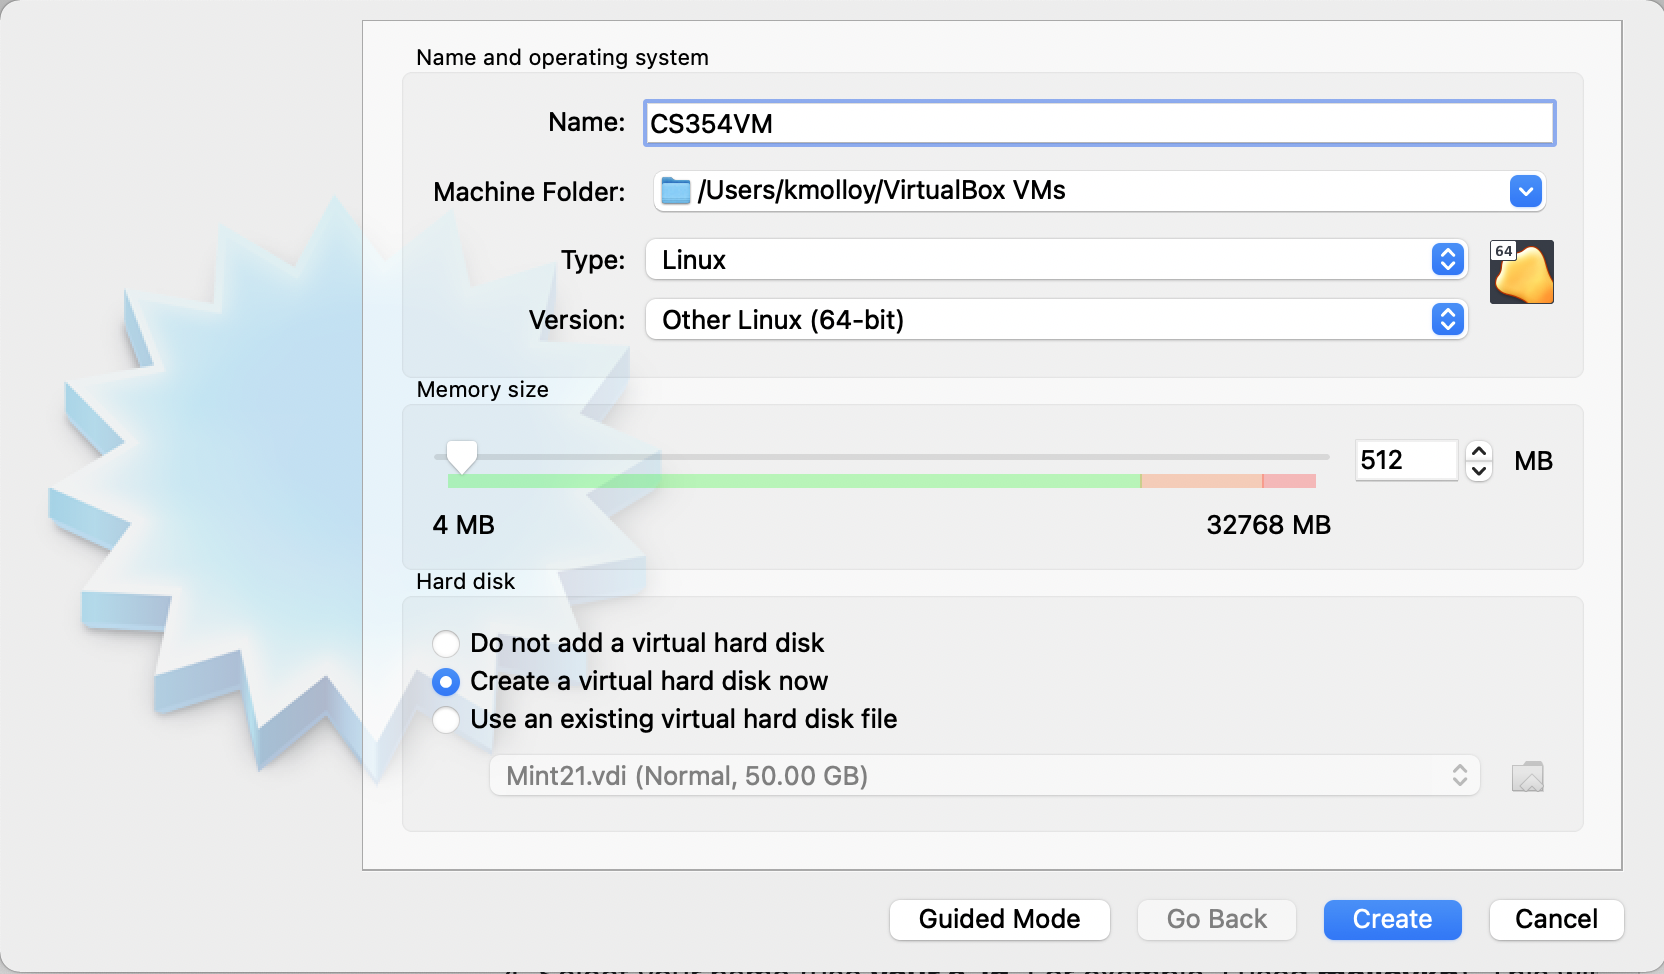
- Click on the New button, then fill in the dialog box as follows:
- IF the button on the bottom of the screen should says Export Mode, then click on it. This will toggle the box so that it provides more options (and the button will change to Guided Mode
- The type needs to be Linux
- The Version should be Other Linux (64-bit)
- The memory size needs to be 4096
- The radio buttons for hard disks should have Create a virtual hard disk now selected
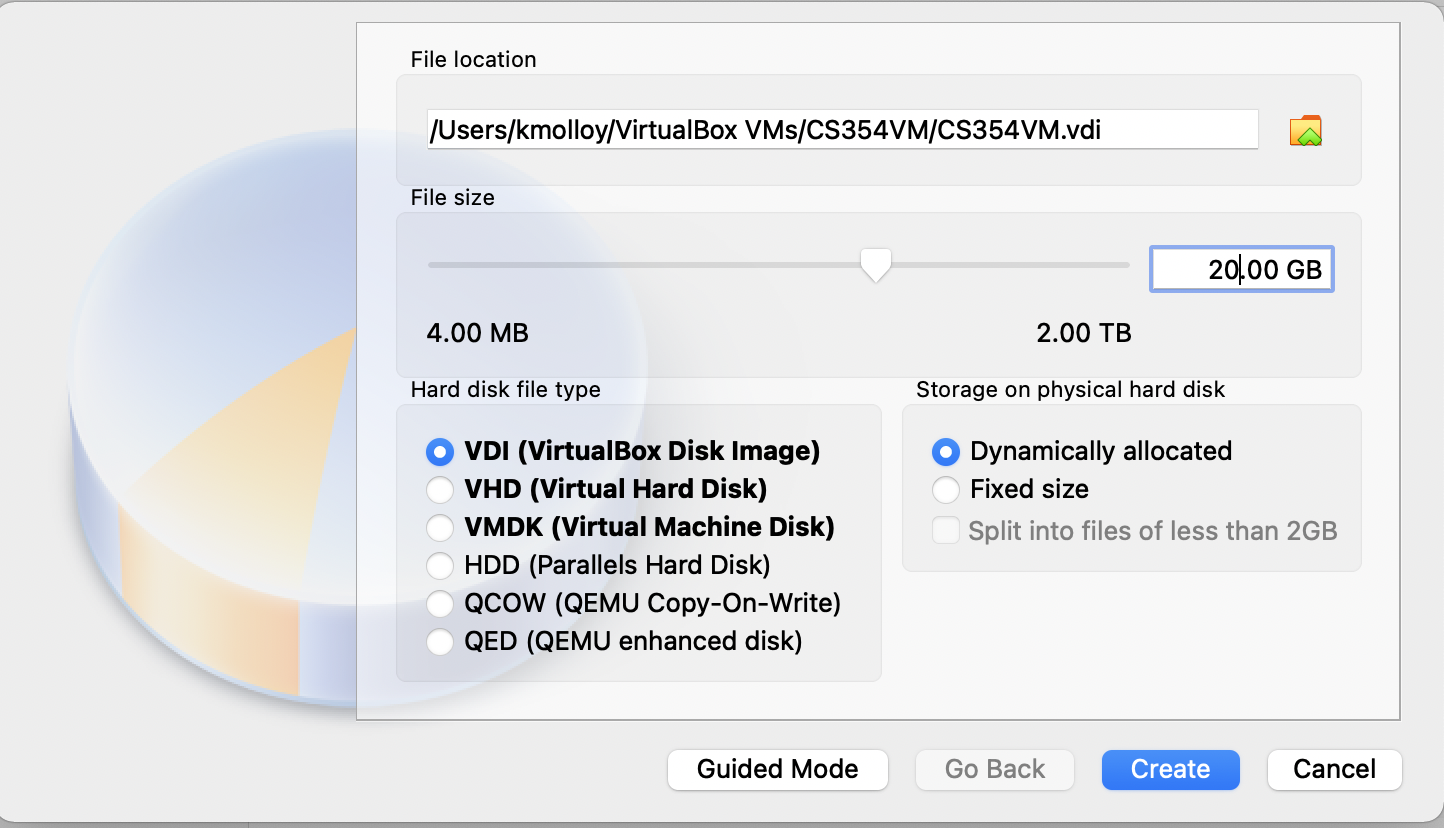
- Start the machine by double clicking on the name (CS354VM in my examples). The list of machines is on the left side of your VirtualBox window
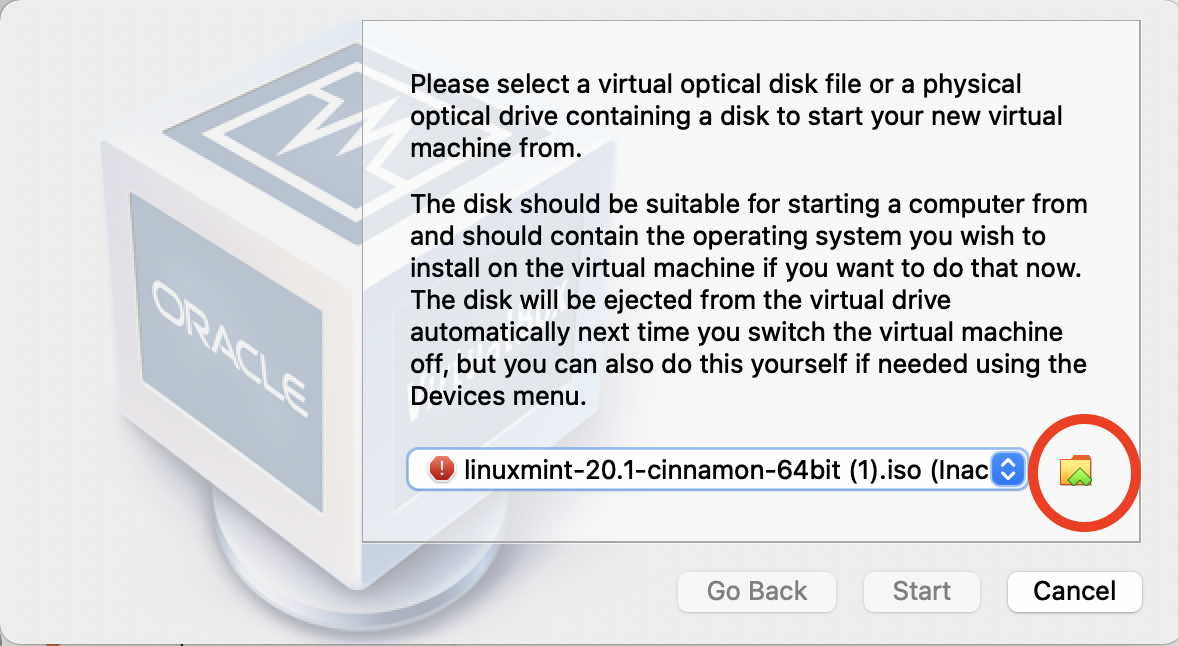
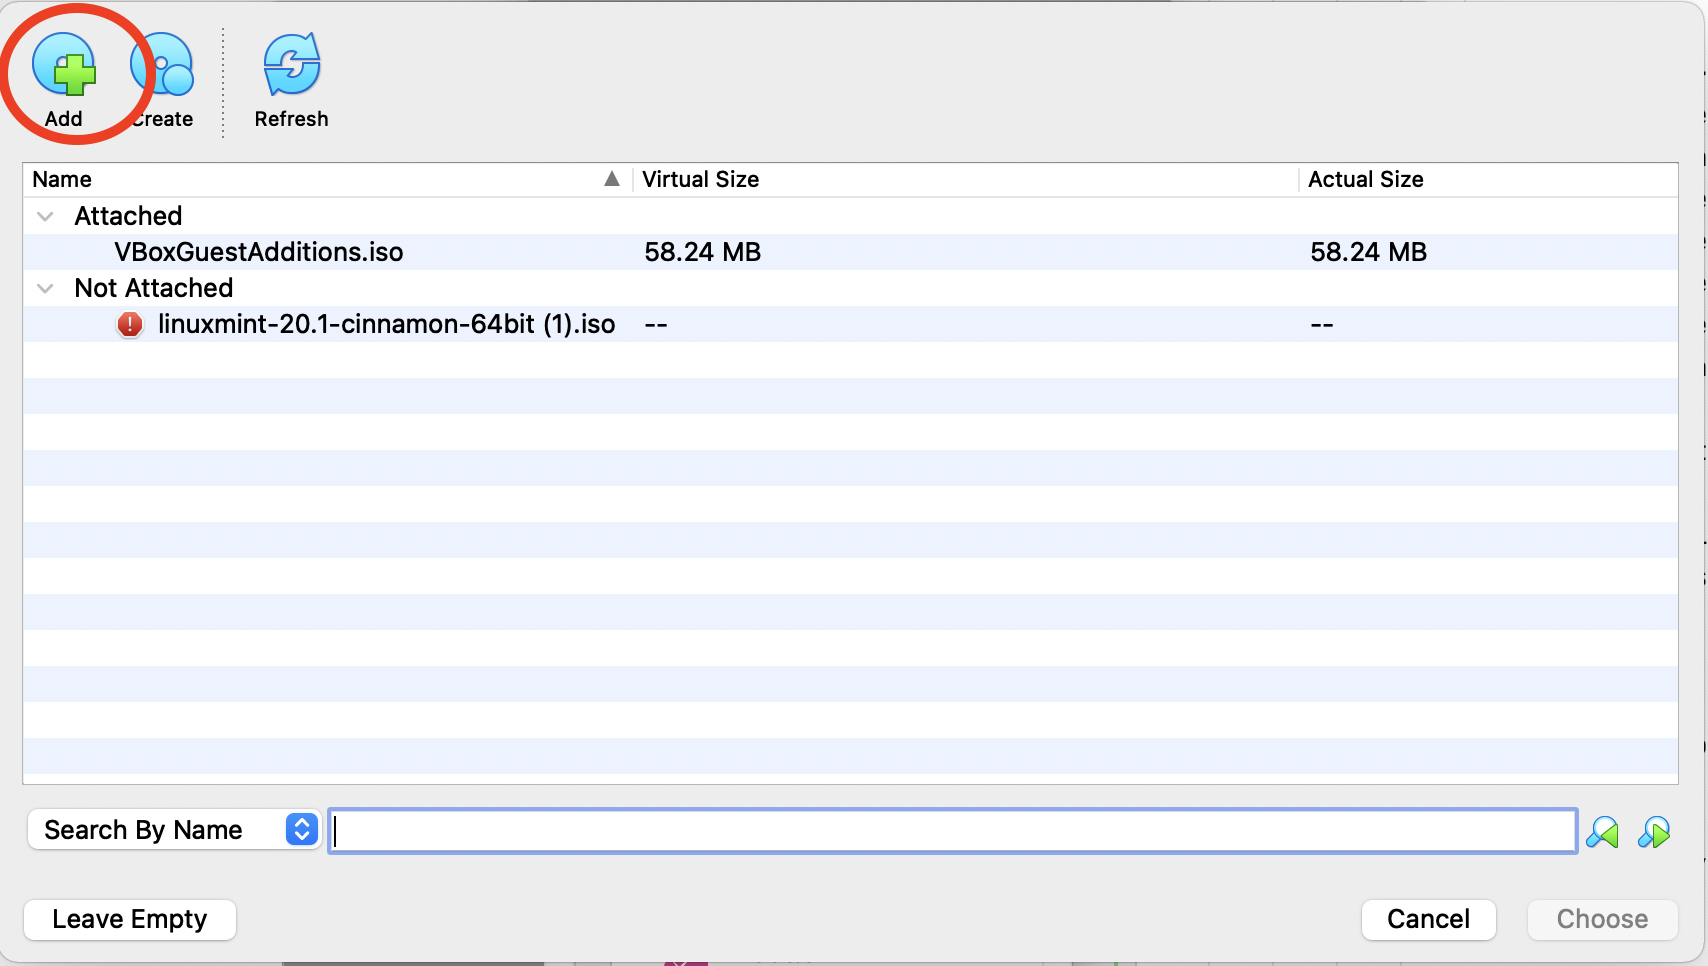
- It will prompt you to select the for the ISO file that you downloaded
(linuxmint-20.2-cinnamon-64bit.iso). You will need to select
the little folder on the bottom right side of the panel, then
select Add, then locate the ISO file you downloaded
in the previous step.
- Select English and then continue
- Take the default keyboard (English (US) and press Continue
- Take New York as the default timezone, and press Continue
- Select your name (use your e-id. For example, I used molloykp). This will auto populate the next 3 fields.
- Select a password and then press Continue
Install Guest Additions and Configurations
To allow your VM to run more smoothly, install the Guest Additions.
- Start your VM and log in
- Click on the devices menu in your OS (not within the VM) and select Insert Guest Additions CD image...
- The system will then prompt you to run the image, click Run. Enter your VM password when prompted.
- When completed, you will get a Press Return to close this window..., so press return.
- Restart your VM.
Configuring Video, CPU and Memory
Robotics tasks such as planning and virtual rendering of the robotics
within a simulator can be a computationally expensive task. ROS's
design utilizes multiprogramming, so enabling your virtual machine
to utilize additional cores will improve performance.
You can increase the number of CPU core's and video memory available to your
virtual machine.
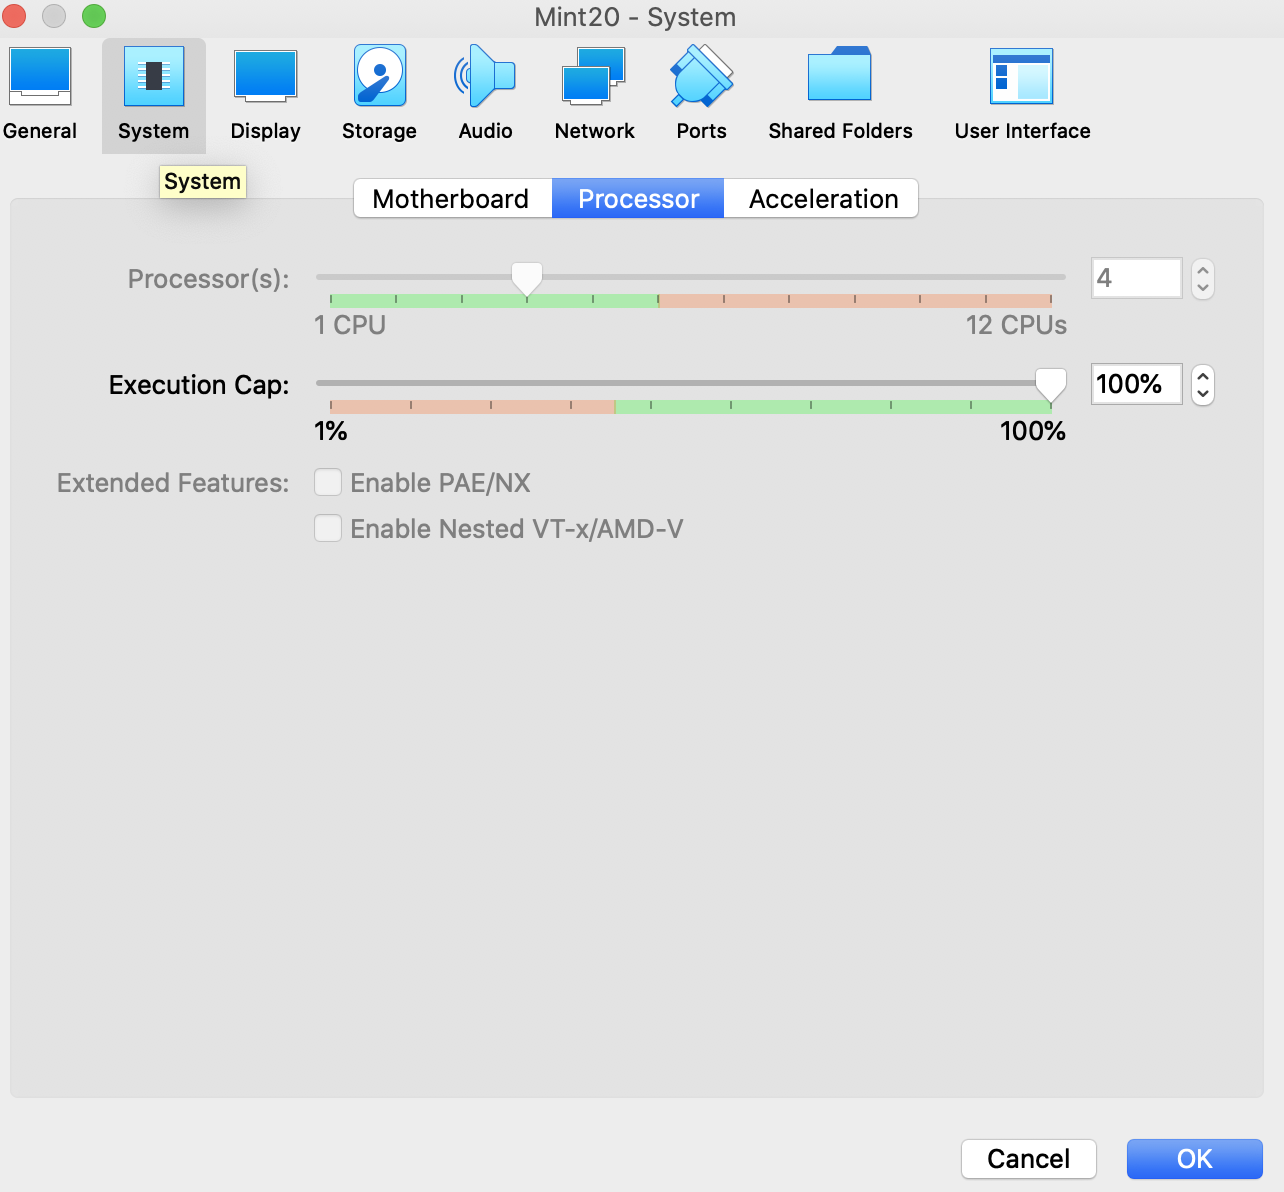
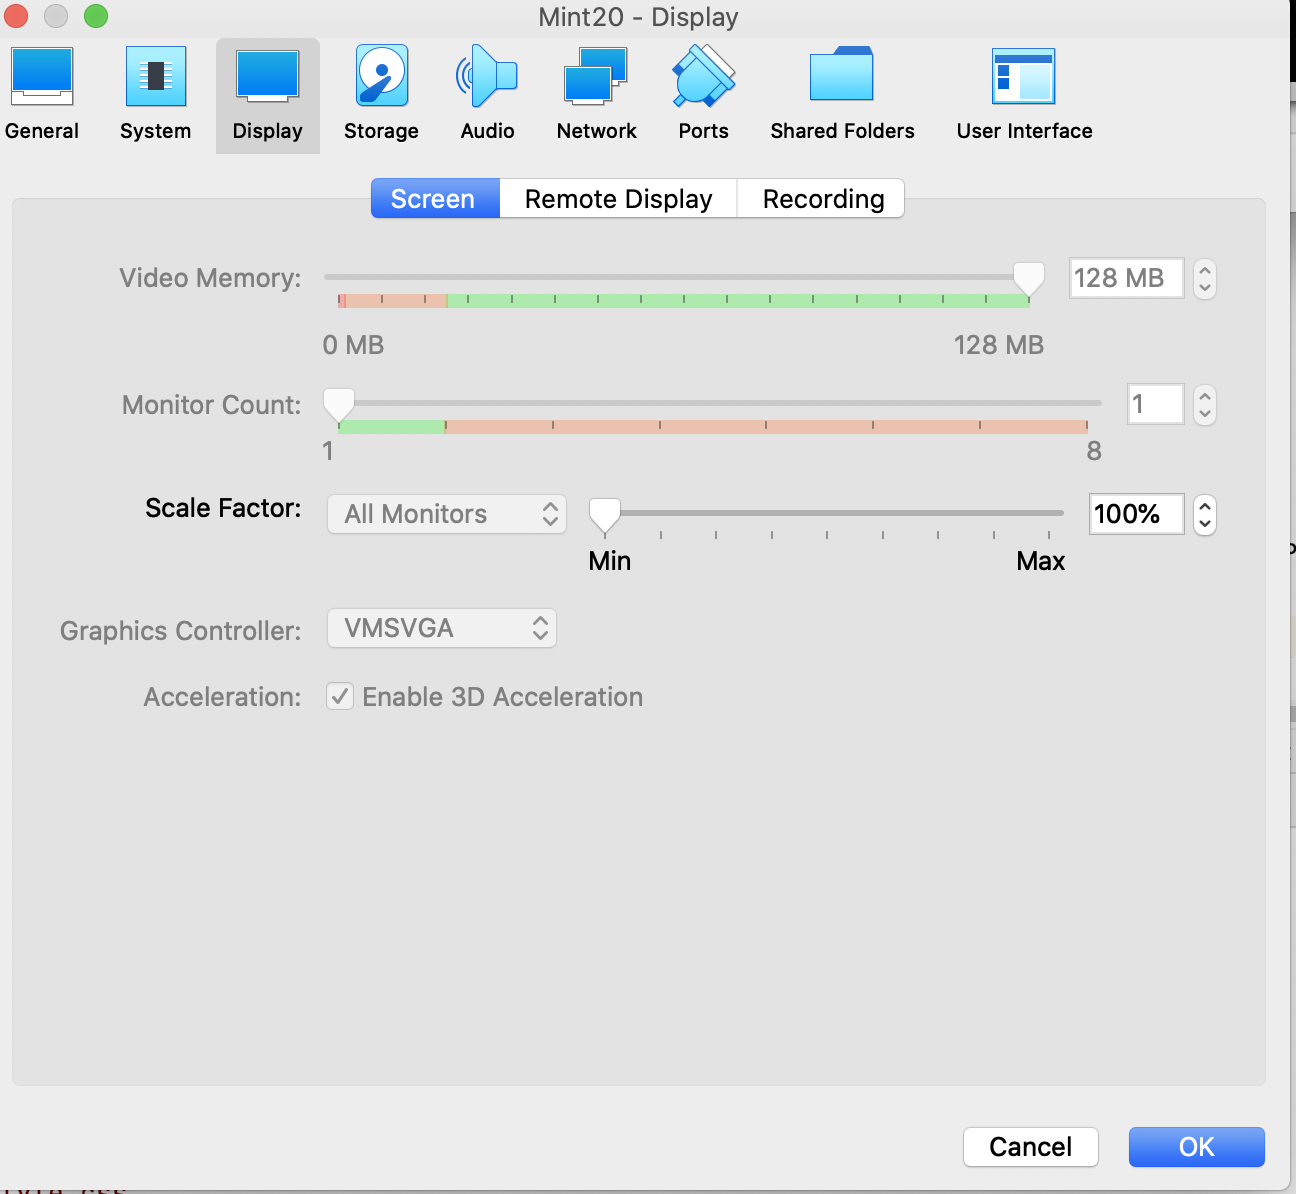
- Shutdown your virtual machine if it is running (otherwise, some of the settings can not be changed)
- On the VirtualBox home screen, select your virtual machine and then click the yellow gear button for settings.
- The click the system button and select processor (as shown in the image below). Increase the CPUs/cores.
- Click on display, and increase video memory to its maximum settings (128 MB) and make sure that Enable 3D acceleration is checked. An example of this configuration is shown below (right).

