DIGITAL Camp: Tech gift activity
In this tutorial we will learn how to program ESP32 M5Stack StickC with Arduino IDE.
Outline
- Preparation 0: Things used in this activity
- Preparation 1: M5Stack's board management
- Activity 1: Display text on M5StickC ESP32 Using Arduino
- Activity 2: Play Games on M5StickC ESP32 Using Arduino
- Activity 3: Develop a Mini Self-balanced Car using BalaC car kit
- References
Note:
- All machines in the labs of CS department at JMU have been set up for tech gift activity.
- Please skip Preparation 0 and Preparation 1 when you use the machine in the labs of CS department at JMU.
Preparation 0: Things used in this activity
- Hardware components: M5Stack BALA-C ESP32 Development Mini Self-balancing Car
- Provided by DIGITAL Camp
- Development tool: USB Driver
- Windows: CH9102_VCP_SER_Windows
- MAC: CH9102_VCP_SER_MacOS
- Linux: P210x_VCP_Linux
- Software apps: Arduino IDE
- Please use the latest version
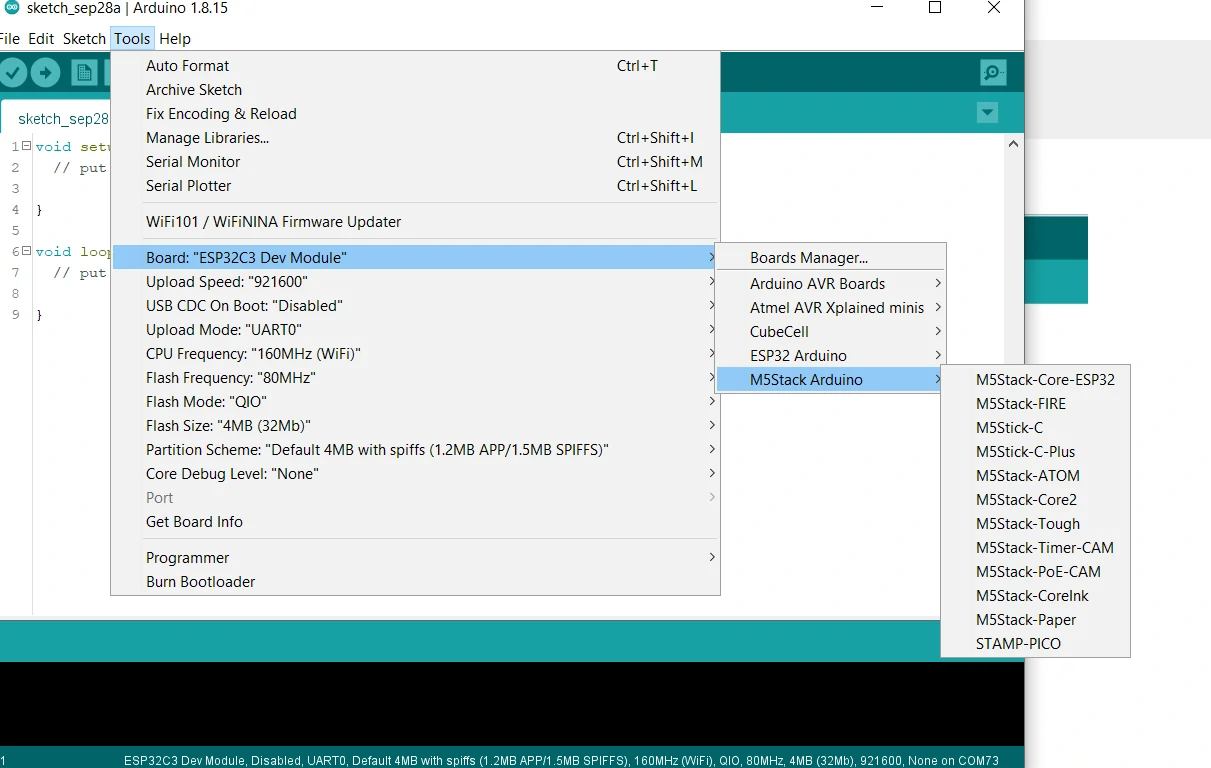
Preparation 1: M5Stack's board management
M5Stack's board management
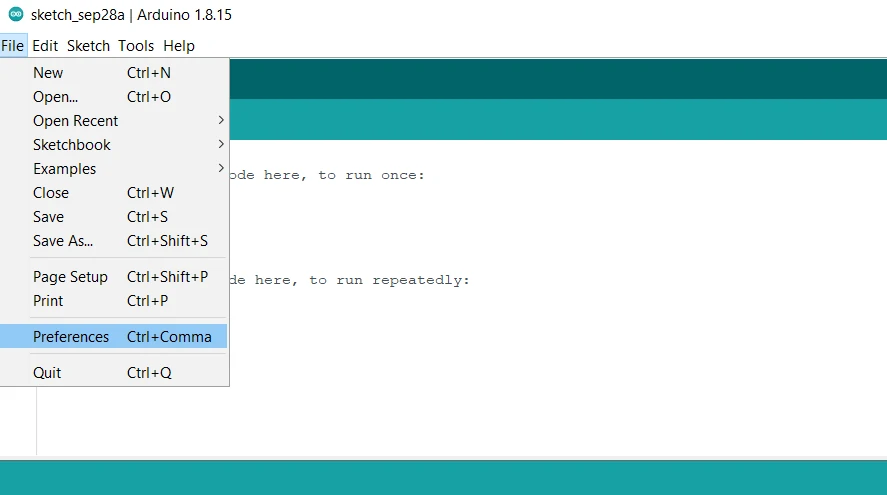
- Open the Arduino IDE, select
File->Preferences->Settings
- Open the Arduino IDE, select
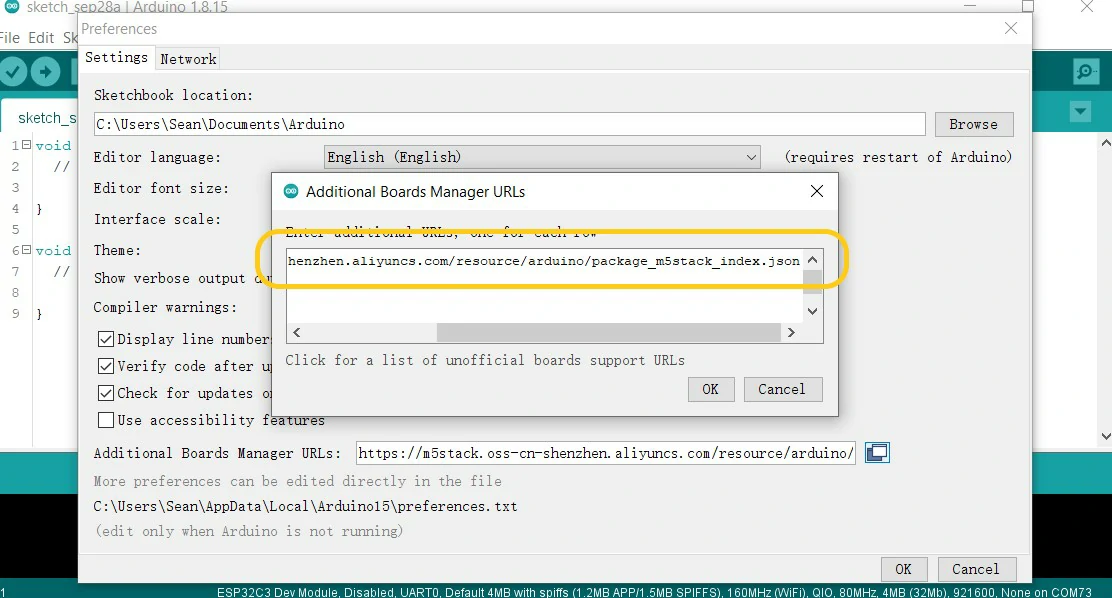
- Copy the M5Stack board management URL below to the
Additional Development Board Manager:
- Copy the M5Stack board management URL below to the
https://m5stack.oss-cn-shenzhen.aliyuncs.com/resource/arduino/package_m5stack_index.json
- Select
Tools->Development Board:->Development Board Manager...
- Select
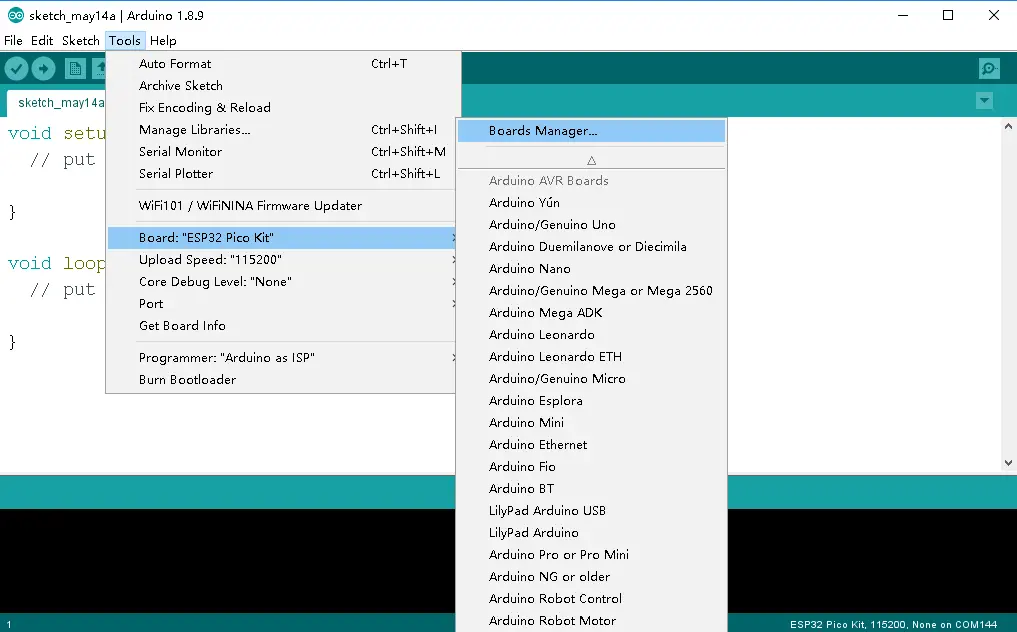
- In the new pop-up dialog box, enter and search for
M5Stack, clickInstall(If the search fails, you can try to restart the Arduino program)
- In the new pop-up dialog box, enter and search for
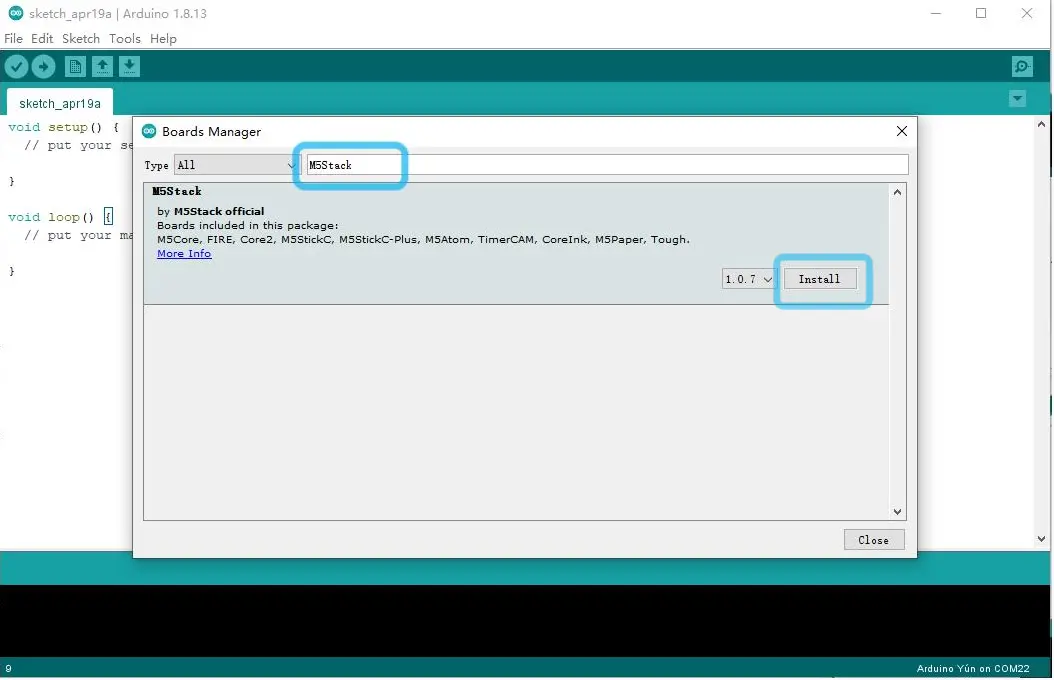
- 5.Select
Tools->Development board:->M5Stack Arduino, and select the corresponding development board configuration according to the device we are using (M5Stick-C).
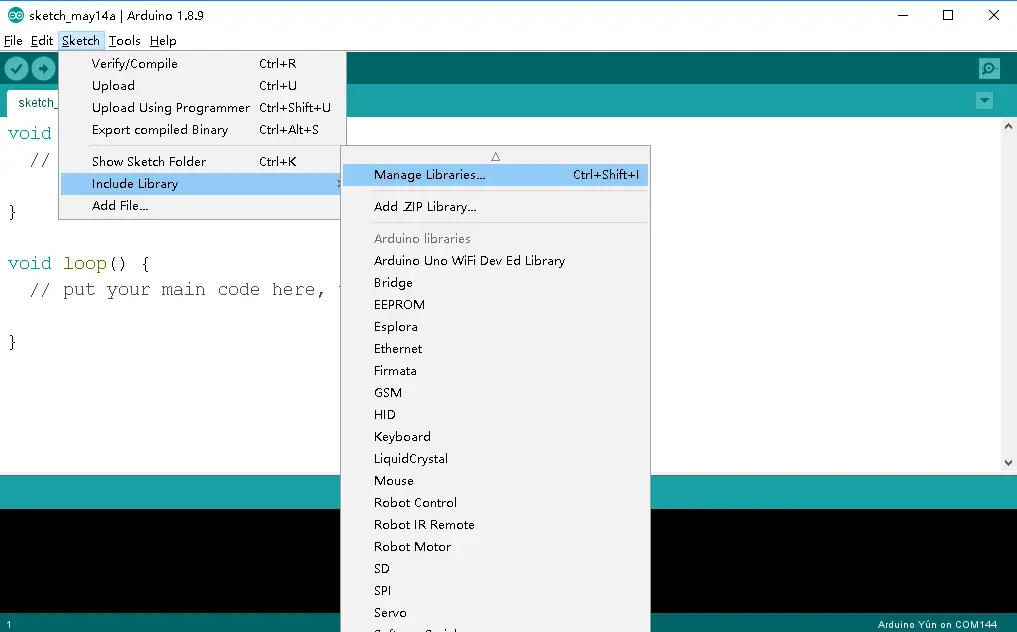
Related libraries
- Different hardware devices have different sample program libraries. Please choose to download according to the device you are using. Open the Arduino IDE, and then select
Project->Load Library->Library Management...
For M5StickC
- Search for
M5StickCand install it, as shown in the figure below. When downloading, please follow the pop-up prompts to install related dependent libraries.

Activity 1: Display text on M5StickC ESP32 Using Arduino
Example 1: Hello World
- Copy the code below to the Arduino IDE, connect M5StickC to the PC and configure the correct port (Windows OS:
Tools->Port->COMx), click the upload button (->) on the menu bar, the program will It will be automatically compiled and uploaded to the device. The program will print the "Hello World" string on the M5StickC screen.
#include <M5StickC.h>


void setup(){
  // Initialize the M5StickC object. Initialize the M5StickC object
  M5.begin();

  // LCD display. LCd display
  M5.Lcd.print("Hello World");
}


void loop() {
}
Example 2: Animated Text
- Download code below to your own device. Use your Arduino IDE to open the
soruce code: (
File->Open->...->Text_animation.ino). Then, click the upload button (->) on the menu bar, the program will It will be automatically compiled and uploaded to the device. - Modify the program above to make M5StickC display the animated text you like.
Activity 2: Play Games on M5StickC ESP32 Using Arduino
We can also play games on M5StickC ESP32 Using Arduino:
- Gravity ball (from Dr. Nathan Sprague)
- Dices (from M5StickC-Lib)
- FlappyBird (from M5StickC-Lib)
- More games on M5StickC-Lib
Example: Play Gravity ball game
Download socurce code above for Gravity ball(Gravity_Ball.ino) to your own device. Use your Arduino IDE to open the
soruce code: (File-> Open->...->Gravity_Ball.ino). Then, click the upload button (->)
on the menu bar, the program will It will be automatically compiled and uploaded to the device.
Now, play the Gravity ball game with M5StickC, enjoy!!!
You can play other games in the similar way above.
You can also use Arduino to develop your games for M5StickC ESP32.
Activity 3: Develop a Mini Self-balanced Car using BalaC car kit
BalaC is a DIY dual wheel balancing car kit. BalaC uses the STM32 series chip, two motor driver ICs, and is also equipped with a rechargable replaceable battery. It incorporates a light-weight design with 360° servos. The BalaC maintains its balance with the help of mpu6886. The real-time compensation of the servos are controlled by calculating the offset value to achieve the purpose of balancing.
Burn program to M5StickC ESP32 to control the car
Download code below to your own device. Use your Arduino IDE to open the
soruce code: (File-> Open->...->Balac.ino). Then, click the upload button (->)
on the menu bar, the program will It will be automatically compiled and uploaded to the device.
Put the car components together and play the Mini Self-balaned Car
- Follow the user guide to put the car together.
- After power on, press the power key for calibration. At this time, the LED flashes and the calibration is successful, and the balance can be maintained automatically
References
- https://github.com/m5stack/M5StickC
- https://docs.m5stack.com/en/quick_start/m5stickc/arduino
- https://www.instructables.com/Playing-Flappy-Bird-Game-With-M5stack-Esp32-Based-/
- https://www.hackster.io/ronfrtek/how-to-display-text-on-m5stickc-esp32-using-visuino-564c7c
- https://docs.m5stack.com/en/app/balac