Introduction
The purpose of this lab is to get you started with the basics of
Processing. Processing is a Java-based language that
was originally designed as a programming tool for artists to create visual
applications quickly and easily. The designers of processing cleared away
a lot of the startup-cruft needed just to code a program in Java that does
absolutely nothing. (Why, exactly, do beginners need to type
public static void main(String[] args) and put it all in a class just to get
started?) They also made it incredibly easy to get graphics programs up and
running.
Goals of this lab.
The first purpose of this lab is to get you started with programming in Processing. It is not meant to be comprehensive, but is designed as a jumping-off point for you. Here I’ll explain the basics, and its up to you to take it further.
The second purpose of this lab is to introduce you to the notion of geometric predicates. We won’t go into the details of how they are developed (doing so requires some background in linear algebra) and for now we will use them as a black-box. Our textbook never talks about how these predicates are programmed, but in order to actually write code to solve geometric problems, you will need to know some of the implementations. I’ll post background information on the math behind these predicates in the future, for those of you who are interested.
Processing 101
Processing is really two things: a code library for creating geometric computations and an IDE for coding them. The IDE itself is not nearly as fully featured as a production IDE like Eclipse or Netbeans (it has no debugger, for example), but for the small programs we’ll work on its generally sufficient.
You should be able to find the Processing app in the Applications folder of your Mac lab computer. Go ahead and start it. What you’ll see, when you start it, is a blank processing document like this:
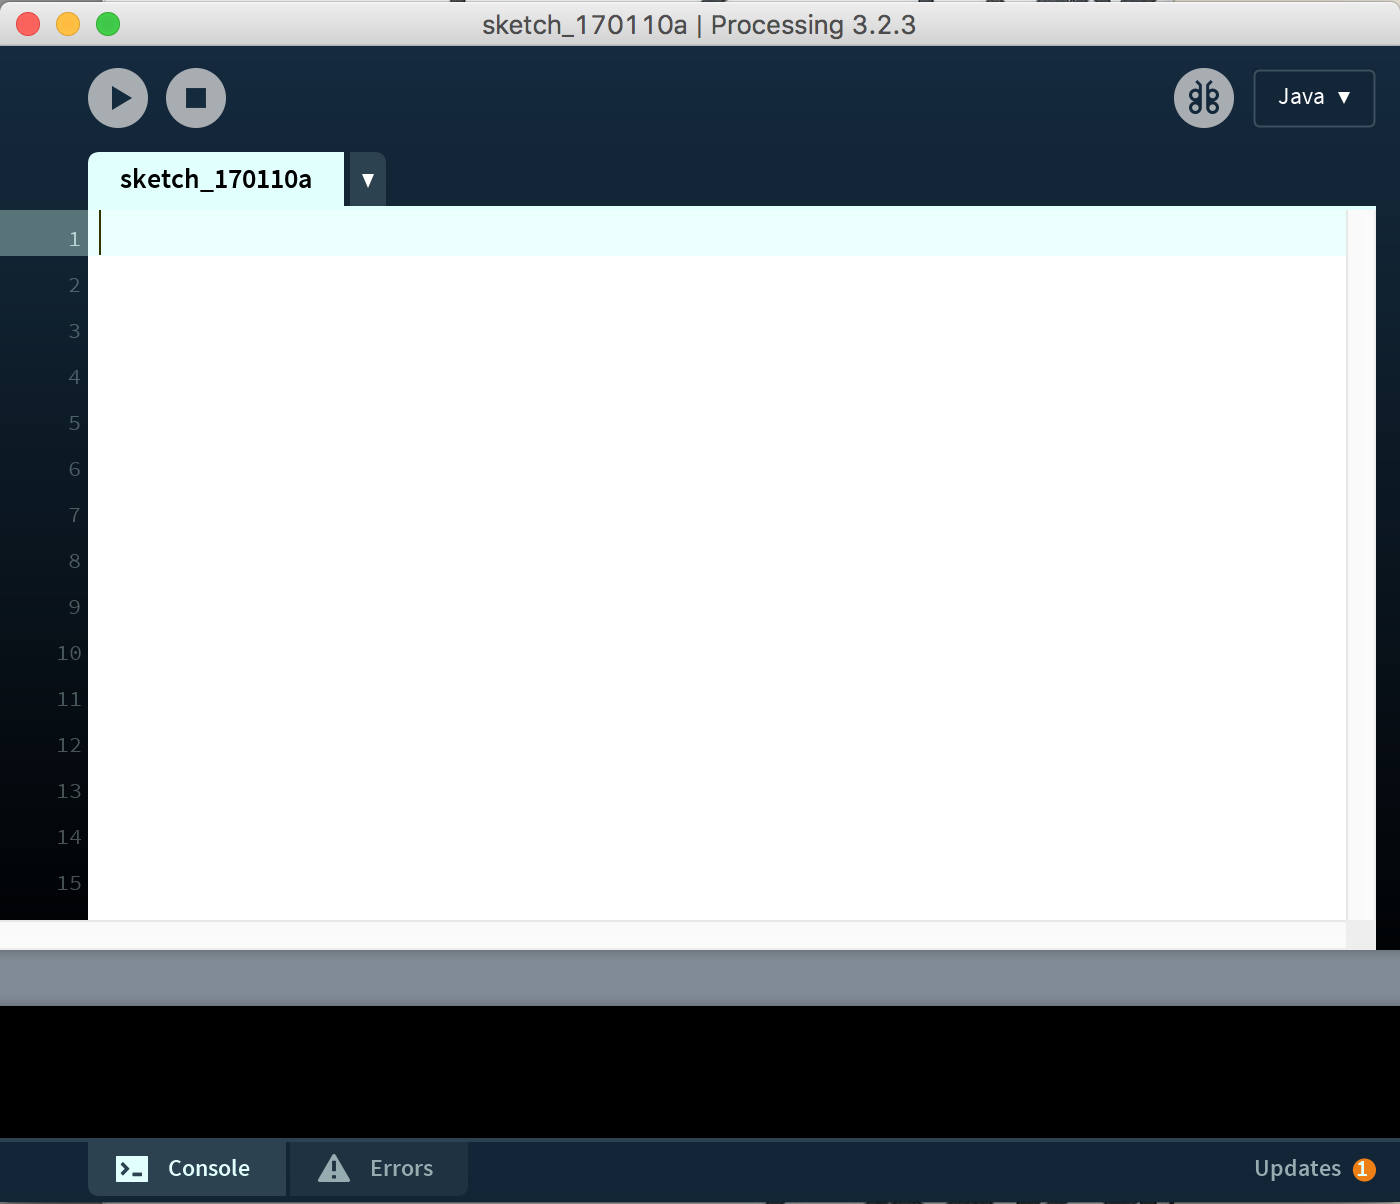
What you are looking at is the source code file for your first program (which Processing calls a Sketch). It is already runnable (no public static void main required). Just click the Play button in the top left-hand corner and Processing will compile and run your code and you’ll get a little gray window.
As you may recall, the starting point for a normal Java program is the main
method. In Processing, there are two basic methods you need to override to get
anything done. They are: setup() which performs any initial set-up of your
scene, and draw() which contains the actual drawing code.
Behind the scenes, Processing is really generating a main() method for you
that looks something like this:
public static void main(String[] args) {
    setup();
    while (true) {
        handleKeyboardAndMouseInput();
        draw();
    }
}
This model of program design is called an event loop. A program in this model
usually performs some amount of setup once, and then enters an infinite loop
which alternates between checking for inputs and updating outputs. This is one
key thing to keep in mind as you code Processing: unlike main in a Java program,
which is called exactly once when the program is started, draw() will be called
over and over again (about 30 times per second) until the program is exited.
The Setup Function
Let’s add a setup() function to your Sketch:
void setup() {
  size(640, 480);
  smooth(4);
  background(235, 245, 255);
}
Notice there is no need for a public modifier. Essentially everything is
automatically public unless otherwise specified. The size function sets up
the width and height of the window. The call to smooth(4) tells Proclessing
to do something called anti-aliasing, which essentially renders your application
into an image that is four times its width and height and then scales it down to
make it look nicer. This, of course, means slower, but better looking graphics,
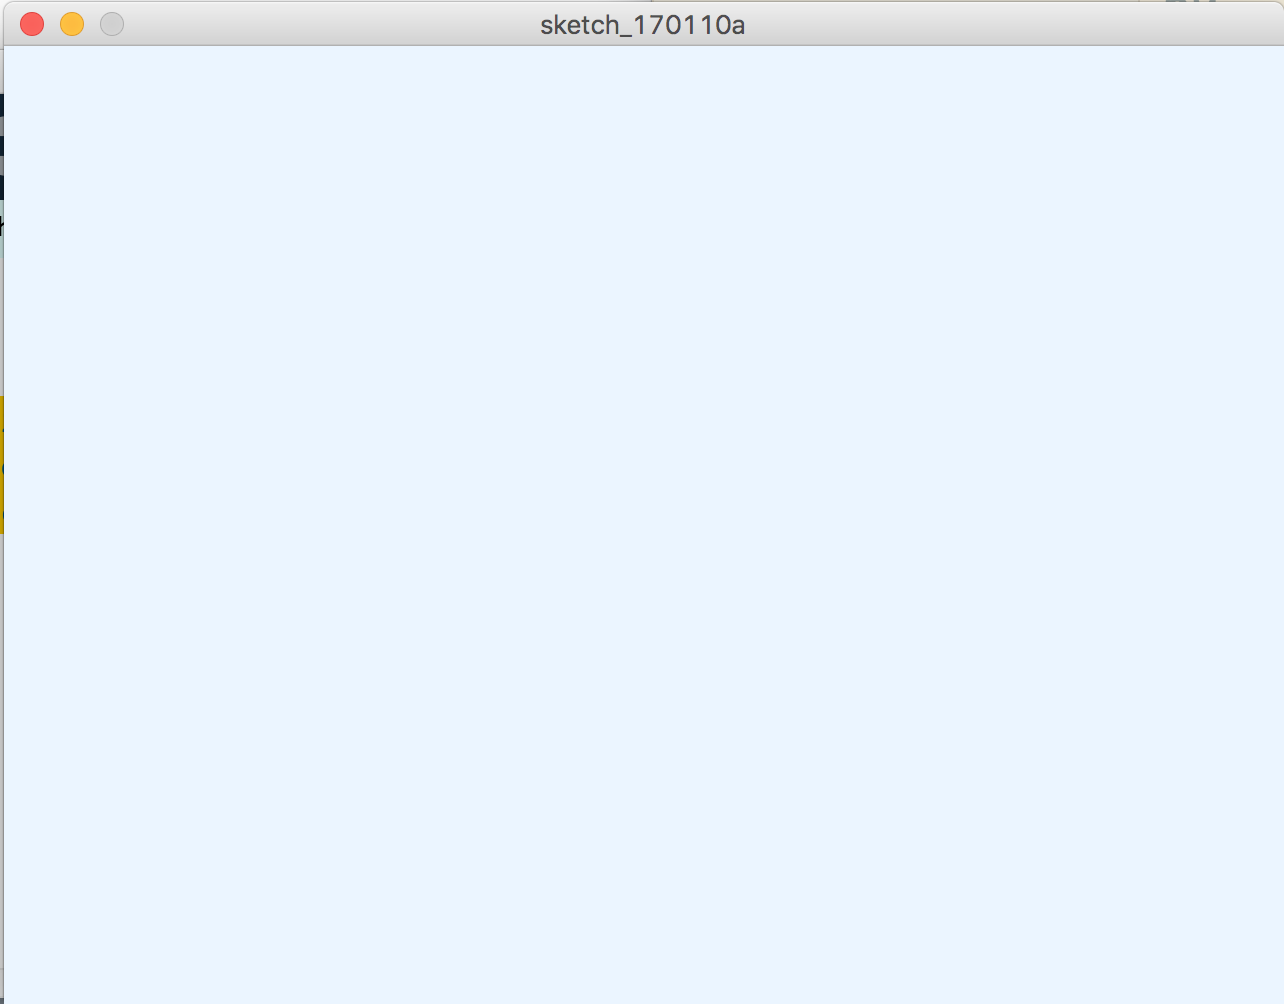
and for our purposes will be plenty fast. The background method sets the
background color of the app. The three parameters passed to background are the
amount of red, green, and blue to use to create the color and are on a scale of
0 (meaning no color) to 255 (meaning full color). If you run this now, you should
see:
The Draw function
Let’s add some drawing code somewhere after setup():
void draw() {
    ellipse(width / 2, height / 2, 50, 50);
}
One thing to immediately note is that the code above uses two special variables
width and height. You can use these anywhere in your program to get the
current width and height of your application.
Run your code to see the result. The call to ellipse takes four parameters,
x, y, w, and h. The idea is that you are selecting the center point
(x, y) of the ellipse and its width, w and height, h. Here we’ve made an
ellipse that is centered at the center of our app (width / 2, height / 2) and
has a width of 50 and a height of 50 (and hence is a circle).
Let’s draw a rectangle around it. Add the following code after the call to ellipse:
rect(width / 2 - 25, height / 2 - 25, 50, 50);
Here the parameters represent the coordinates of the bottom left-hand corner of the rectangle (which is -25 points in the x direction and -25 points in the y direction off from the center), and the width and height. Run your code again.
OH NOEZ! The square covered over our circle. This is because Processing is
automatically filling each shape it draws with a color, in this case white.
We remedy this by specifying how we want it to color the square. Add the
following code before the call to rect:
noFill();
stroke(255, 0, 0);
Run it again. Wait weird! Now our circle is red. Answer this question for yourself before reading further: why is the circle red?
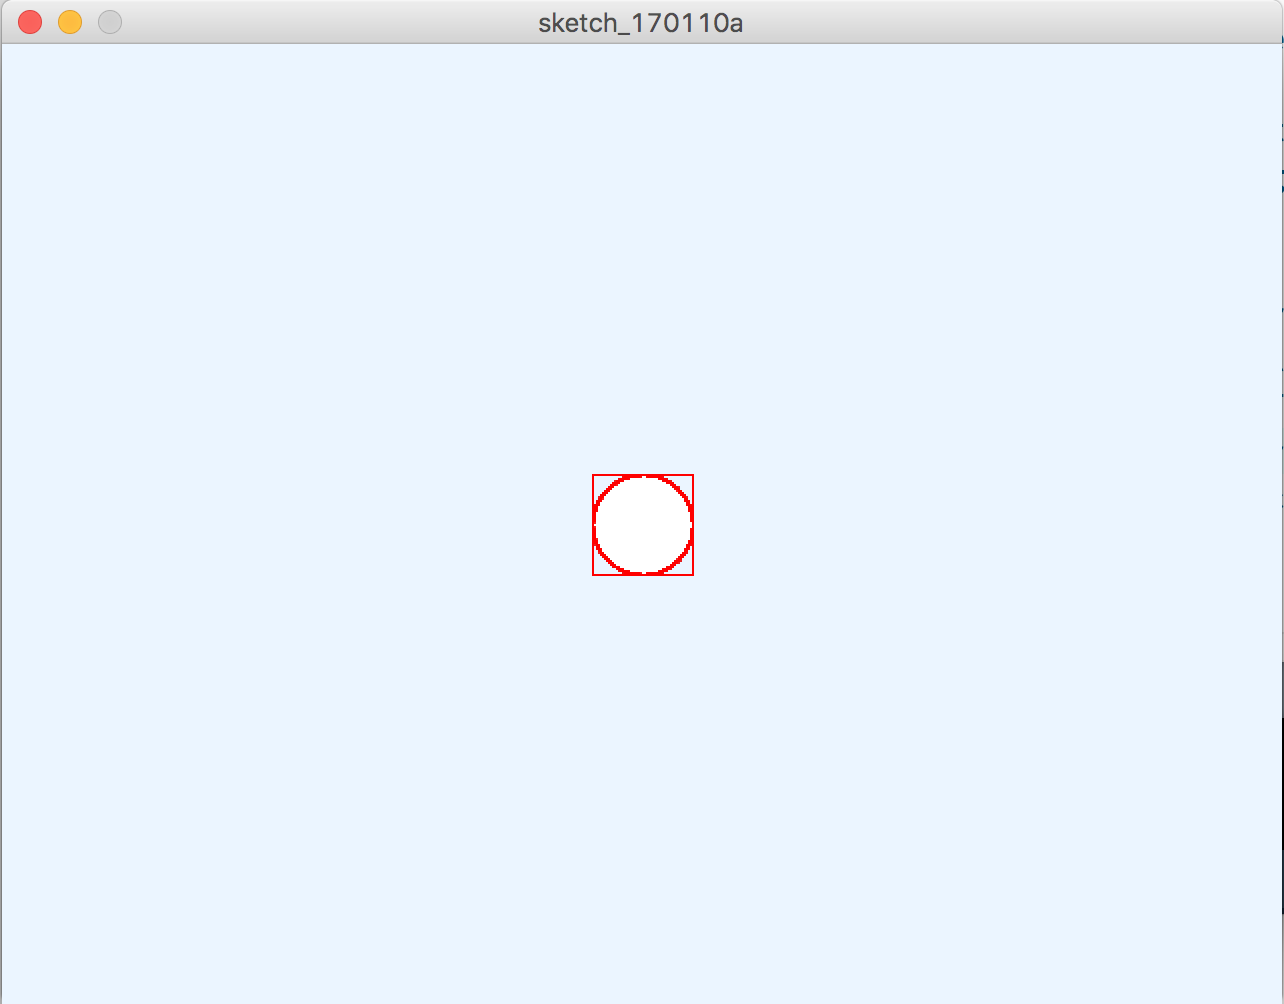
It’s red because Processing is continually calling the draw() method. The first
call draws a black circle, changes the current stroke to red, and then draws
a red square. On the next call, however, the stroke is still red (Processing does
not reset any of its internal state variables before calling draw()), so when
the circle is drawn for the second time, it draws with a red pen stroke.
We can fix this by adding calls to stroke and fill before drawing the circle
to set the correct colors. Let’s change things slightly and give our circle a
green outline and a blue fill:
strokeWeight(4);
stroke(0, 255, 0);
fill(0, 0, 255);

// and just before the call to rect add:
strokeWeight(1);
Now, let’s make it move. Create a global variable by adding the following to the top of your Sketch (outside any function call):
int xPos = width / 2;
and replace both places width / 2 appears in in the draw code with xPos.
Run it again. Oh drat, the xPos is off. This is because we initialized xPos
globally before the call to setup(). Change this so that xPos is declared
globally, but is initialized to width / 2 at the end of setup. Finally,
add the following to the end of draw:
xPos++;
Run the application. Now what is going on? It’s like TRON. Remember that call to
background we placed in setup()? That was only called once. Each call to
draw simply draws over what was there before, and we never called background
again. Fix this by moving the call to background from setup() to be the
first statement in draw() and re-run the application. That is much better!
OK. At this point you should be able to see the basics of processing. Next we’re going to look at creating an editable point set that can be manipulated using the mouse.
You can find all of the built-in Processing functions at the Processing Reference.
An Editable Point Set
Let’s start with a new Sketch. Go ahead and create a basic setup() method with
the same size and smoothing as the previous. Use the following for the draw method:
void draw() {
    // Update any primitives
    update();

    background(255);
    // Draw the primitives
}

// Update all data
void update() {

}
The designers of Processing made one design choice that annoys me. Usually in
applications like this, there is an update step followed by a draw step. This
allows you to logically separate the manipulation of your data/objects from the
display of your data/objects. Unfortunately, processing only gives us a draw()
method, and no update() method, so to fake better design, we are adding our
own update() method and simply calling it at the beginning of draw().
One of the great things about having Processing built on Java, is that we have access to all of the features of Java. We’re going to make use of that now. At the top of your Sketch add the following import statement:
import java.util.ArrayList;
Isn’t that beautiful? We just imported Java’s ArrayList and can now use it for storing lists of things. Here we’re going to store a list of 2D points, but before we do that we need to declare a class for storing points. We could inline this, but to be a little cleaner, let’s add a file. Notice next to the tab above your source code there is a little down arrow. Click this arrow, and select “New Tab”. You’ll be prompted to name a new file (bad design, I know, why didn’t the menu option read “New File”???!!!1!). Let’s call it Point2i, since we will create a 2D point that stores integer coordinates (hence the ‘i’).
Add the following code:
//
// A class for storing 2D points of integers.
//
class Point2i {
    int x, y;
    public Point2i(int x, int y) {
        this.x = x;
        this.y = y;
    }
}
We’ve now created a class for storing points with integer coordinates (usually you’ll probably want to store floats or doubles, i.e. Point2f or Point2d, but for today, we’ll just do this since it’s simple).
Click back over to the main sketch (might be a good time to save it as something,
by the way). Between the import statement and the first function, add a section
for global variables (via a comment), and declare and initialize an ArrayList
of Point2i objects:
ArrayList<Point2i> pointSet = new ArrayList<Point2i>();
and create three initial points at the end of the setup() method, something like:
pointSet.add(new Point2i(50, 50));
pointSet.add(new Point2i(100, 100));
pointSet.add(new Point2i(50, 100));
And let’s add some draw code to draw those points (under the Draw the primitives
comment):
for (Point2i p : pointSet) {
    ellipse(p.x, p.y, 8, 8);
}
We now want to add some code to drag a point if its clicked on. To do this, we
need to override the mousePressed and mouseReleased methods to determine if
any of the points are being pressed, and have a variable selectedPoint to track
a selected point (if there is one). To do this, we will also need to be able
to compute distances between points. The normal Euclidean distance between points
is the square root of the difference in x-coordinates added to the difference in
y-coordinates between the two points, i.e. for points $p_1=(x_1, y_1)$ and $p_2=(x_2, y_2)$, the distance between $p_1$ and $p_2$ is $$d(p_1, p_2) = \sqrt{(x_2 - x_1)^2 + (y_2 - y_1)^2}.$$ Since our points are of radius 8, we could simply check whether there is
any point $p$ that is within 8 distance of the mouse point $p_m$, i.e. we would check
for any point such that $d(p, p_m) \leq 8$.
There are two problems with this approach, however. First, we are using integers to store our coordinates, so we would need to cast these as some sort of floating point number in order to compute the square root. Second, and more importantly, even if we did so computing square roots is slow. It requires an algorithm, and is not implemented in hardware, but rather software. But notice that the term within the square root involves the sum of two squares, and is therefore always positive. Because of this checking that $d(p, p_m) \leq 8$ is the same as checking whether $(d(p, p_m))^2 \leq 64$ (we just squared both sides). And now we are only dealing with integer values, which are blindingly fast to compute with. For this reason, in many libraries that deal with graphics, you will find functions not only for computing distances between points (and lengths of line segments, etc.) but also for computing the square distances between points (and square lengths of line segments, etc.). So let’s begin by adding a method to our Point2i class for computing the square distance from it to another Point2i:
// Computes the square distance from this
// point to that.
int distSqTo(Point2i that) {
    int dx = that.x - this.x;
    int dy = that.y - this.y;
    return dx*dx + dy*dy;
}
Next, back in the main file, add a global variable (initially null) for storing a selected point:
Point2i selectedPoint = null;
Then, override mousePressed and mouseReleased as follows. The purpose of
mousePressed is that when the mouse is down, we will find out if any point is
within 8 units (or 64 squared-units) from the current mouse position. If there
is such a point, we will store a reference to it in selectedPoint. When the
mouse is released, we will reset selectedPoint to null so that we are no longer
tracking any point.
void mousePressed() {
    // mouseX and mouseY are built-in Processing variables for the current
    // mouse coordinates
    Point2i mousePoint = new Point2i(mouseX, mouseY);

    // Loop over all points and store a reference to one that is close enough:
    for (Point2i p : pointSet) {
        if (p.distSqTo(mousePoint) < 64) {
            selectedPoint = p;
            break;
        }
    }
}

void mouseReleased() {
    selectedPoint = null;
}
Ok, so now we have the selected point, but we need to do something to it. First,
let’s make the selected point red by adding the following to the for loop we
created to draw all the points in draw():
if (p == selectedPoint) {
    fill(255, 0, 0); // Fill red
} else {
    fill(255); // Fill white
}
Run it and make sure it works. Once that’s working, we’d really like for dragging
the mouse to update the location of the selected point. To do this, add the
following code to the update() method:
if (selectedPoint != null) {
    selectedPoint.x = mouseX;
    selectedPoint.y = mouseY;
}
Geometric Primitives
When designing geometric algorithms we often need to perform a series of simple tests of the following flavor: Given two points $P$ and $Q$, is a third point $R$ lying on the line through $P$ and $Q$ or not? Given a line $L$ through points $P$ and $Q$, and two other points $X$ and $Y$, do the points $X$ and $Y$ lie on the same side of $L$ or on opposite sides of $L$? Given a circle $C$ through three points $P$, $Q$, and $R$, is a fourth point $X$ inside, on, or outside the circle? Etc.
The answers to each of these questions is either a true or a false, and is used as part of a decision in how the algorithm should proceed. When we talk about these algorithms in class, we will simply say something like “if this is in the circle then do XYZ, otherwise do ABC”. To code these algorithms, however, you have to actually determine the answer to these questions. These questions (and others like them) have a name: they are called Predicates and are connected to the predicate-logic you studied in CS 227. The code behind these questions comes from determinants of matrices, which are studied in Linear Algebra. Since most of you have not had a course in Linear Algebra, we’ll leave the theoretical development of these objects for now, but we’ll build a little bit of code needed to use them.
The base of all these predicates is the area of a parallelogram. Suppose I give you three points $A$, $B$, and $C$ on a parallelogram $ABCD$, like so:
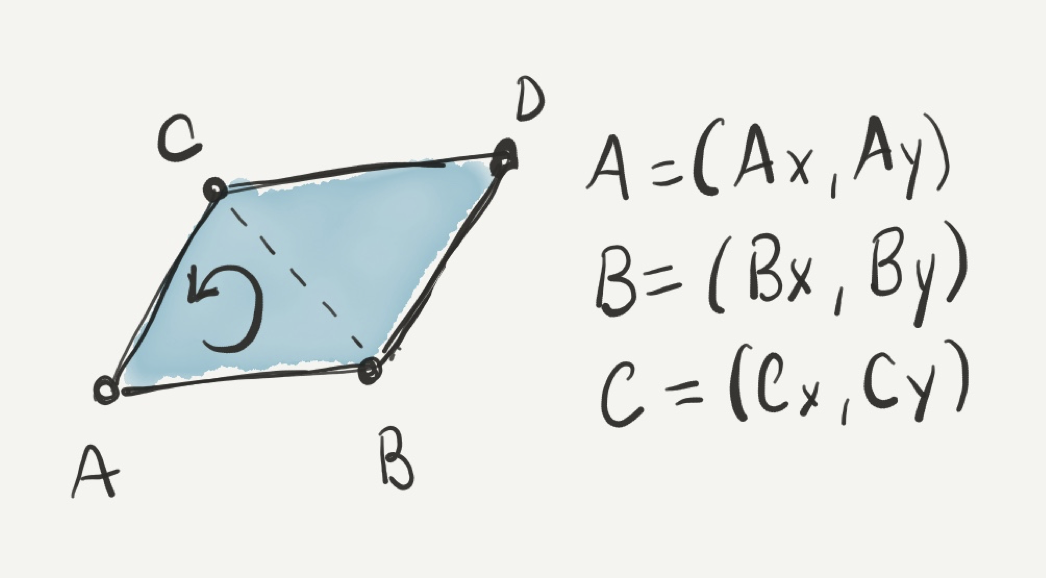
Turns out you can compute the area of this parallelogram using the following function: $$A(A, B, C) = (B_x - A_x)(C_y - A_y) - (C_x - A_x)(B_y - A_y).$$ (Those of you who do know linear algebra may recognize this as the determinant of the matrix with rows $(A_x, A_y, 1), (B_x, B_y, 1),$ and $(C_x, C_y, 1)$, but I digress.)
The strange thing about this area function is that it is signed, which means that it is negative if the parallelogram is oriented in a counter-clockwise direction (in other words, if you walk along the parallelogram starting from $A$ counter-clockwise you will encounter $B$ before $C$) and is positive if the parallelogram is oriented in a clockwise direction.
Notice also that we do not need to know $D$ to compute this area, and furthermore, the area of the triangle $ABC$ is simply one-half the area of the parallelogram $ABCD$. Thus we have:
int areaOfParallelogram(Point2i A, Point2i B, Point2i C) {
    return (B.x - A.x) * (C.y - A.y) - (C.x - A.x) * (B.y - A.y);
}

double areaOfTriangle(Point2i A, Point2i B, Point2i C) {
    return 0.5 * areaOfParallelogram(A, B, C);
}
Notice that we switched the return type of areaOfTriangle to accommodate dividing
the area of the parallelogram by 2. Notice also that instead of / 2.0 we used
* 0.5. This is because floating point division is significantly slower than
floating point multiplication. In graphics applications you should always multiply
unless you absolutely have to divide.
Let’s create a new “Tab” to store our library of Predicates. Create another new tab/file called “Predicates” and add the two functions above to it.
Exercise 1:
Next let’s add code to draw a triangle through our three points which is red if
the points are ordered counter-clockwise along its boundary and blue otherwise.
To do this, you will want to use the triangle() built-in function.
Once you have completed this task, notice that the point at which the triangle changes from red to blue is exactly the point at which the three points are collinear. This occurs when the area is 0, so from this we can quickly create a robust method of checking whether three points are collinear or not.
Exercise 2:
Add a fourth point to your point set and draw a second triangle between the first,
second, and fourth point in pointSet. Make the triangle similarly colored.
Imagine a line through the first two points dividing the plane. When do the two
triangles have the same color?
Exercise 3:
Here’s something remarkable about the signed area. It can be used to compute the (signed) area of any polygon. To do this we are going to change the setup a bit. If you choose any point $p$ and a polygon given by vertices $(p_1, p_2, \cdots, p_n)$, you can compute the signed area of the polygon by adding up the areas of all of the triangles $p pi p{i+1}$. In other words, for each edge $(pi, p{i+1})$ you create a triangle from that edge to your chosen point $p$. The (signed) area of the polygon is the sum of the signed areas of all the triangles. You should work out a small example of this on paper to see why this might be true.
For this final exercise, you are going to add code to compute the signed area of the polygon and investigate its properties. As stated above, we need some additional point $p$ from which to create all of these triangles. Add the following two global variables to your code:
ArrayList<Point2i> polygon = new ArrayList<Point2i>();
Point2i strayPoint;
and the following code to your setup() function:
polygon.add(new Point2i(300, 300));
polygon.add(new Point2i(350, 350));
polygon.add(new Point2i(400, 300));
polygon.add(new Point2i(400, 400));
polygon.add(new Point2i(300, 400));
strayPoint = new Point2i(width / 2, height / 2);

// Adds the polygon points to pointSet so our
// mouse handling code will modify the polygon
for (Point2i p: polygon) {
pointSet.add(p);
}
pointSet.add(strayPoint);
Notice that we are storing references to the polygon’s points and strayPoint in
our original pointSet list. This is in order to allow our previous mouse-drag
handling code edit our polygon for us.
Your tasks are now:
- Add drawing code to actually fill the polygon. See this for the methods you will need.
- Add a method to “Primitives” for computing the signed area of a polygon.
- Color the polygon blue if the sign of the area is negative, and red otherwise.
- Somewhere in the code, print the area of the polygon, using
System.out.printlnas the stray point is moved, does the area change? - See if you can get the polygon’s color to change by moving its points around. When are you able to? Can you move them into another position as a simple polygon where the color is flipped? How did you do it?
Turn it in
When you are done with your processing code, zip up the folder and submit it via the Canvas link. You have until Thursday night at 11pm to finish the code.
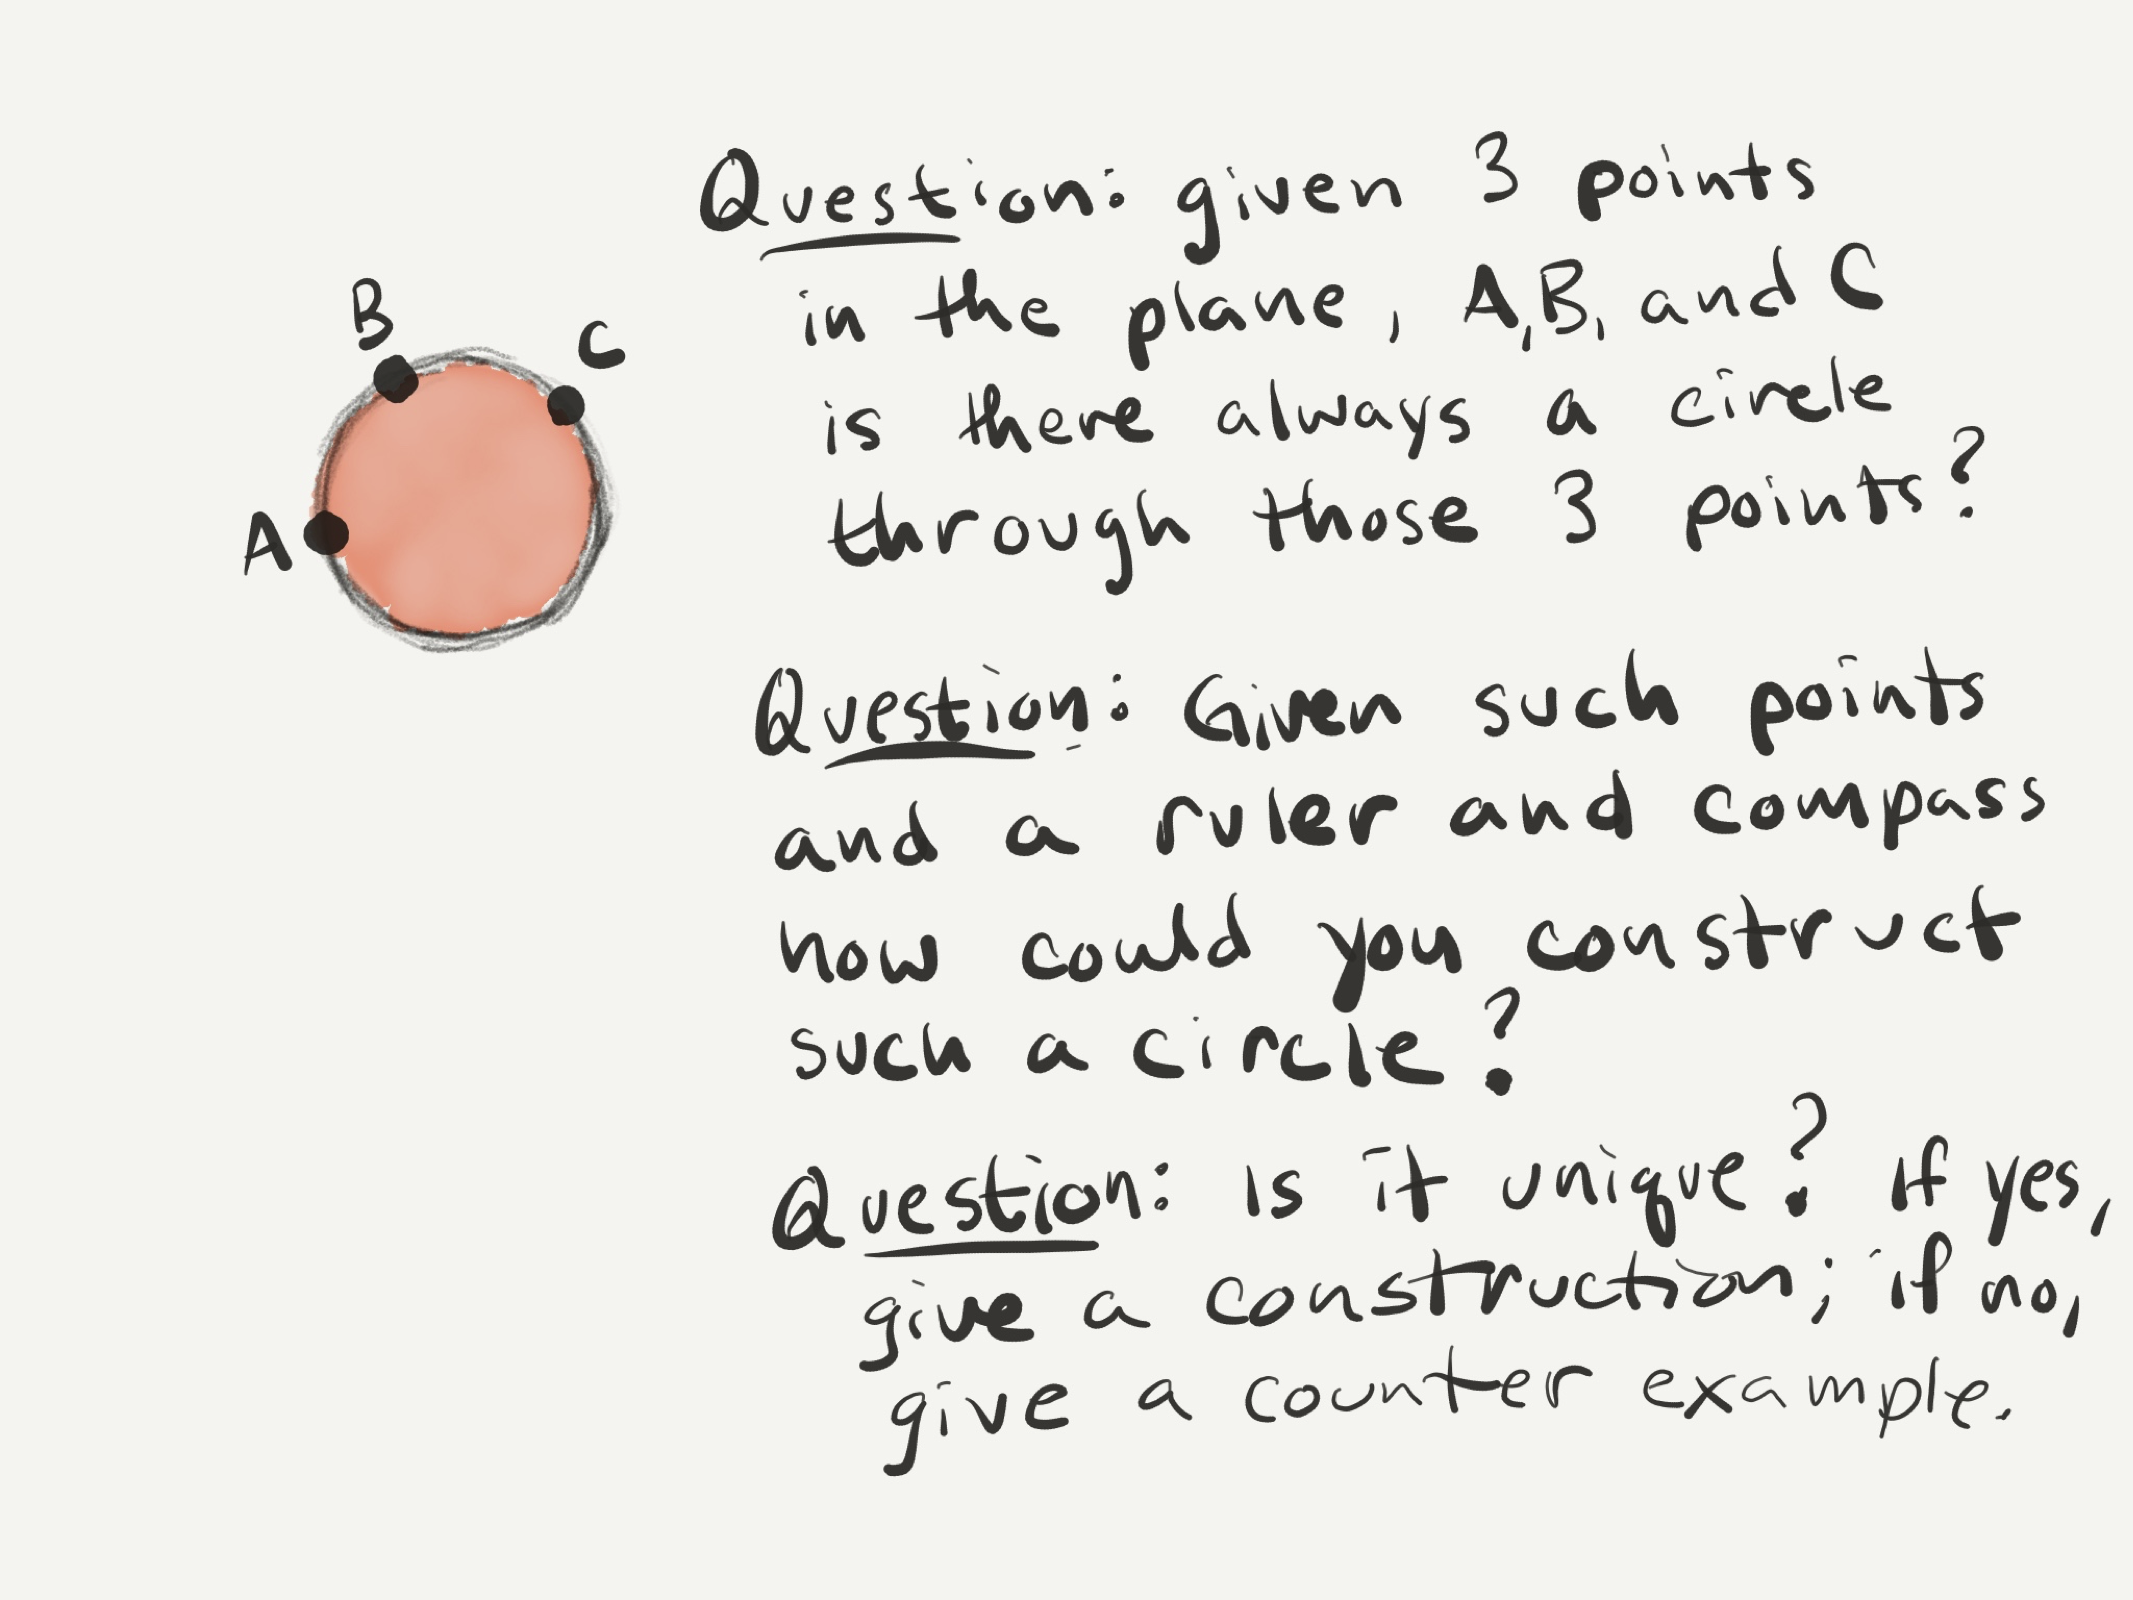
Challenge Questions
Puzzle over the following 3 questions. The answers are online, so don’t look it up. The point of this exercise is to help you start to think geometrically and start working with geometric objects, not for you to just know the answer.