Zeta Rescue!
Introduction
Once again, students in the Engineering Department have meddled with forces they do not understand. In the early morning hours of Dec. 13th 2022 members of an unauthorized capstone project accidentally released massive quantities of deadly zeta radiation into King Hall on the campus of James Madison University.
An unknown number students and staff members were in the affected area at the time of the incident. It is assumed that these individuals have been incapacitated by the effects of the zeta radiation. Zeta radiation poisoning progresses through two stages: In the first stage, the victim loses consciousness and transforms into a pumpkin-headed monstrosity. (See Figure 1 below.) The second stage is death. Fortunately, most victims make a full recovery if they receive treatment in time.
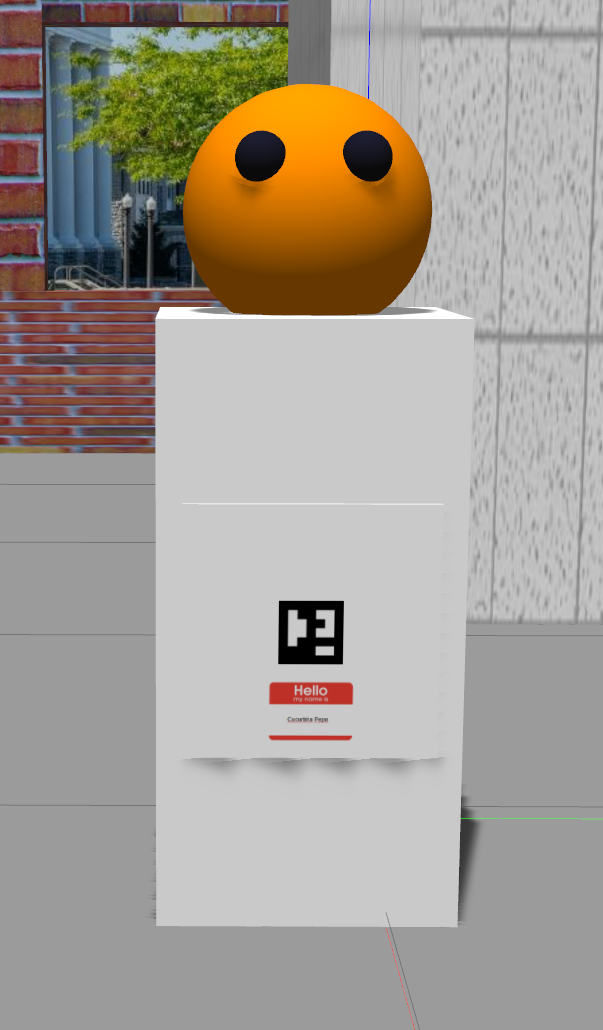 Figure 1
A response team is on the way with the necessary equipment to decontaminate the affected areas and treat the victims. Unfortunately, the decontamination process is slow, and the victims don’t have much time. It is crucially important that we determine the location and identity of all victims so that the response team can allocate their resources as efficiently as possible.
The high levels of zeta radiation in the contaminated areas will interfere with any wireless communications. The only hope is to send in fully autonomous robots to find the victims and report back on their positions.
Project Outline
Once your application has been launched, no interaction with the robot will be allowed. The robot will have a limited amount of time to search for victims within the area defined by the map. By the end of the time period the robot must return to its initial location.
Once the user requests a report by clicking on the appropriate button, the robot must provide location and identity information for as many victims as possible.
You are free to use any existing ROS Packages in your solution.
Provided Code
The following GitHub repository contains submodules providing a number of ROS packages that will be necessary or helpful in developing your application:
This updated version of the ros2 configuration script will download and build all of these packages:
You will run this script INSTEAD OF ros2_jmu_setup.sh.
Competition Steps
A (simulated) round of competition would proceed as follows:
The judge launches the competition:
This launch file has an optional
This launch file will starts the following:guiargument that makes it possible start the Gazebo simulator with no GUI. This should reduce computational overhead.- Gazebo simulator
- Navigation system
- The end-of-competition button node.
Judge starts YOUR rescue application:
This launch file takes an optional
time_limitargument indicating the time limit for the competition in seconds:You are free to modify
rescue.launch.py, but you should not add or remove any command line arguments.The judge waits until the time limit has elapsed. By this point, the robot should have returned to the starting area. The judge will then run the
The final command line argument is a string that will be used to prefix the filenames for storing the results of this run. This node will store an an image for each victim and create a .csv file containing all reported victim locations.victim_listenernode to receive the results:- The judge will click on the “CLICK FOR REPORT” button, indicating to the rescue application that it should publish victim information.
The judge will then inspect the saved files to evaluate the success of the rescue operation.
Each of the launch files described above takes additional command-line
arguments that will be used to run the competition on the real robots
instead of the simulator. You can always see the full list of command
line arguments for a launch file by using the --show-args flag.
Competition API
The node(s) that you write for the competition must conform to the following API.
- Subscribed topics:
/report_requested(std_msgs/msg/Empty) - When a message is received on this topic, victim information must be published. Any victim information published before the button is pressed will be ignored.
- Published topics:
/victim(zeta_competition_interfaces/msg/Victim) This message will contain the full information about a single victim including an image and a location. The image in this message should provide the clearest possible view of the victim, ideally with a legible view of the name tag.
Issues To Consider
Searching
The simplest search strategy is to select random navigation targets until time elapses. The time limit will be short enough that a random strategy will be unlikely to discover all victims. There are many other approaches ranging from simple greedy strategies to complex search algorithms. If you are interested in exploring the literature in this area, A survey on coverage path planning for robotics by Enric Galceran and Marc Carreras [1] would provide a reasonable starting point.
Identifying Victims
Fortunately, all of the victims were wearing name tags with ArUco
augmented reality markers [2] at the time of the accident. The
ros2_aruco package provides a ROS2 wrapper for performing ArUco
marker identification. You can try out on the competition markers by
starting the competition launch file and then executing the following
launch file to start the aruco detector and an appropriate
visualization:
The marker detection is not perfectly accurate or reliable, and it only works if the victim is observed from the correct direction. You are welcome to use additional strategies for identifying and locating victims.
Coordinate Transforms
It will be necessary to perform some coordinate transformations to map
sensor data into the map coordinate frame. The standard mechanism for
handling this in ROS is to use tf. Unfortunately, the tf Python
API is not available in ROS Foxy. Instead, you can use the
transform_service package to request coordinate transforms. The
transform_service_demo package includes some sample Python code
illustrating how to access the server. You can run the code be
executing the following launch file:
Testing and Debugging
RViz is one of the key features of the ROS ecosystem. It can be very
difficult to debug a robotics application without being able to
visualize intermediate results. For this application it will probably
be useful to visualize victim data as it is discovered. One approach
to this is to publish to the /victim topic during testing while
running the victim_listener node. This node publishes rviz markers
at reported victim locations as well as victim images on the the
/victim_marker and /victim_image topics respectively. Both topics
can be viewed in rviz.
Real Robots vs. Simulator
The actual competition will not use the simulator. There is no guarantee that solutions that work will in simulation will work well (or at all) on the real robots. Make sure to leave time to evaluate and tune your solution in the real world.
Competition
The final project day will be organized as a friendly competition between the project teams. Results will be scored on the basis of the number of victims that each team locates and reports.
The exact scoring rubric will be released as competition date gets closer. The following factors will be considered:
- Incorrect reports: points will be deducted for reporting non-existent victims.
- Duplicate reports: points will be deducted for reporting the same victim multiple times.
- Image quality: points will be deducted if the name of the victim is not legible.
The scoring rubric will not explicitly reward smart search strategies, but random wandering will probably result in fewer detections than a systematic search.
Deadlines and Grading
Your grade for this project will be based on the quality of your final solution, as well as on making adequate progress on intermediate checkpoints.
For the fist two checkpoints you must:
- Create a release named with the appropriate checkpoint number: “checkpoint1”, “checkpoint2”, etc.
- Post a narrated YouTube video demonstrating the current functionality.
- Provide a short text document document including:
- A link to the YouTube demo.
- A description of the current state of the code: what works, what doesn’t, etc.
- Any instructions I would need to test your current code.
- A development plan for the next checkpoint.
The text documents should be named README1.md, README2.md etc., and should be stored in a doc folder in your package.
There are no specific requirements for the functionality that should be finished for the first two checkpoints. However, for full credit, there must be clear progress in functionality from one checkpoint to the next. Also, the code submitted for each checkpoint must represent a complete, executable application. I should be able to run your code after each submission and evaluate the level of functionality. The following checkpoint schedule has an example of the kind of thing I have in mind:
- Checkpoint 1: The robot wanders randomly for a while, somehow recording or reporting where it sees victims. The robot returns to the start location after a fixed time interval.
- Checkpoint 2: All of the functionality for checkpoint 1, plus systematic search patterns. Careful navigation to enable close-up name tag images. Victim data is reported in response to button presses.
Overall final project grades will be calculated as follows:
| Checkpoint 1 | 15% |
| Checkpoint 2 | 20% |
| Peer Evaluation* | 15% |
| Final Functionality and Code Quality | 40% |
| Competition Score | 10% |
References
[1]Galceran, Enric, and Marc Carreras. “A survey on coverage path planning for robotics.” Robotics and Autonomous systems
[2] Garrido-Jurado, Sergio, et al. “Automatic generation and detection of highly reliable fiducial markers under occlusion.” Pattern Recognition 47.6 (2014): 2280-2292.
* We reserve the right to increase the weight of this factor if there is strong evidence that a group member has not make a good-faith effort to contribute to the project.

This work is licensed under a Creative Commons Attribution-NonCommercial 4.0 International License.