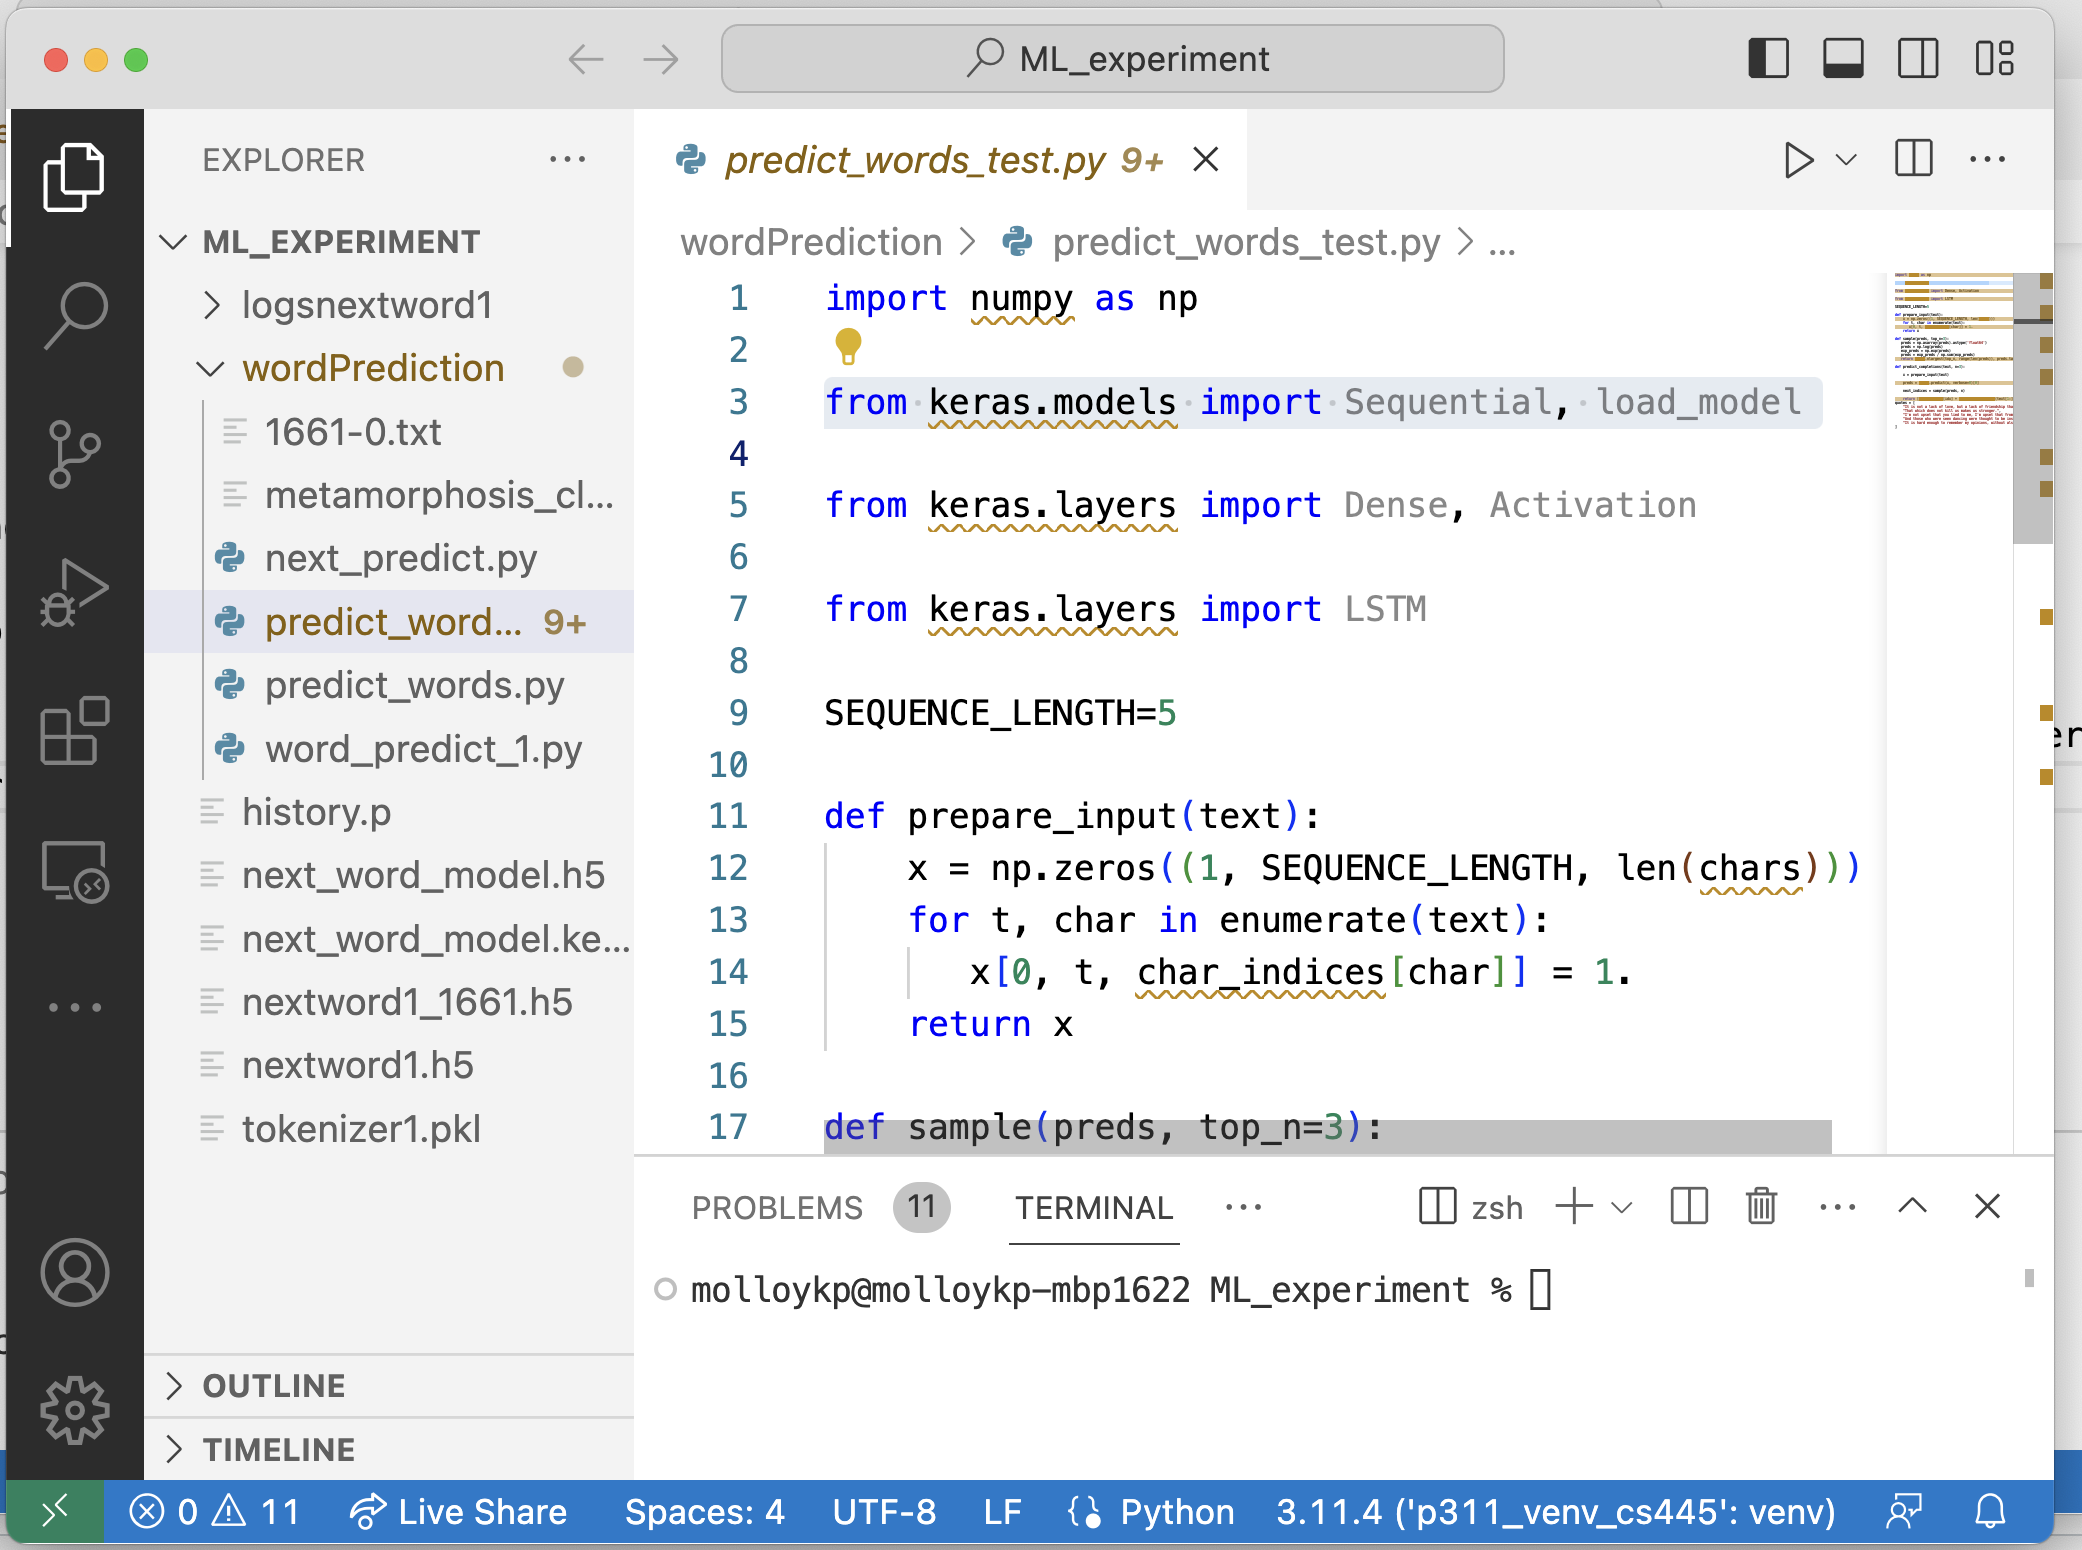
This document presents a roadmap for software development for CS 445.
Operating Systems Supported
All of the programming activities for this class have been tested and developed on a UNIX based system (either Mac or Ubuntu). In theory, they should also work directly on Windows. Some support will be offered to students using Windows, however, this support will be very limited. In the event that an issue can not be resolved under Windows (and this item function correctly in the Mac and/or Ubuntu environments), you will be able to use the stu server to develop and run your code. You can use the Visual Studio IDE on your laptop while using a UNIX based backend to run all of your code. If you are using Windows, you may need to utilize this type of configuration on some assignments. It is also possible to install the WSL (Windows subsystem for Linux). However, I am not an expert in this and will have very limited troubleshooting ability.
Step 1 – Install Python
If you are using a JMU lab computer, Python is already installed and you can skip this step. If you are using your own workstation, then proceed.
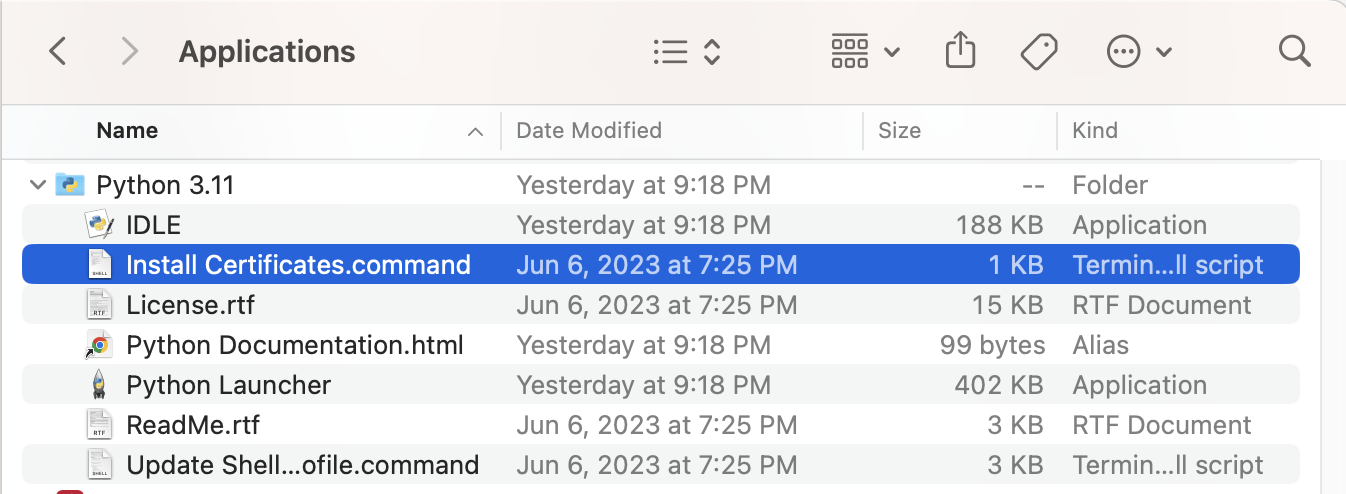
You can download an implementation of Python from the python web site for your computer and operating system. For this class, it is recommended that you download the latest Python 3.11 version. Make sure you run the certtificate install after you run the installation script. Here is a screenshot of where that is on a mac:
Certificate Install Script
Step 2 – Create a VENV environment
Python virtual environments and packages are convenient ways to isolate the packages you need for a specific project (or class). It also allows the installation of packages without administrator rights (so, you can install packages on stu for example). See the Python documentation on virtual environments for more information.
Example of Creating a VENV in Mac/Ubuntu Unix
VS Code prefers all your python virtual environments (venvs) to be under a single directory. For me, I just created this under my home direcotry at /Users/molloykp/dev/python_venvs/. Here is an example of me creating my venv and then activiating it for this shell:
Making a VENV and Activating It

Step 3 – Downloading the required packages for CS 445
Within a command window, make sure you have your new Python environment set. Notice that after I ran activiate, it changed the prompt so that it is prefixed with the venv’s name. From that window, run the following commands:
pip install --upgrade pip
pip install wheel
pip install setuptools
pip install keras
pip install matplotlib
pip install notebook
pip install pandas
pip install seaborn
pip install scikit-learn
Step 4 – Configure VS Code
You can download VS Code from here. Once downloaded and you run the installation script, follow these steps:
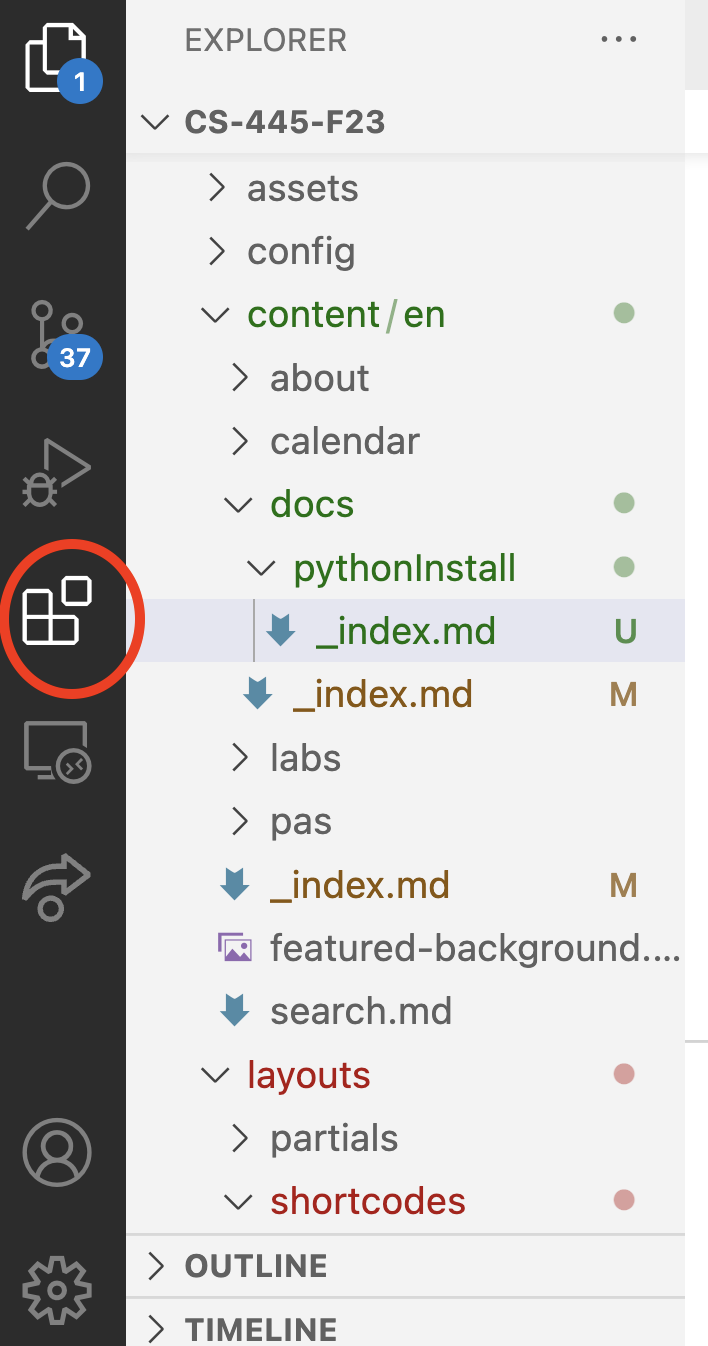
- Install the Python extension(s) by opening the Extensions tab (icon w/ boxes at the bottom of the tab strip on the left-hand side) by clicking the extensions button on the left hand side. This button is shown in the Figure below:
VS Code Options
Install the following extensions:
- Python
- Pylance
- Remote-SSH
- Remove Explorer
- Jupyter
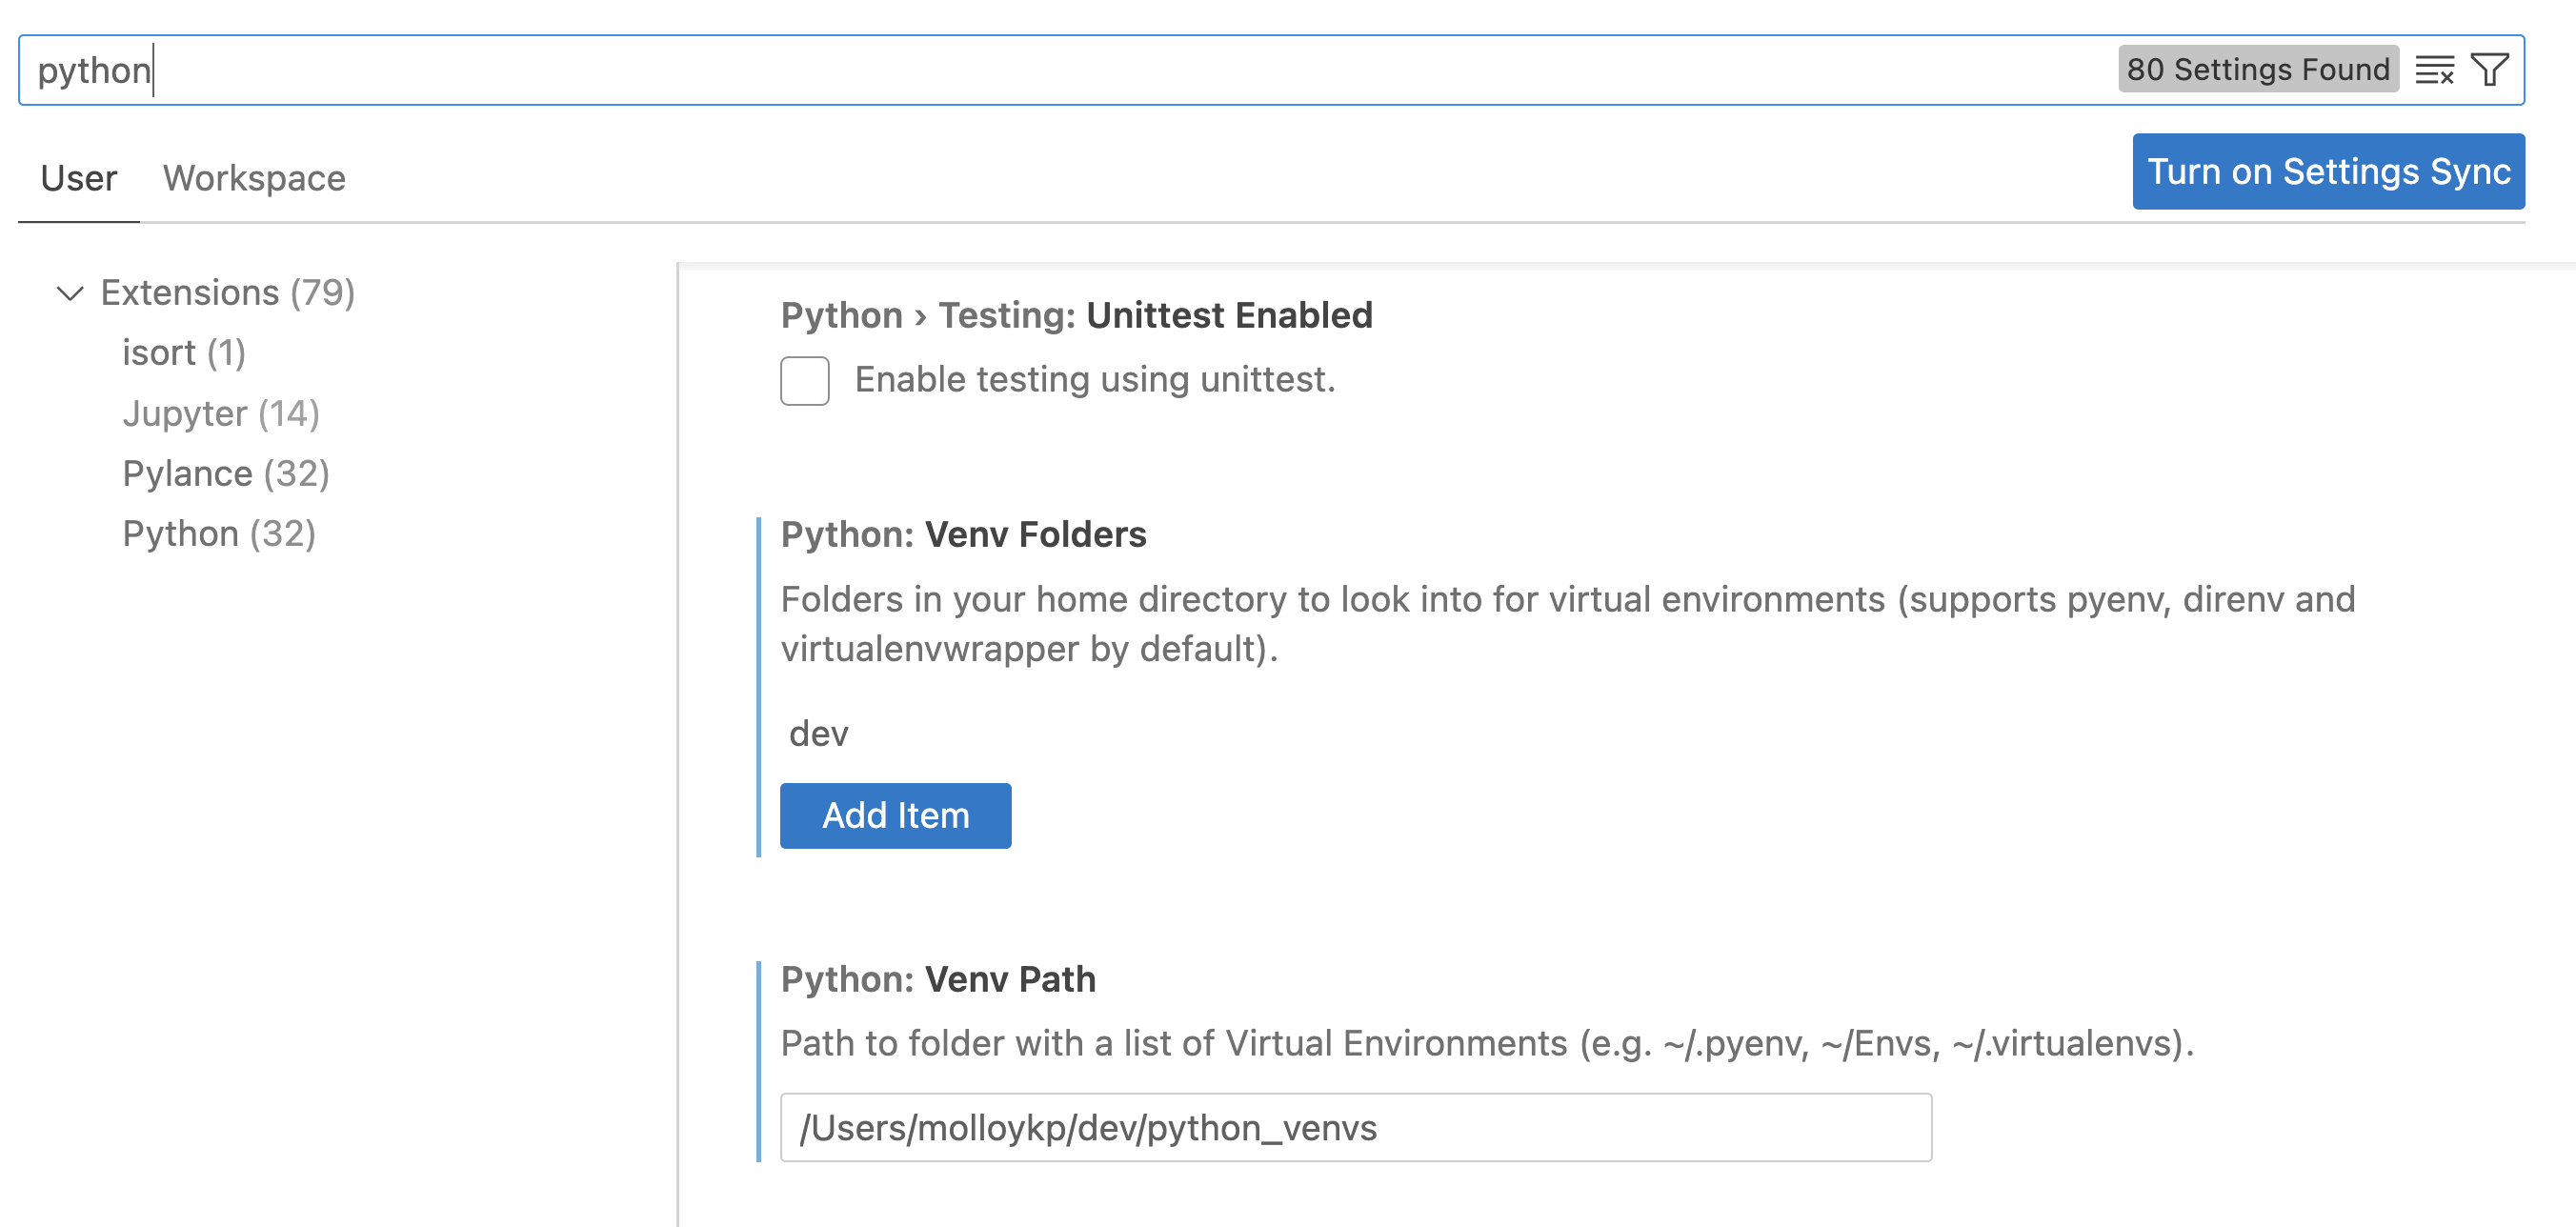
- Tell VS Code where to look for your Python venvs. If you go to Codfe, Settings, and search for Python, you can find the Python venv path setting.
VS Code Options
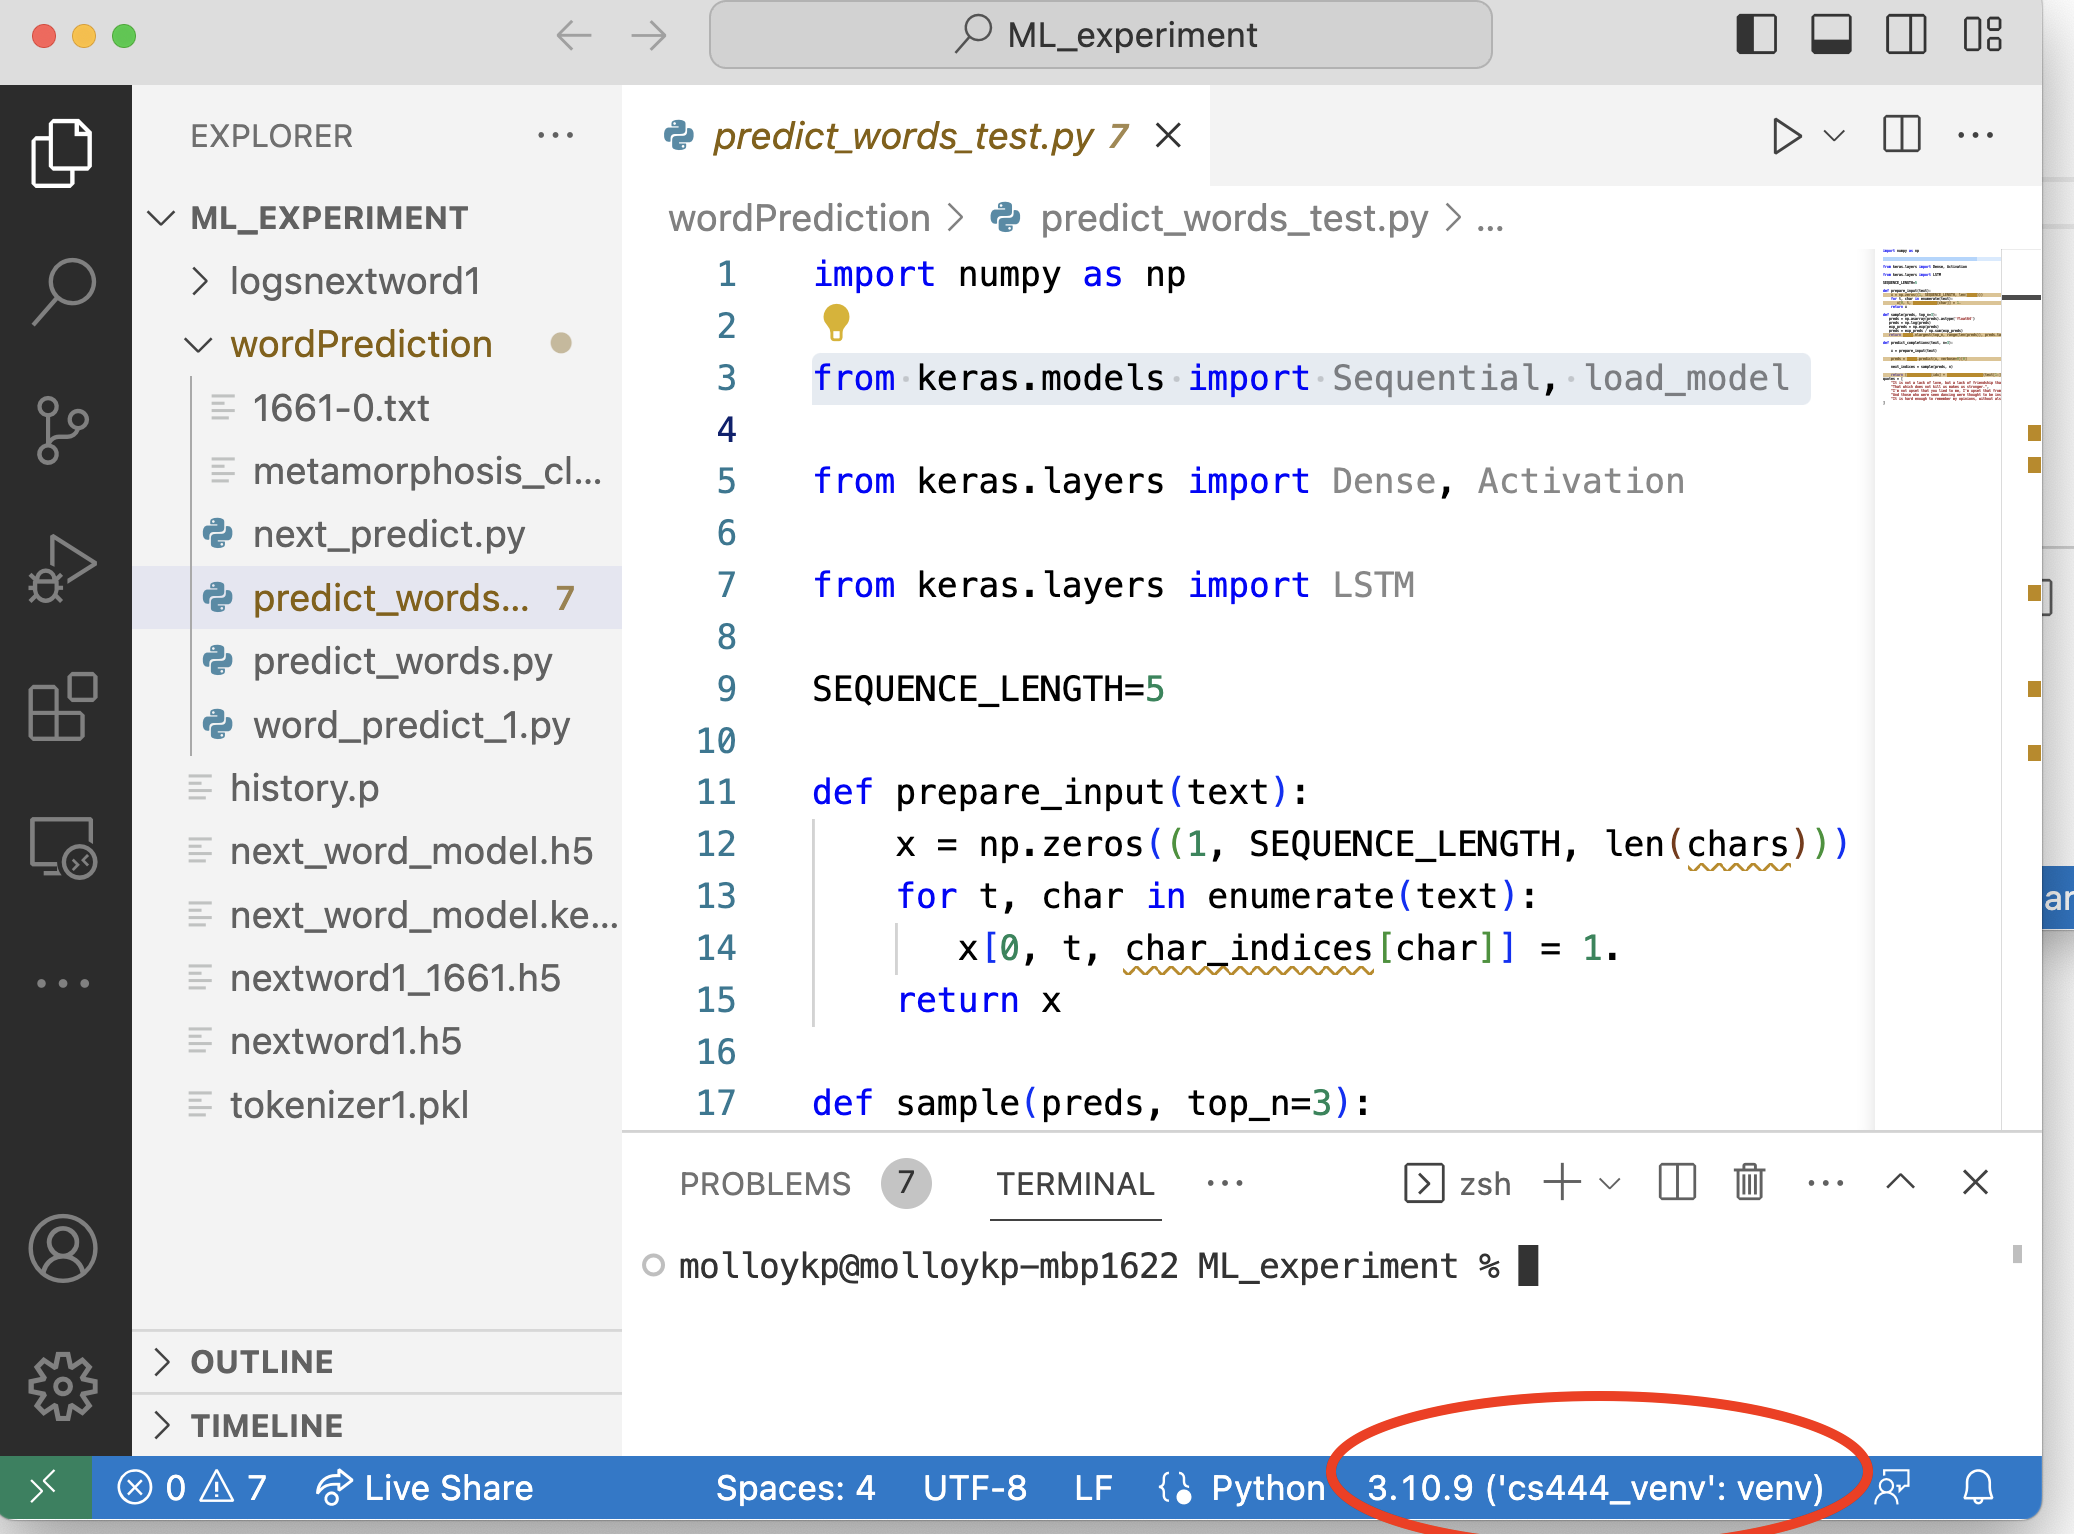
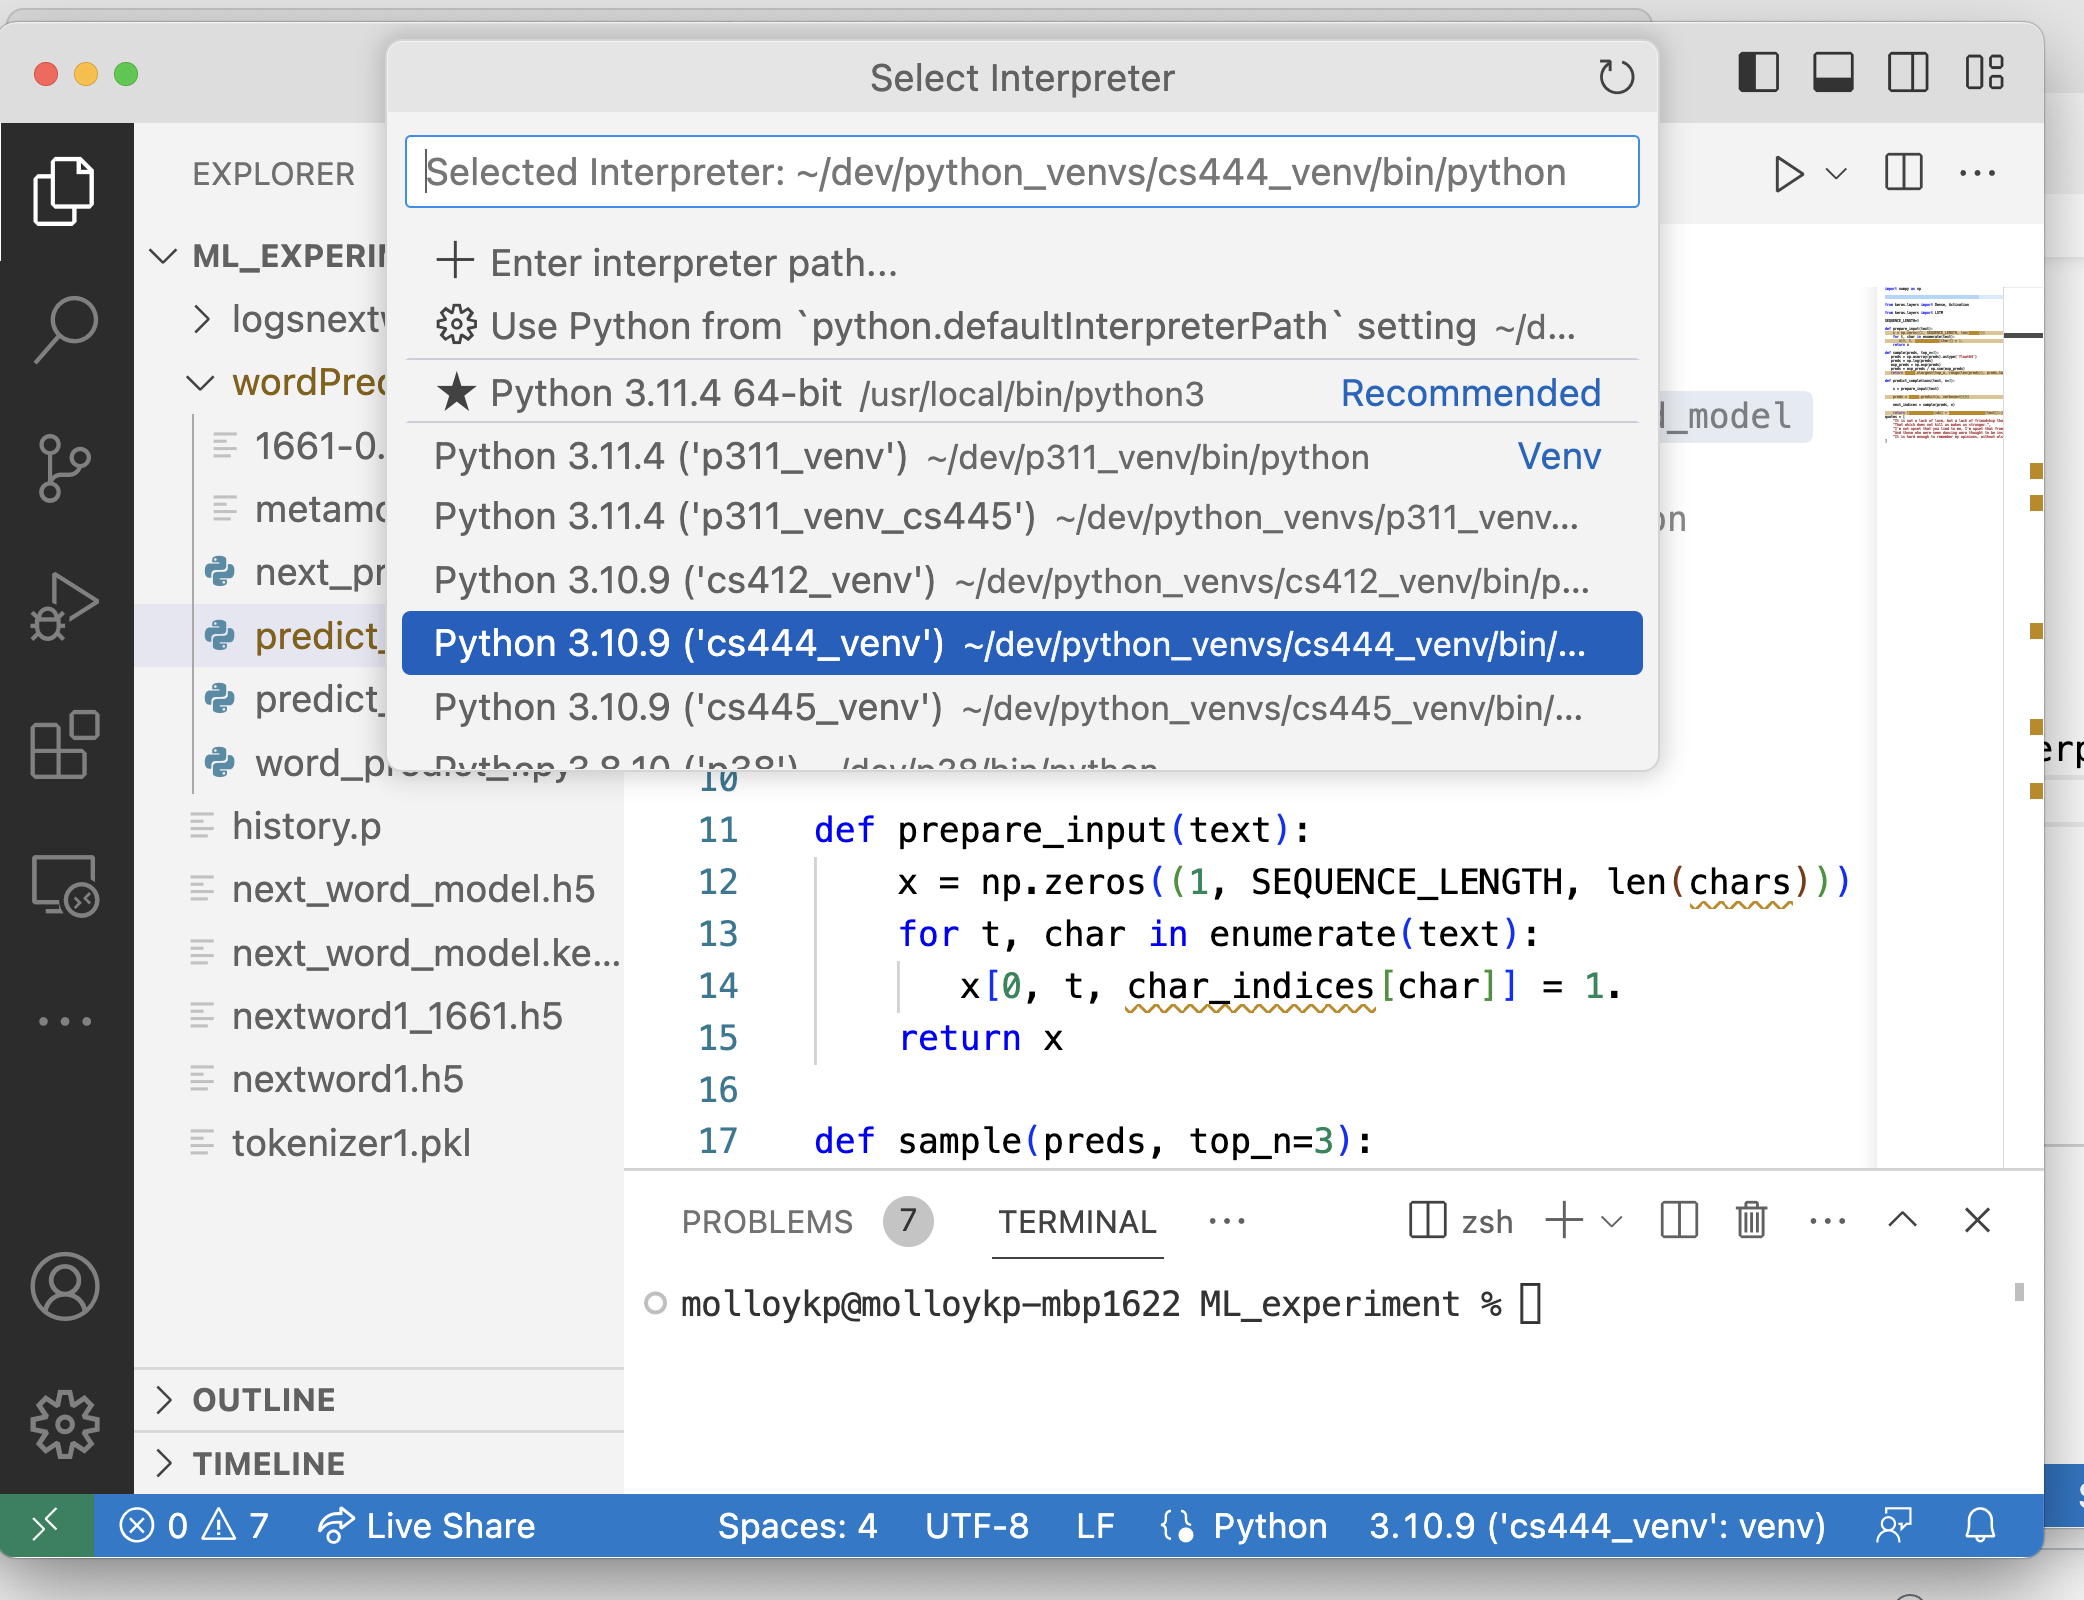
- Select your venv. Open or create a python file (one that ends with .py). You should then be able to select the interpretor. It should state the name of your venv in the bottom right corner of VSCode as shown below. The picture on the left shows where the current interpretor is shown. The middle image shows what happens when you click on the interpretor name, which tells VSCode to show all the interpretors it knowns about. I want to select the p311_venv_cs445 venv, so, I clicked on it. The image on the right shows that after I clicked on it, the interpretor listed at the bottom of the screen reflects my selection.
VS Code Options
