This is the multi-page printable view of this section. Click here to print.
Docs
1 - Final Exam - Coding Practice
Note
You have 2 Gradescope assignments available. The specs and java files to start with are linked below.Problem 1 (18 points): Spell
boolean canISpell(int start, String candidates, String target)
Write method canISpell(int start, String candidates, String target) for
this provided Spell class (DOWNLOAD IT HERE)
. Given a String candidates and an int start, is it possible to choose a group of some of the characters in candidates (from position start onward), such that the group of characters can be concatenated to form the given target word? The caller can specify the whole String simply by passing in 0 for start. No loops are needed (and they will receive no points) – you must write a recursive solution. Return false if any String parameter is null, or if start is out of bounds.
canISpell(0, "qwertyuiop", "try") → true
canISpell(0, "qwertyuiop", "pie") → true
canISpell(0, "qwertyuiop", "quick") → false
canISpell(0, "qwertyuiop", "quit") → true
canISpell(1, "qwertyuiop", "quit") → false
Problem 2 - Forestry Management
Download the provided classes,
Forest.java
and
ManagedForest.java
. Implement the methods as described in ManagedForest.java and submit only ManagedForest.java. DO NOT change Forest.java.
- ManagedForestTest.java is provided for your convenience in testing.
2 - Installing Java and Eclipse

Throughout the course, we will use Eclipse as our primary development environment. This page shows you how to install and configure Eclipse on your own computer.
Step 1: Install Java
Skip this step if you’re on a CS lab machine; Java is already installed.
In order to compile Java programs on your computer, you will first need to install the Java Development Kit (JDK). The JDK we recommend is OpenJDK, an open source implementation of Java SE (Standard Edition).
Note: Java SE 17 is the current Long-Term Support (LTS) release, but Java SE 16 is the version installed on the CS lab machines. Either version should work for this class.
Linux (Ubuntu/Mint):
Simply run the command: sudo apt install openjdk-17-jdk openjdk-17-source
Windows and macOS:
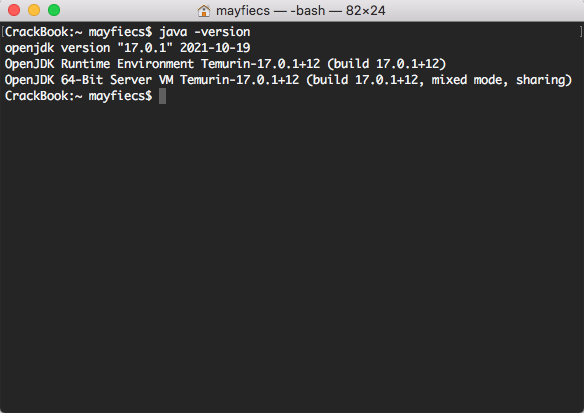
Visit Adoptium.net and download Temurin 17 for your operating system (Figure 1). Run the installer, and follow the instructions (Figure 2). To verify the installation, open a Terminal and type java -version (Figure 3). Your version might be slightly newer than the images below.
Figure 1
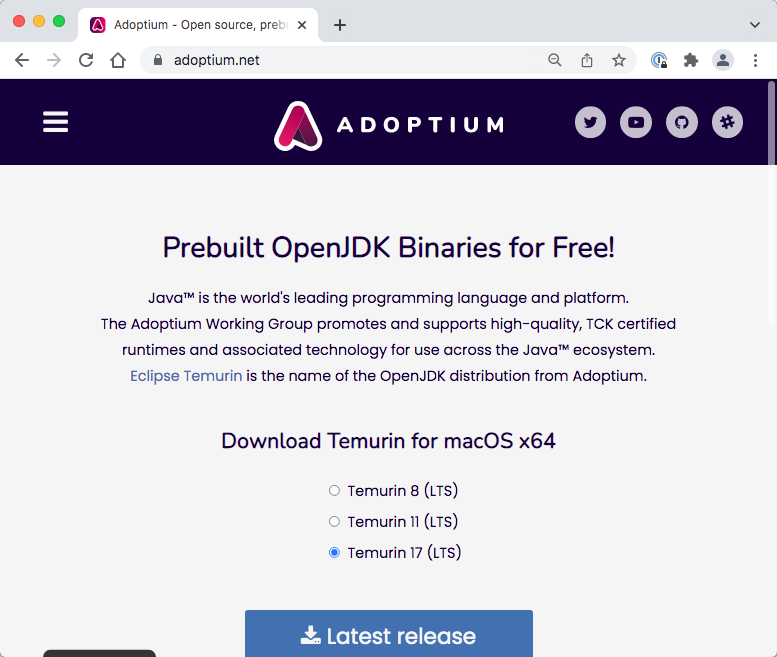
Figure 2
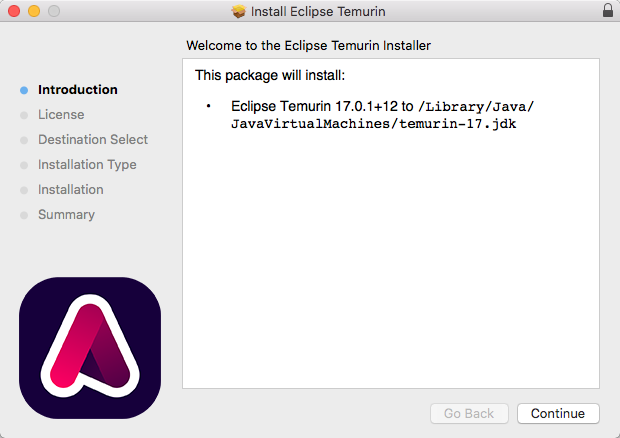
Figure 3
Step 2: Install Eclipse
Skip this step if you’re on a CS lab machine; Eclipse is already installed.
Eclipse is an integrated development environment (IDE) for building applications based on Java, C/C++, Python, and many other languages. It’s free and open source, and it’s widely used by professionals around the world.
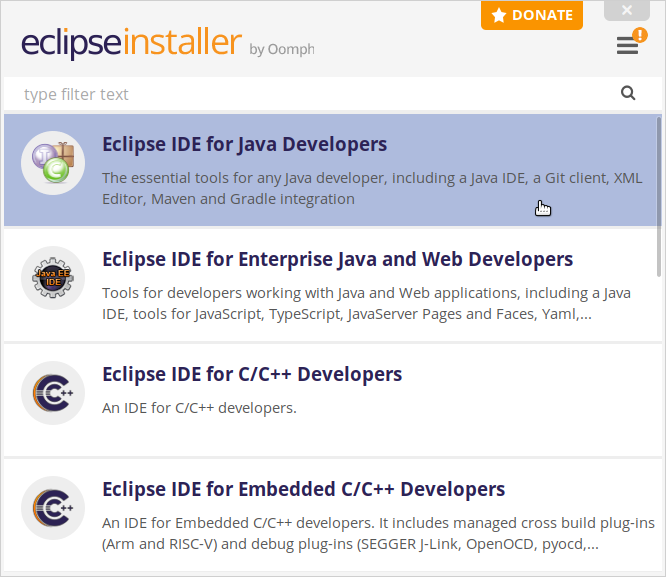
Download and run the installer for your operating system (Figure 4). The current version is 2021-12. When asked, select the “Eclipse IDE for Java Developers” package (Figure 5). The installation might take several minutes.
Figure 4
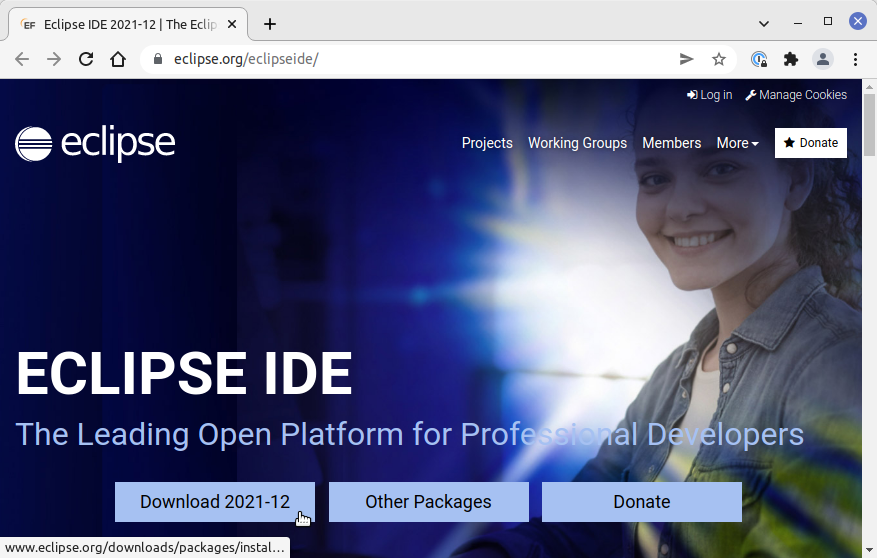
Figure 5
Step 3: Create Workspace
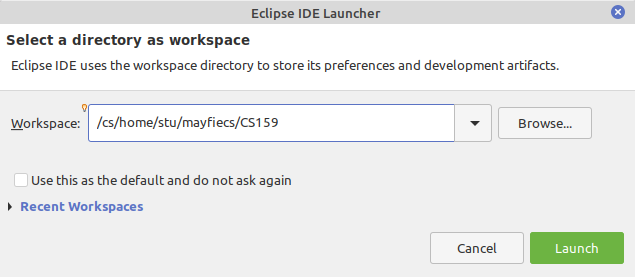
When you run Eclipse, it will prompt you to select a workspace location. The default location is a directory named eclipse-workspace. Change the name to CS159 (with no space between CS and 159), as shown in Figure 6.
Notice that /cs/home/stu/<i>username</i> is the location of your home directory on the CS lab machines. This location will likely be different on your own computer.
An Eclipse “workspace” is a folder (or directory) that contains projects and settings. Typically students create a separate workspace for each course and a separate project for each assignment.
Figure 6
Step 4: Install Checkstyle
Skip this step if you’re on a CS lab machine; Eclipse is already installed.
Checkstyle is a tool that can be used to determine if your source code follows a set of style rules. More importantly, it also checks for common programming mistakes, such as empty statements and accidental assignment.
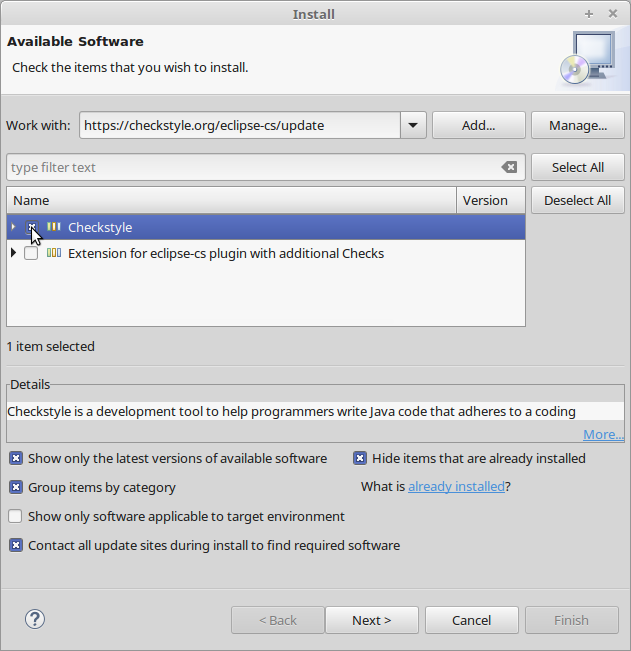
Go to Help > Install New Software... in the Eclipse menu. For “work with”, enter the URL https://checkstyle.org/eclipse-cs-update-site and press Enter. Check the box to install Checkstyle and click Next, as shown in Figure 7.
The installation will take a minute or two. Accept the license terms, and click “Finish”. When given the security warning, click “Install anyway”. Then click “Restart Now” to apply the changes.
Figure 7
Step 5: Set up Checkstyle
Download the configuration file
Checkstyle.xml
(right-click and “Save link as…"), and save it under your CS159 workspace folder (not your Downloads folder).
Then in Eclipse, go to the Window > Preferences menu (or Eclipse > Preferences on a Mac). Click “Checkstyle” on the left, and then click “New…” on the right. Enter the following information shown in Figure 8:
- Type: External Configuration File
- Name: ThinkJavaCode2
- Location: .../CS159/Checkstyle.xml (where ... is your home directory location)
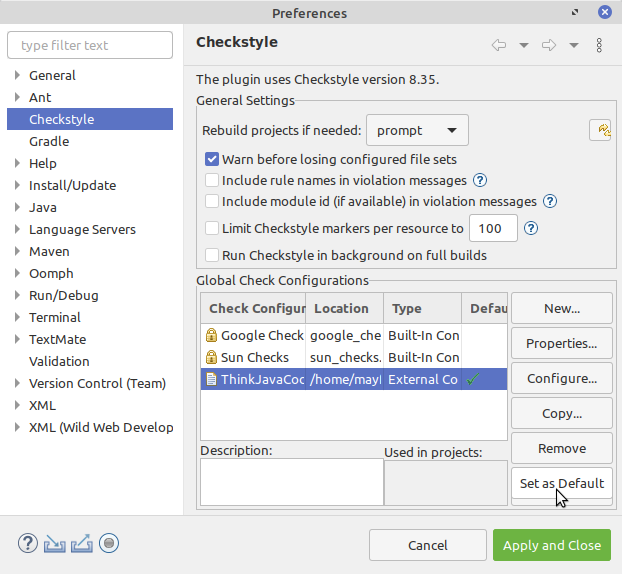
After you click the “OK” button, select ThinkJavaCode2 in the list and then click “Set as Default”, as shown in Figure 9. There should be a green check mark to the right of the ThinkJavaCode2 configuration. Finally, click “Apply and Close”.
Figure 8
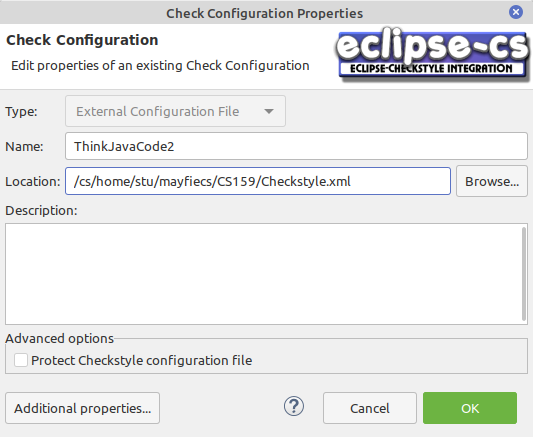
Figure 9
Step 6: Set up Formatter
The Eclipse formatter will automatically fix most style errors in your programs. Download the configuration file
Formatter.xml
(right-click and “Save link as…"), and save it under your CS159 workspace folder (not your Downloads folder).
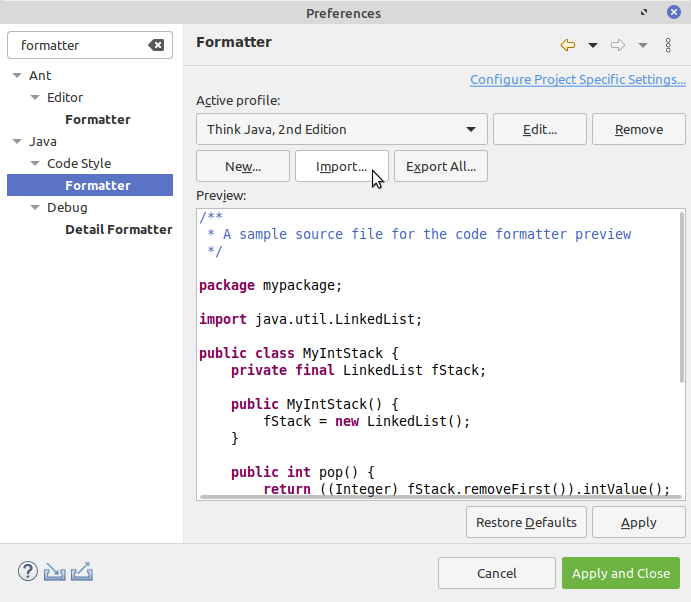
Go back to the Window > Preferences menu (or Eclipse > Preferences on a Mac). Search for the word formatter, and click “Formatter” under “Java > Code Style”. Then click the “Import” button, and navigate to the Formatter.xml file.
When finished, you should have “Think Java, 2nd Edition” as the active profile, as shown in Figure 10. Click “Apply and Close” to save your progress.
Figure 10
Step 7: Other Settings
The following settings are recommended, based on the work we’ll be doing in CS 159. They are all found under Window > Preferences (or Eclipse > Preferences on a Mac).
-
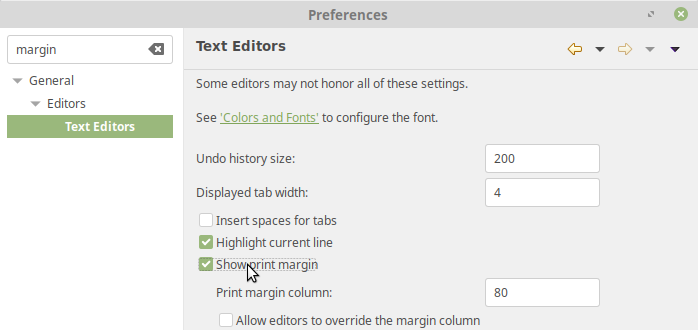
Show the print margin (under Text Editors) to see the 80-character limit.
-
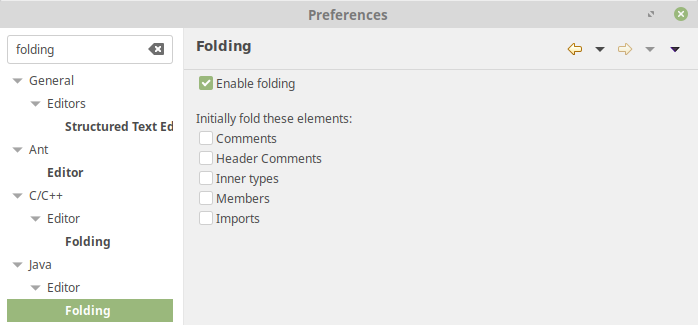
Do not initially fold any code elements, so you can see the whole file.
-
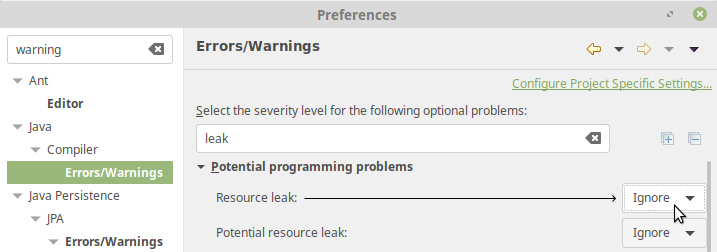
Ignore resource leaks (this “feature” is unfortunately a bug in Eclipse).
-
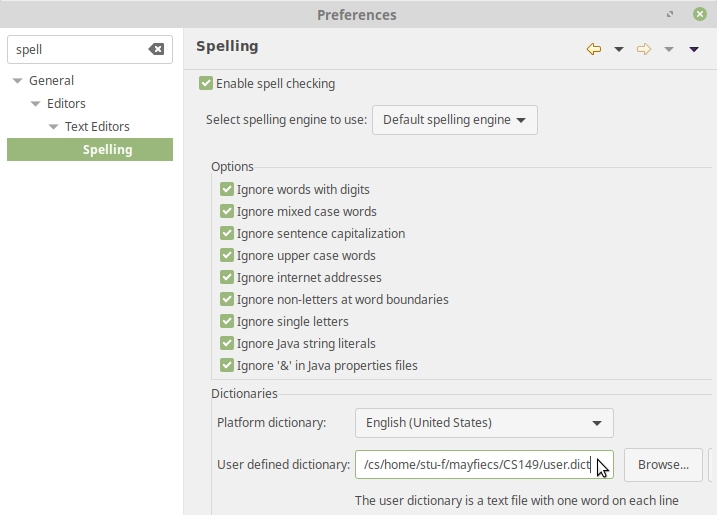
Specify a “user defined dictionary” (filename) for the spell checker. This file will store new words you add to the dictionary. You will need to create an empty file named user.dict in your workspace location first.
-
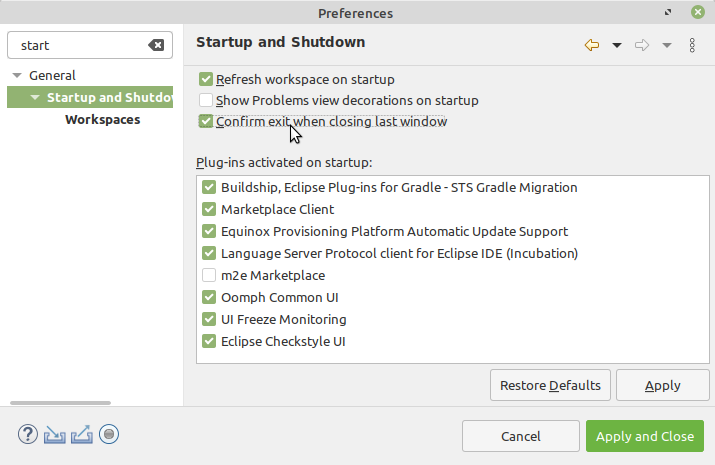
Refresh workspace on startup and confirm exit when closing last window.
-
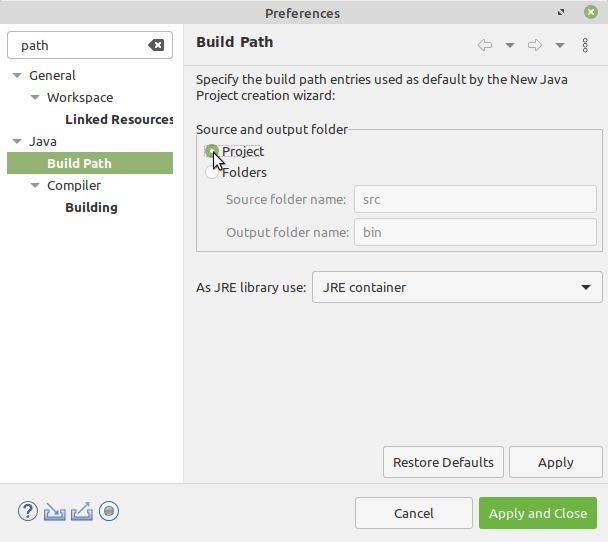
Use the project folder as root for source and output files.
Don’t forget to click “Apply and Close” at the end!
Step 8: Create Project
An Eclipse “project” is a collection of files that make up a single application. Typically each lab or assignment will be its own project.
Figure 11

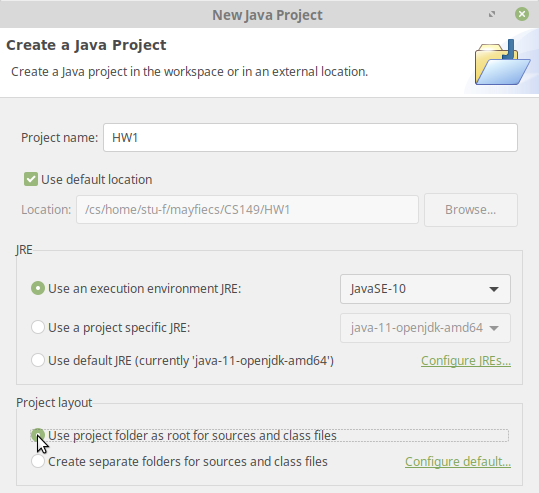
Click the “New” button on the Eclipse toolbar (Figure 11), select “Java Project”, click “Next”, and enter a name (e.g., HW1). Make sure “Use project folder as root for sources and class files” is selected (Figure 12). You can click on “Configure default…” so this will always be the case.
Also uncheck the box that says “Create module-info.java file” or you will get an error saying “No source folder exists in the project.” (This error is harmless and can be ignored.)
Figure 12
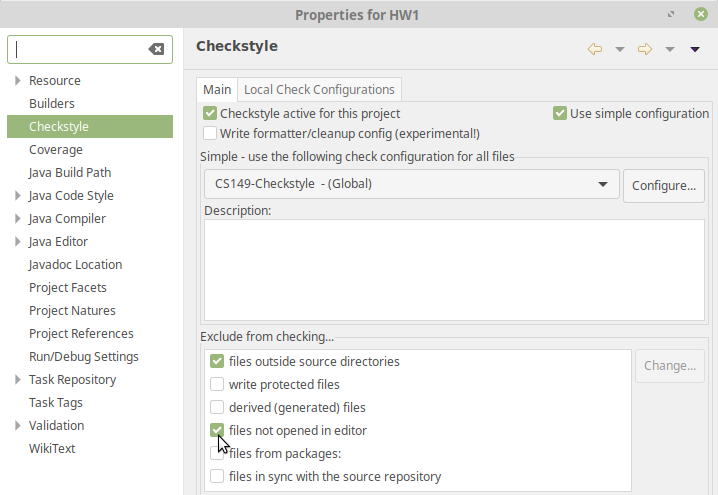
Checkstyle must be turned on manually for each project. Go to the Project > Properties menu, click “Checkstyle” on the left, and check the boxes “Checkstyle active for this project” and “files not opened in editor”, as shown in Figure 13.
Figure 13
Step 9: Settings Checkup
Watch this video and verify that your Eclipse settings are correct. The video provides a few tips and customizations that are not listed above. After that, congratulations! You now have Eclipse all set up to do some serious programming this semester.